Rear Brake Drum Replacement
REMOVE OR DISCONNECT1. Raise and suitably support vehicle.
2. Tire and wheel.
NOTE: Be careful not to drop the brake drum during handling. An out-of-round condition can occur from even the smallest fall, which may result in brake pulsation. Do not pry against the splash shield or backing plate in an attempt to free the drum. This will bend the splash shield or backing plate. A bent backing plate may cause brake chatter and/or pulsation.
3. Drum.
a. Mark relationship of drum to axle flange.
Backing Off Rear Brake Shoe Adjustment:
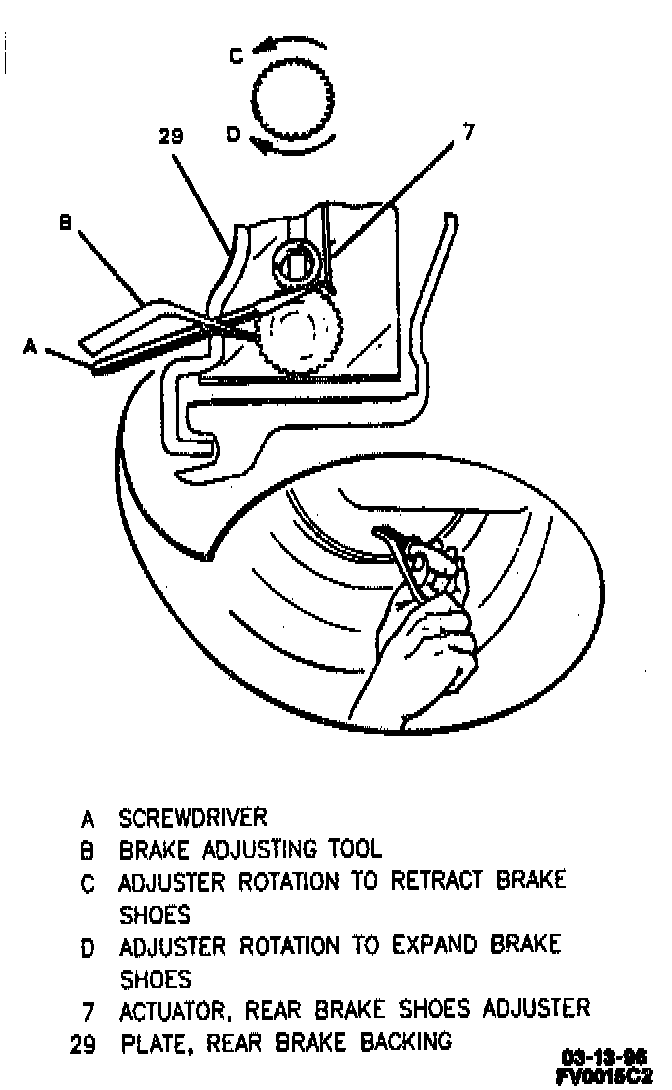
b. If you have trouble removing rear brake drum, try the following:
- Make sure parking brake is released. Disconnect parking brake cables from equalizer. Remove adjusting hole cover or knockout plate from backing plate (29) and back off adjuster, using a screwdriver and brake adjusting tool. Use rubber mallet to tap gently on outer rim of drum and/or around inner drum diameter by axle flange and/or axle pilot, while pulling outward on drum. Take care not to deform drum by excessive use of force.
INSTALL OR CONNECT
NOTE: Adjust Rear drum brakes. Refer to Rear Drum Brake Adjustment.
1. Drum. Align locating marks on drum and axle flange.
2. Tire and wheel. If knockout plate was removed, an adjusting hole cover, GM P/N 5464803 must be installed. If parking brake cables were disconnected from equalizer, install to equalizer.
3. Lower vehicle.
4. Cycle parking brake lever three times.