Brakes - ABS Light ON, Codes 21, 22, 25 or 26
9229chevy02
Number: 92-188-5
Section: 5
Date: May 1992
Corporate Bulletin No.: 235004
ASE No.: A5
Subject:
ANTI-LOCK BRAKE (ABS) LIGHT"ON"
Model and Year:
1992 CORSICA AND BERETTA
Condition:
ABS Light Codes 21 or 22 Poor Connection or Open Wire (Front Wheel Speed Sensor) or Codes 25 or 26 Excessive Wheel Speed Variation (Front).
Cause:
Front Wheel Speed Sensor wires may break due to ABS Front Wheel Speed Sensors wiring leads not having sufficient length between the last control arm clip and the end of the Wheel Speed Sensor Connector
Correction:
If the above condition exists, follow the repair procedures below using the ABS Wheel Speed Sensor Lead Service kits.
Part Numbers:
12140077 Left Front 12140078 Right Front Parts are currentl available from GMSPO.
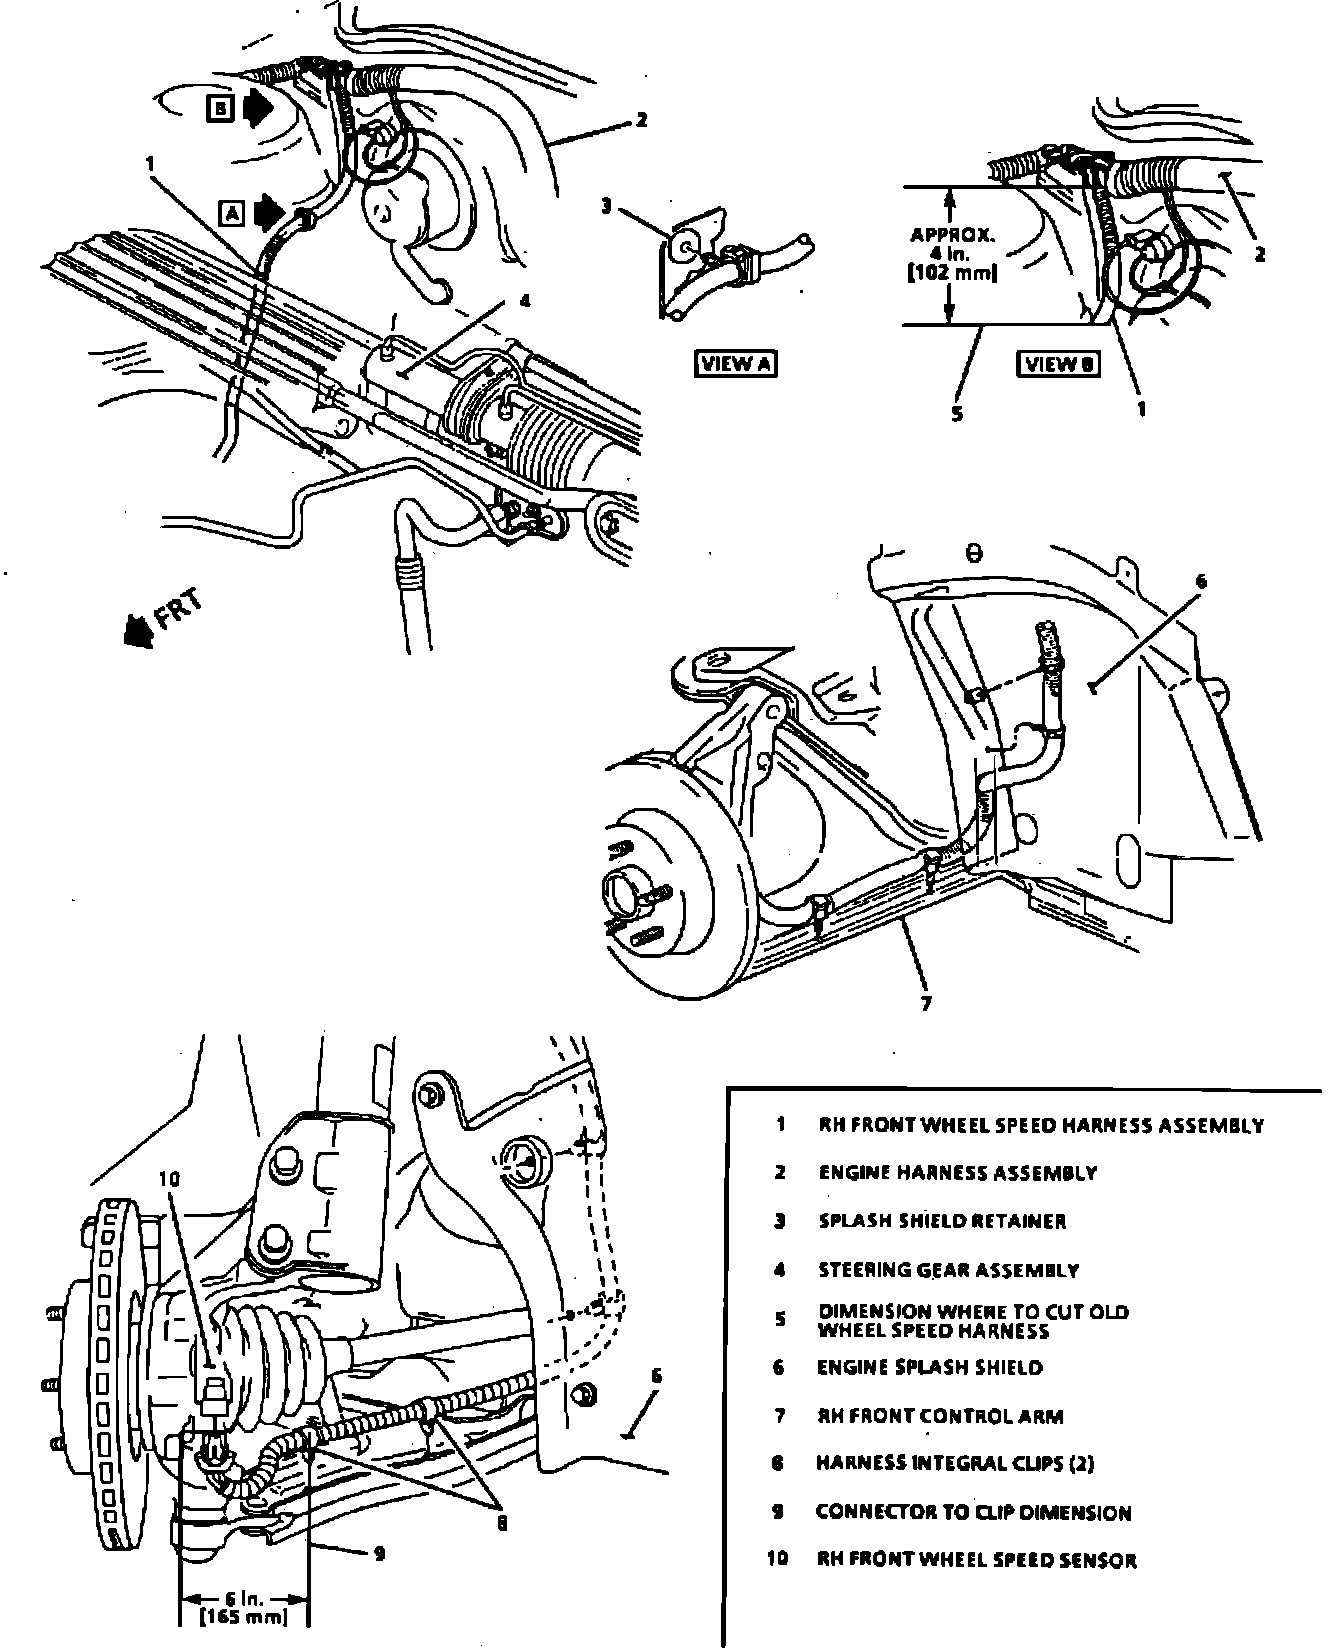
1 . Raise and support vehicle on suitable hoist, as indicated in Section OA.
2. Disconnect front Wheel Speed Sensor electrical connectoL
3. Remove harness attaching clips (2 at control arm) and (2 at splash shield) see attached callout 8.
4. Lower vehicle.
5. Remove harness attaching clip at strut tower, see attached callout 3.
6. Cut Wheel Speed Sensor harness FOUR INCHES from main engine harness, see attached callout 5.
7. Strip insulation on engine harness leads and new Wheel Speed Sensor leads.
8. Slide shrink tube over each engine harness lead.
9. Connect new Wheel Speed Sensor harness leads to engine harness leads, (matching color of leads). Solder connections and slide the shrink tube over soldered connections.
10. Heat shrink tube lightly to seal connections.
11. Route new harness down to control arm and insert attaching clip at strut tower.
12. Raise vehicle.
13. Insert attaching clips (2 at splash shield and 2 on lower control arm). See attached callout 8.
14. Connect Wheel Speed Sensor electrical connector.
15. Check the dimension of the last control arm dip and electrical connector for a dimension of 6 INCHES. See attached callout 9.
Labor Operation Number: T1853
Labor Time: .4 Hours