Master Cylinder Disassembly/Assembly
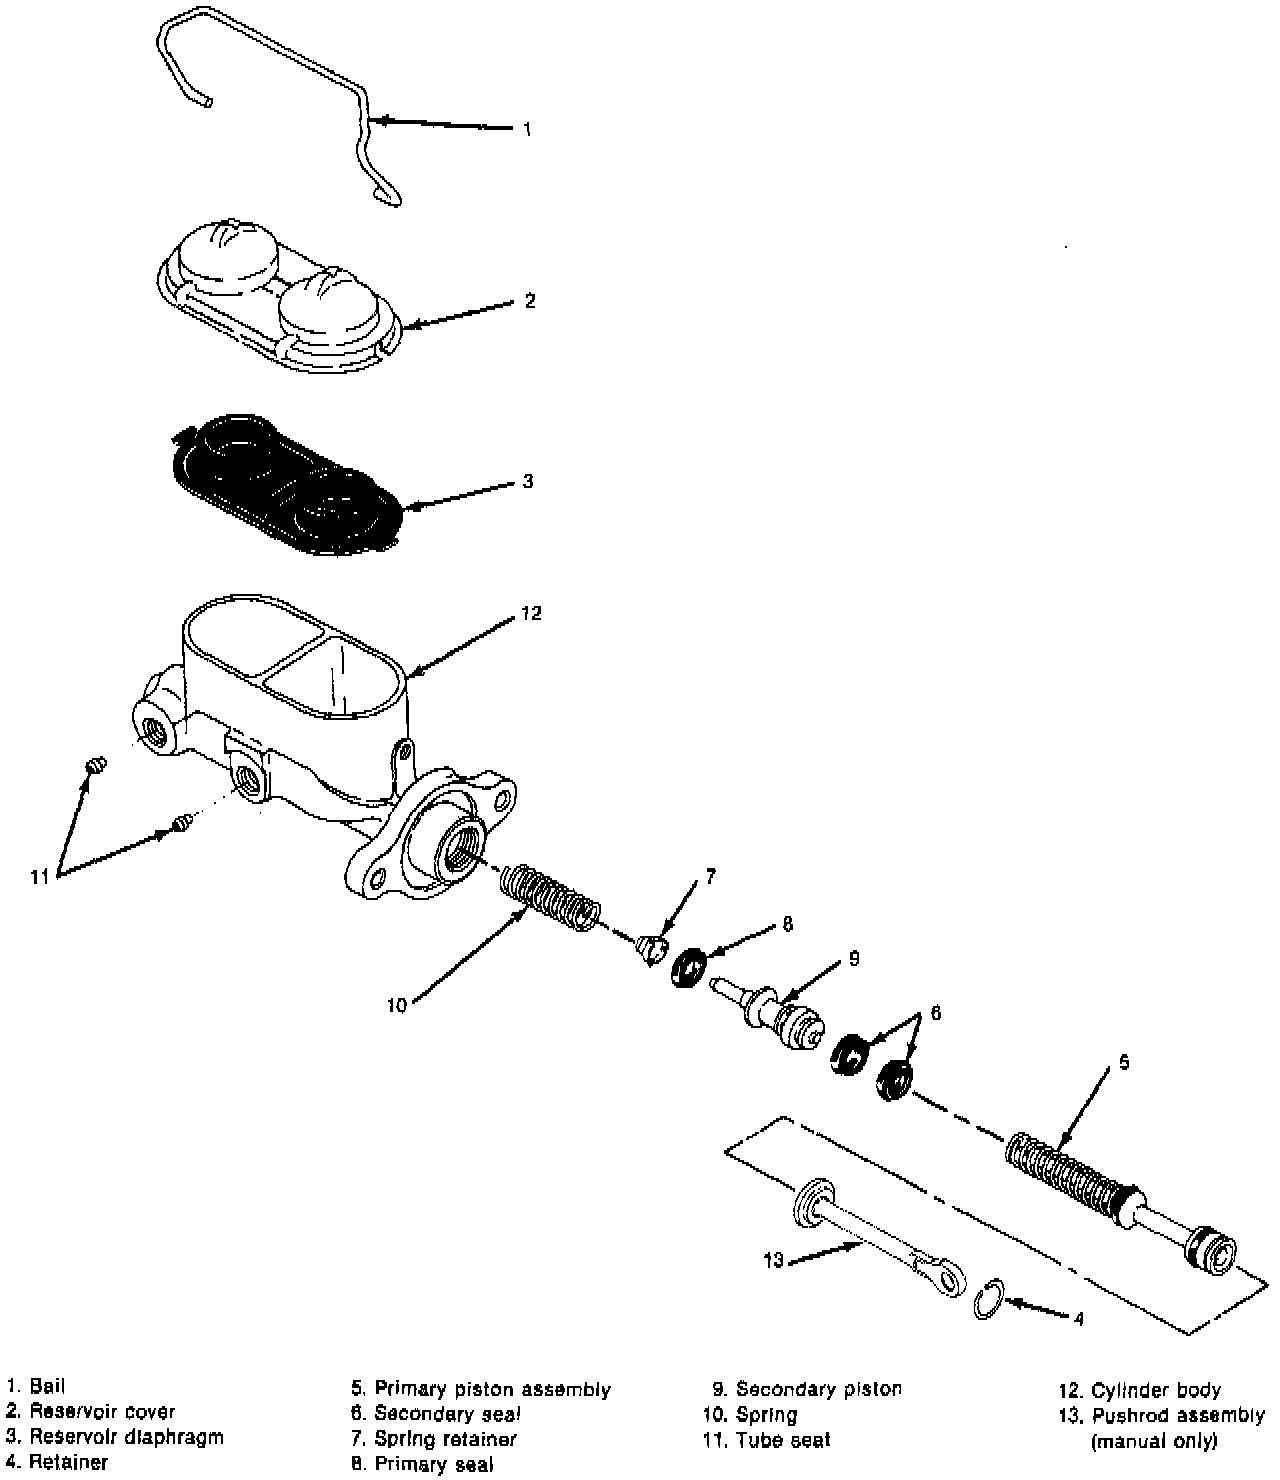
Exploded View Of Cast Iron Master Cylinder Assembly:
Disassembly
1. Rotate bail (1) away from reservoir cover (2) then remove reservoir cover (2) and diaphragm (3).
2. Inspect reservoir cover (2) and diaphragm for cuts, cracks or deformation. Replace damaged or defective parts.
3. Remove bail (1) only if diaphragm (3) is not sealing to master cylinder body (12). Replace if defective.
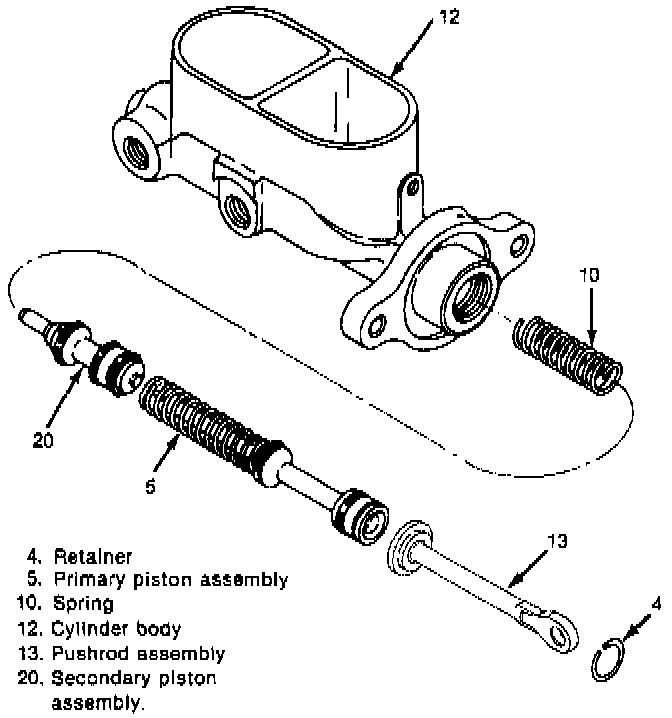
Master Cylinder Assembly Internal Components:
CAUTION: Do not damage piston or cylinder wall.
4. Depress primary piston and remove retainer (4). Remove pushrod (13).
5. Direct compressed air into the outlet at the blind end of the bore and plug the other outlet to remove primary and secondary pistons (5 and 20).
Fig.3 Secondary Piston:
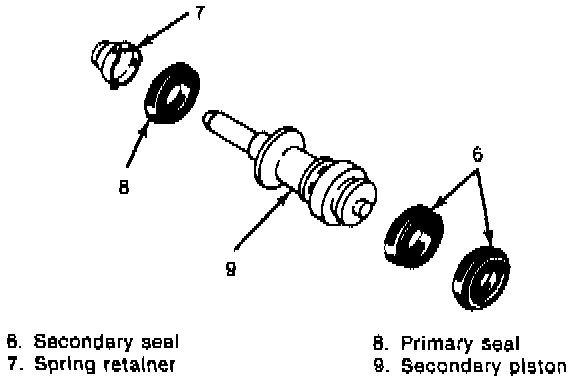
6. Disassemble secondary piston (20) and remove seals (6 and 8).
7. Inspect master cylinder bore for scoring, nicks, corrosion or wear. Use crocus cloth to polish out any light corrosion. Replace master cylinder if bore will not clean up using crocus cloth.
Figure 4 Removing Tube Seats:
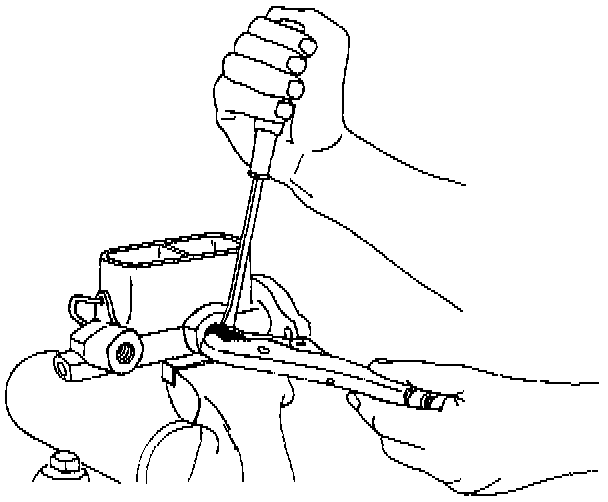
8. Remove tube seats (11).
9. Thread self-tapping screw into tube seat (11) and remove as shown.
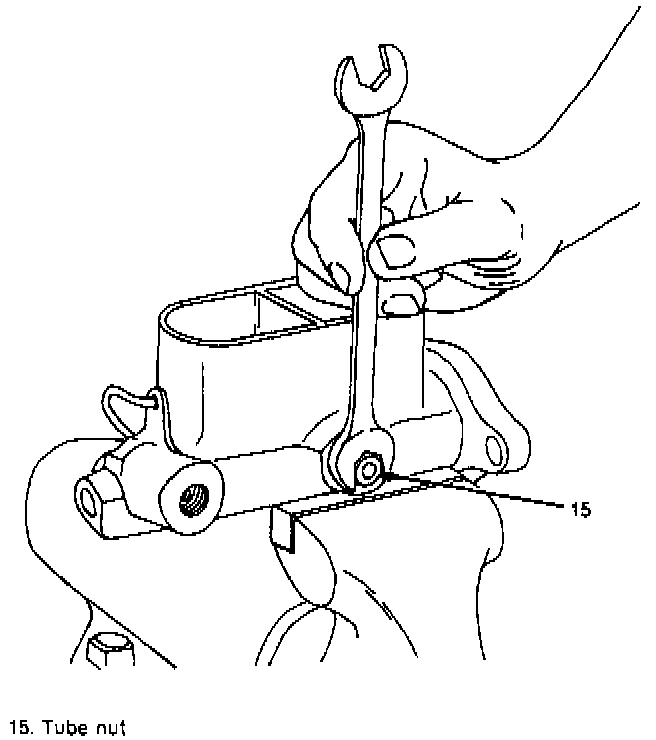
Seating Tube Seat:
Assembly
1. Install reservoir diaphragm (3) in reservoir cover (2) then install assembly on reservoir.
2. Assemble secondary piston.
3. Install spring (10), spring retainer (7) and secondary piston (20) in cylinder.
4. Install primary piston (5), depress, and install retainer (4).
5. Install new seals (6 and 8).
6. Position tube seat (11) in body and seat with a spare brake tube nut (15).