Removal Procedure
- Remove the passenger seat recliner handle, if equipped. Refer to Front Seat Back Recliner Handle Replacement .
 Courtesy of GENERAL MOTORS COMPANY
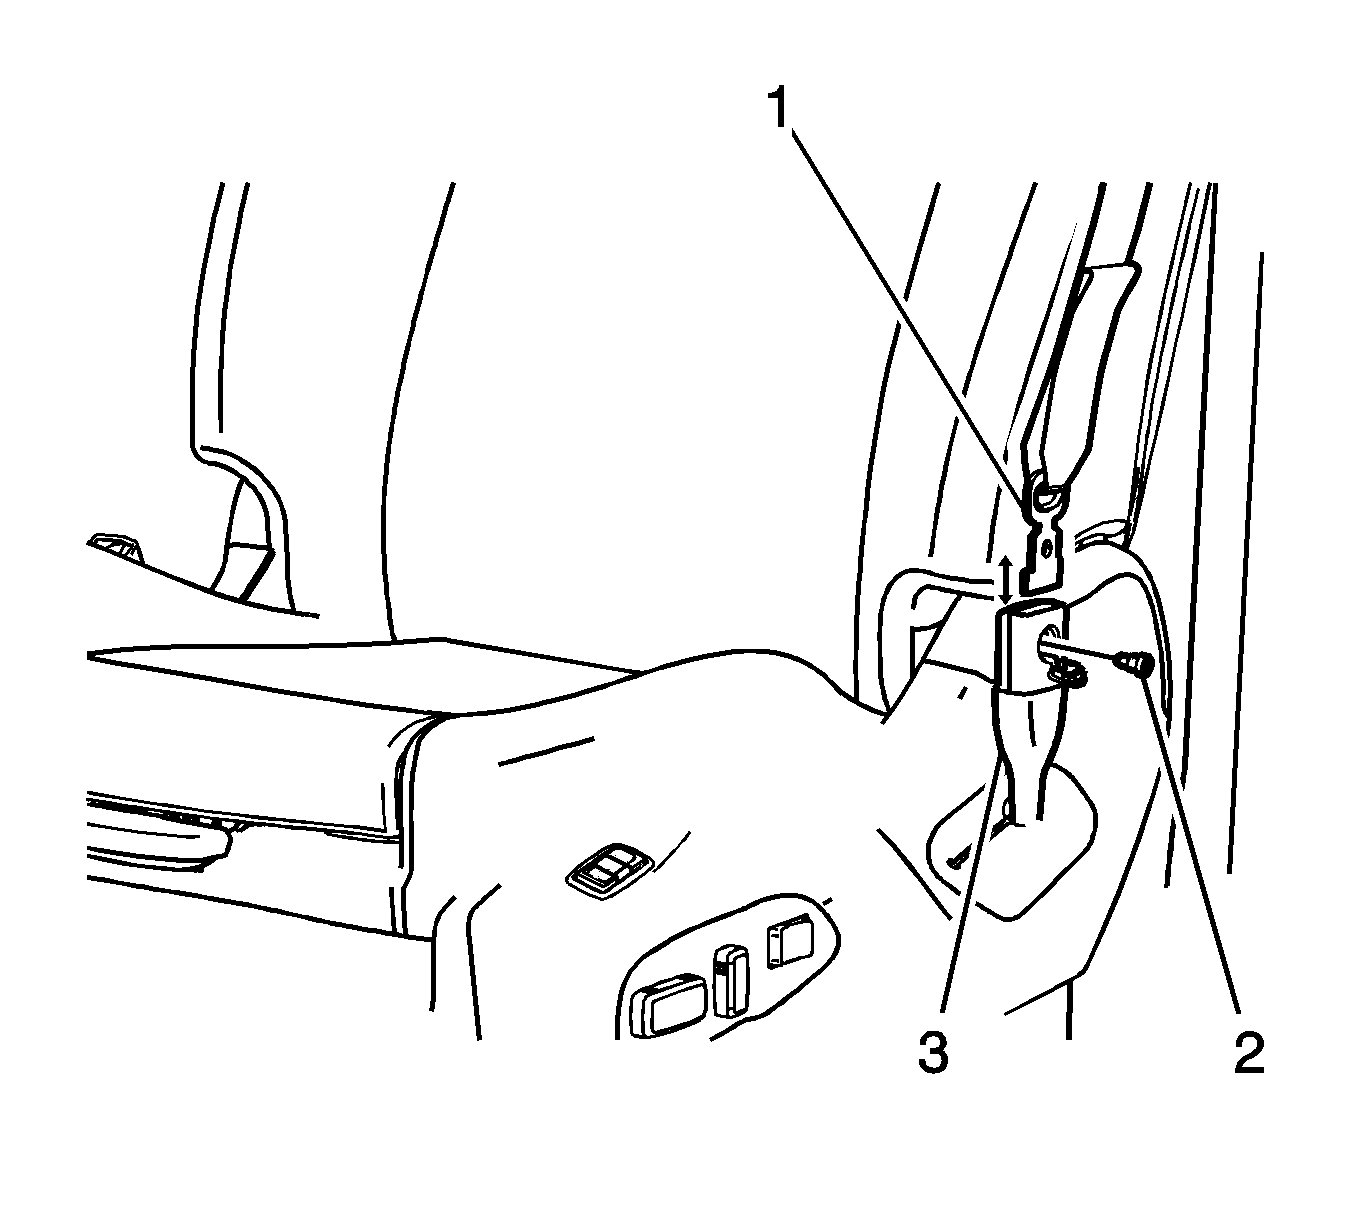
- Remove the seat belt tensioner bolt cap.
- Remove the seat belt tensioner bolt (2).
- Disconnect the front seat belt (1) from the front seat belt tensioner (3).
 Courtesy of GENERAL MOTORS COMPANY
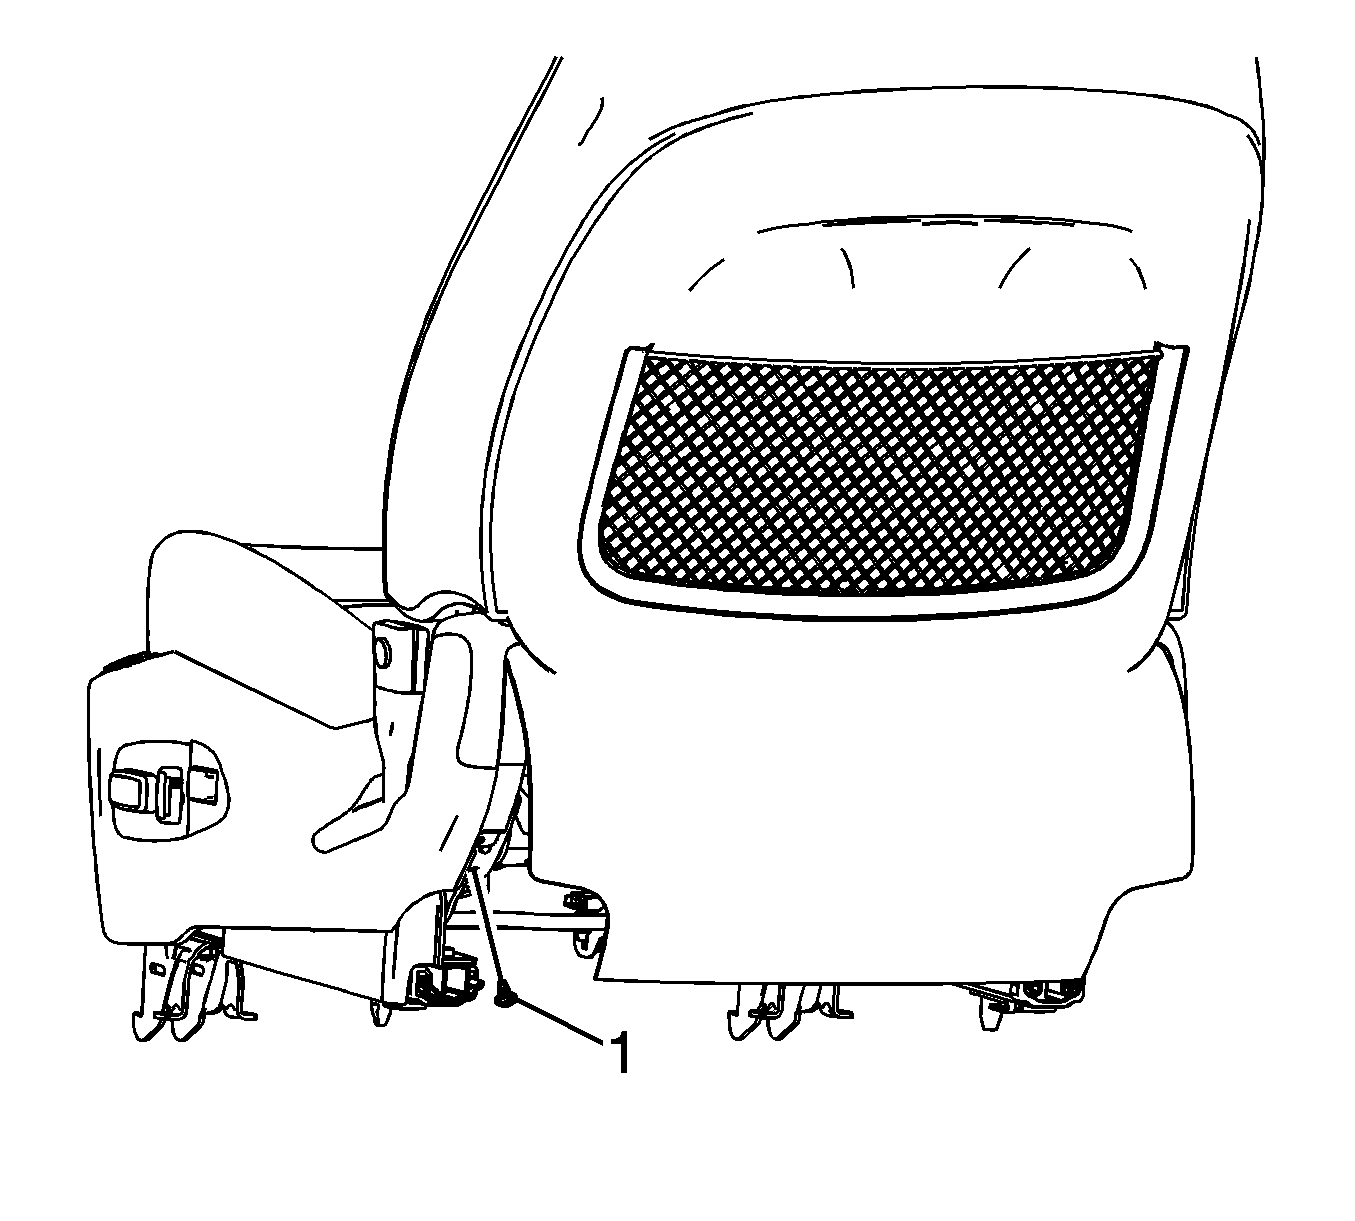
- Pull the lower edge of the seat back cushion finish panel rearward to access and remove the screw (1).
 Courtesy of GENERAL MOTORS COMPANY
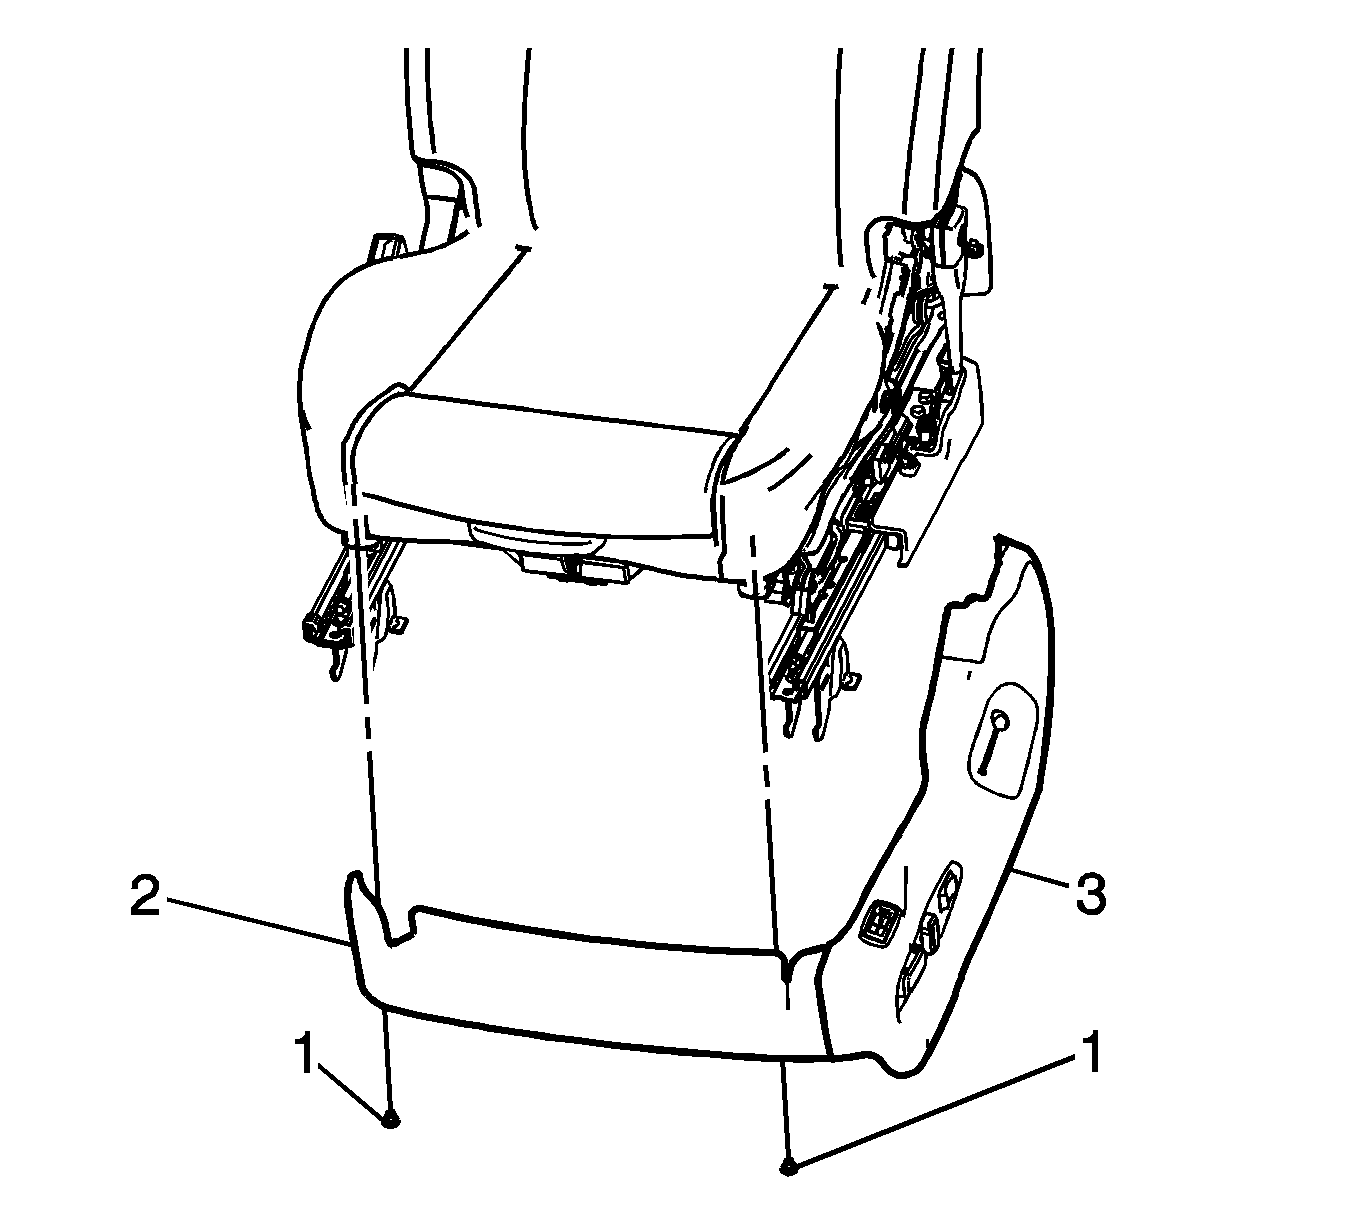
- Remove the two screws (1) that retain the seat cushion front cover (2) to the seat cushion frame.
- Remove the seat outer adjuster finish cover (3) and the seat cushion front cover (2) as an assembly.
- Slide the outer adjuster finish cover over the seat belt tensioner.
- Disconnect the seat switch electrical connectors.
 Courtesy of GENERAL MOTORS COMPANY
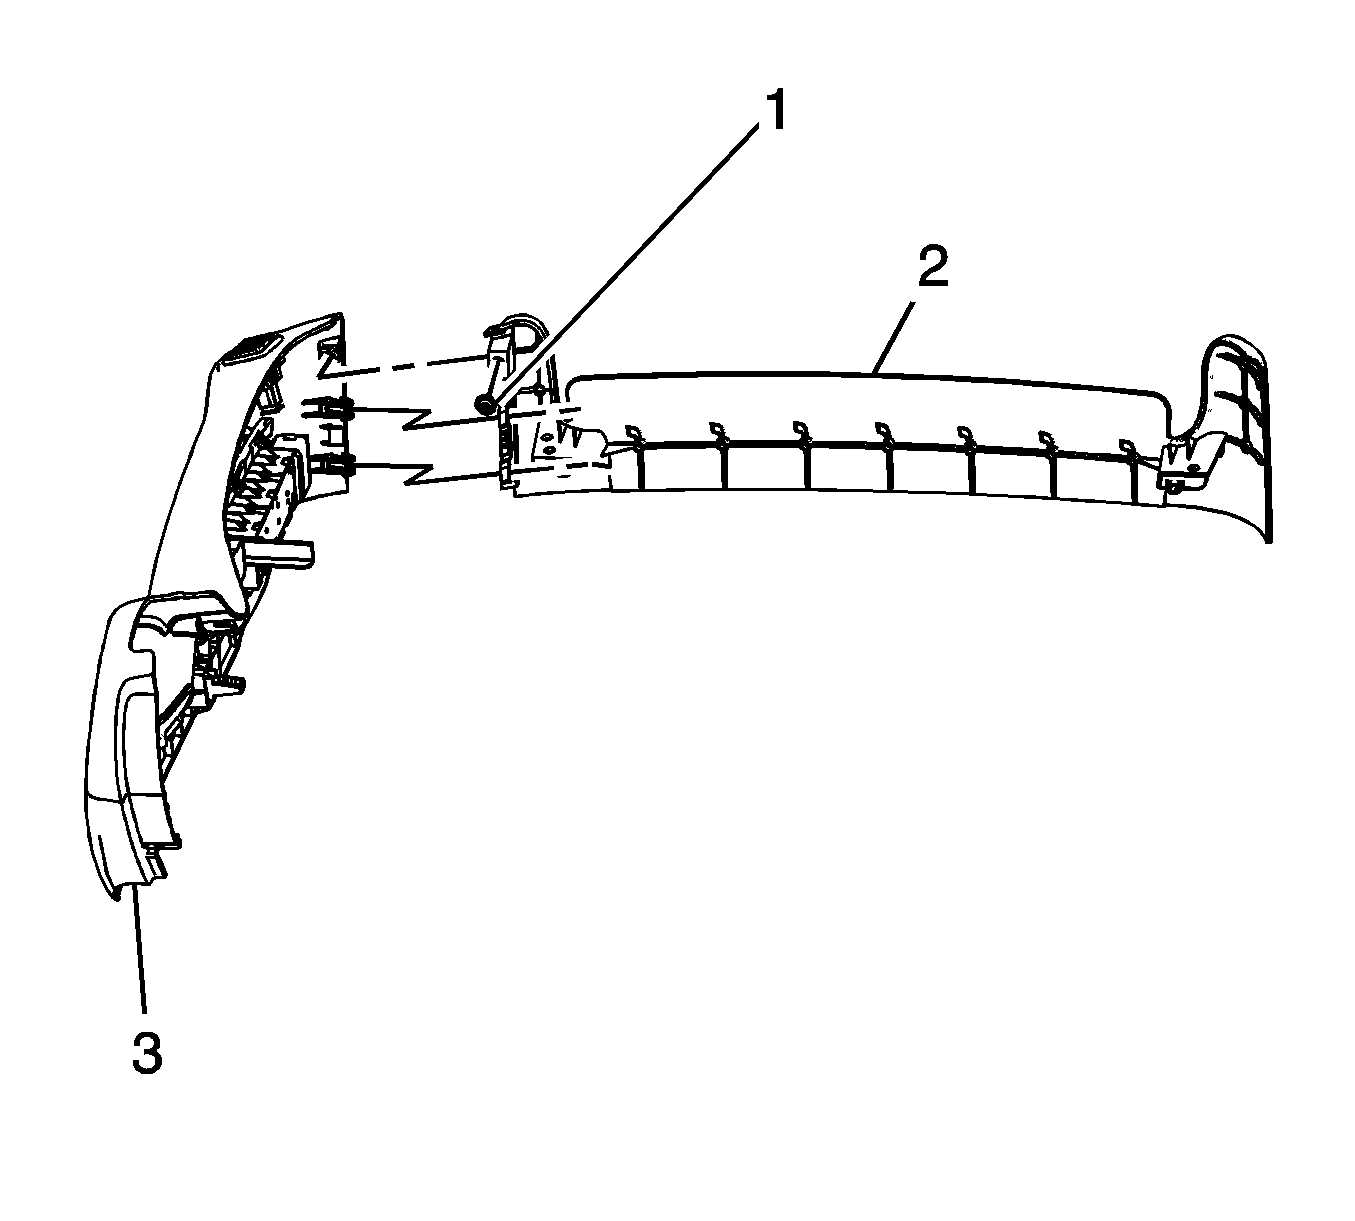
- To separate the front seat cushion cover (2) from the seat adjuster outer finish cover, perform the following steps:
- Remove the screw (1).
- Pinch together the retainers that attach the outer adjuster finish cover (3) to the seat cushion front cover (2), and pull apart.