Luggage Carrier Side Rail Replacement
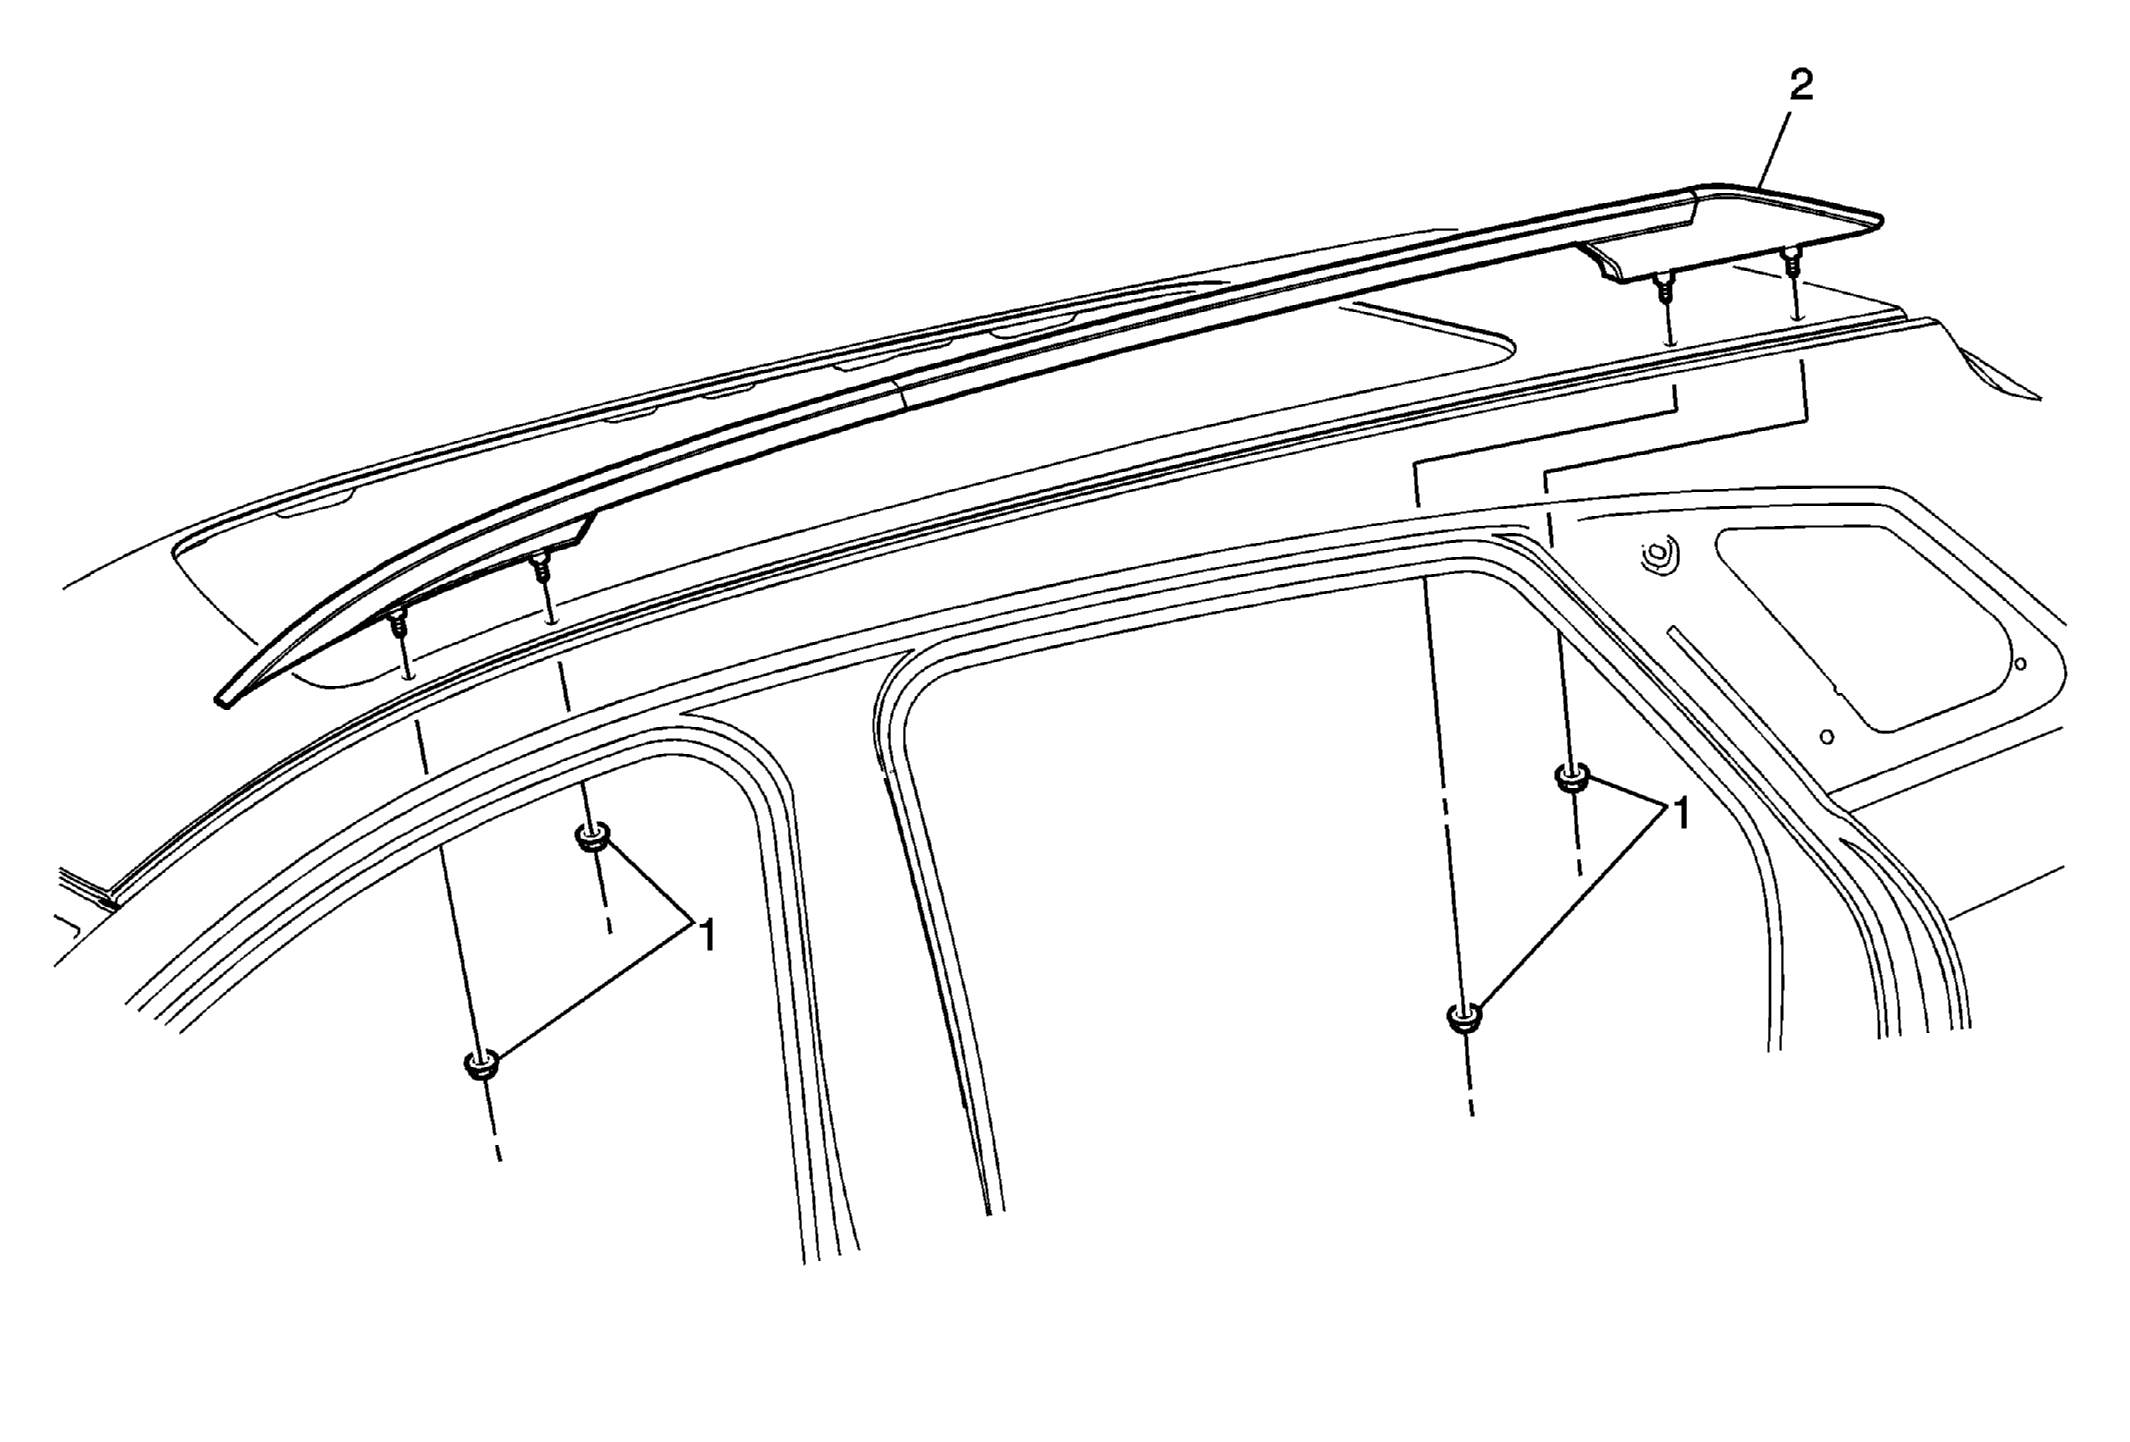 Courtesy of GENERAL MOTORS COMPANY
 Luggage Carrier Side Rail Replacement
| Callout |
Component Name |
|
Preliminary Procedures
- Remove both luggage carrier cross rails. Refer to Luggage Carrier Cross Rail Replacement .
- It is only necessary to lower the headliner. Only do those steps in the headliner replacement procedure that will lower the headliner enough to gain access to the part. Refer to Headlining Trim Panel Replacement (With C3U)
, Headlining Trim Panel Replacement (Without C3U)
.
|
| 1 |
Luggage Carrier Side Rail Fastener (Qty: 4)
Procedure
- The fasteners are located to the underside of the side rail.
- Clean all traces of the old gasket seal from all the fastener hole. Use a 50/50 mixture of isopropyl alcohol and water.
- Ensure that the new side rail nuts have a gasket seal applied. This will prevent water leaks.
Tighten
10 N.m (89 lb in) |
| 2 |
Luggage Carrier Side Rail Procedure
- When replacing the luggage carrier it is necessary to transfer all components.
- Water test the vehicle for leaks on the side rail that was replaced, install the headliner.
- Verify the sunroof for proper operation, if equipped.
|