Headlamp Replacement (Yukon)
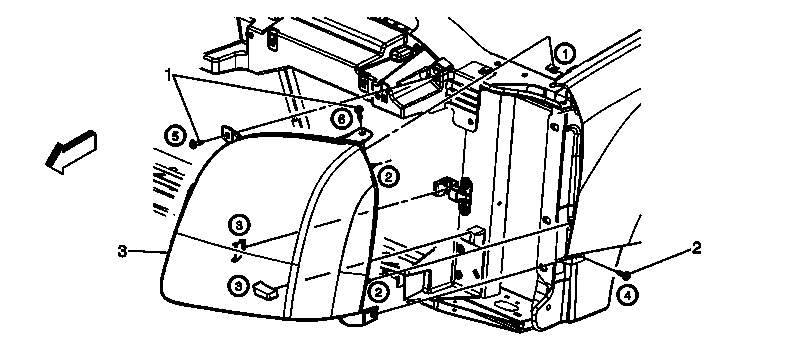 Courtesy of GENERAL MOTORS COMPANY
 Headlamp Replacement (Yukon)
| Callout |
Component Name |
|
Preliminary Procedures
- Remove the 2 forward wheelhouse liner screws.
- Remove the 2 washer container push pins.
- Open the hood.
- Remove the 6 upper fascia bolts right to the hood latch mechanism.
- Remove the lower rear fascia bolt from the support bracket.
- Loosen the 2 fascia to fender bolts from under the fascia.
- Pull the outboard end of the front fascia straight outboard until it disengages from the fender attachment bracket.
- Pull the fascia forward and downward to allow enough clearance to remove the headlamp assembly.
- Loosen the lower outboard attachment bolts.
- Remove the 2 upper headlamp bolts.
- Grasp the headlamp at the upper inboard and lower outboard side and pull the headlamp forward to disengage the locating tab.
- Pull the outboard side of the headlamp forward until the 2 locating pins disengage from the radiator support.
- Disconnect the forward lamp harness connector.
|
| 1 |
Headlamp Bolt (Qty: 2)
TIP:
Secure the headlamp using the sequence as listed.
Tighten
6 N.m (53 lb in) |
| 2 |
Headlamp Bolt
TIP:
Loosen the lower outer fender bolt but do not remove.
Tighten
6 N.m (53 lb in) |
| 3 |
Headlamp Assembly
TIP:
Upon assembly, align the 2 outer locating pins and one inner alignment tab to the radiator support prior to applying pressure to the lamp in order to seat the lamp. |