Digital Radio Antenna Cable Replacement
Digital Radio Antenna Cable Replacement
Removal Procedure
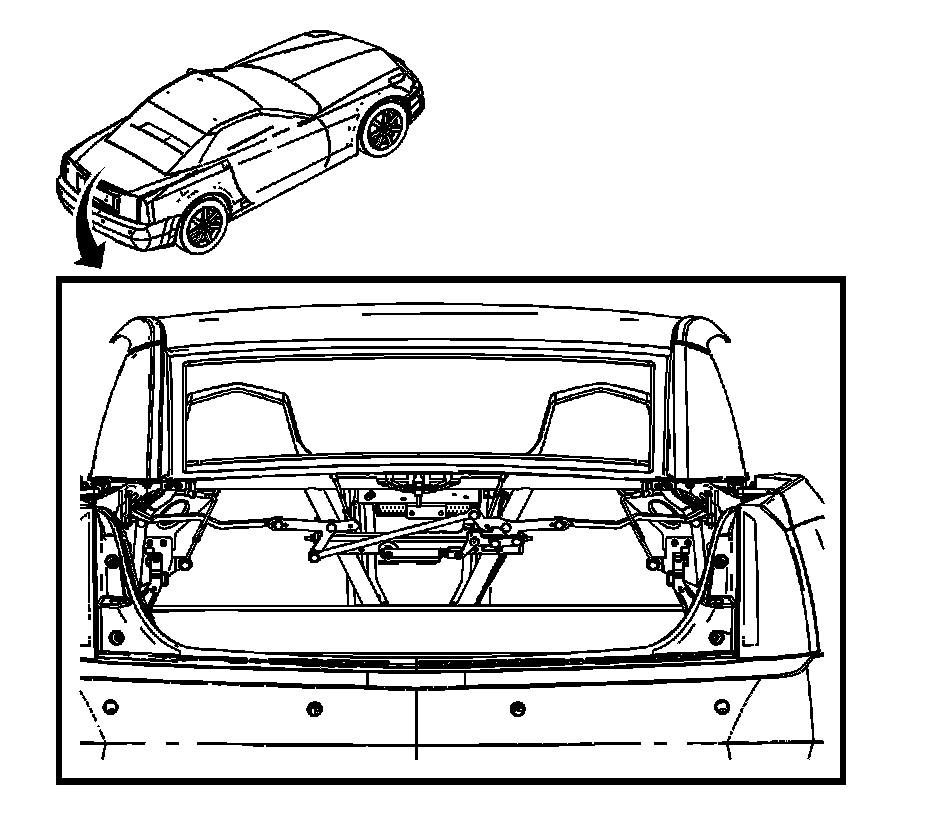
1. Loosen the cloth cover in the trunk area that covers the digital radio receiver to access the antenna cable connectors.
2. Cut the ends off on the antenna cable at the digital receiver.
3. Remove the right front IP closeout panel. Refer to Instrument Panel Insulator Panel Replacement - Right Side (Service and Repair).
4. Remove the right front carpet retainer. Refer to Carpet Retainer Replacement (Service and Repair).
5. Loosen the right side door manual release lever and leave it to the side. Refer to Front Side Door Inside Handle Cable Replacement (Service and Repair).
6. Remove the right side lock pillar trim. Refer to Carpet Retainer Replacement (Service and Repair).
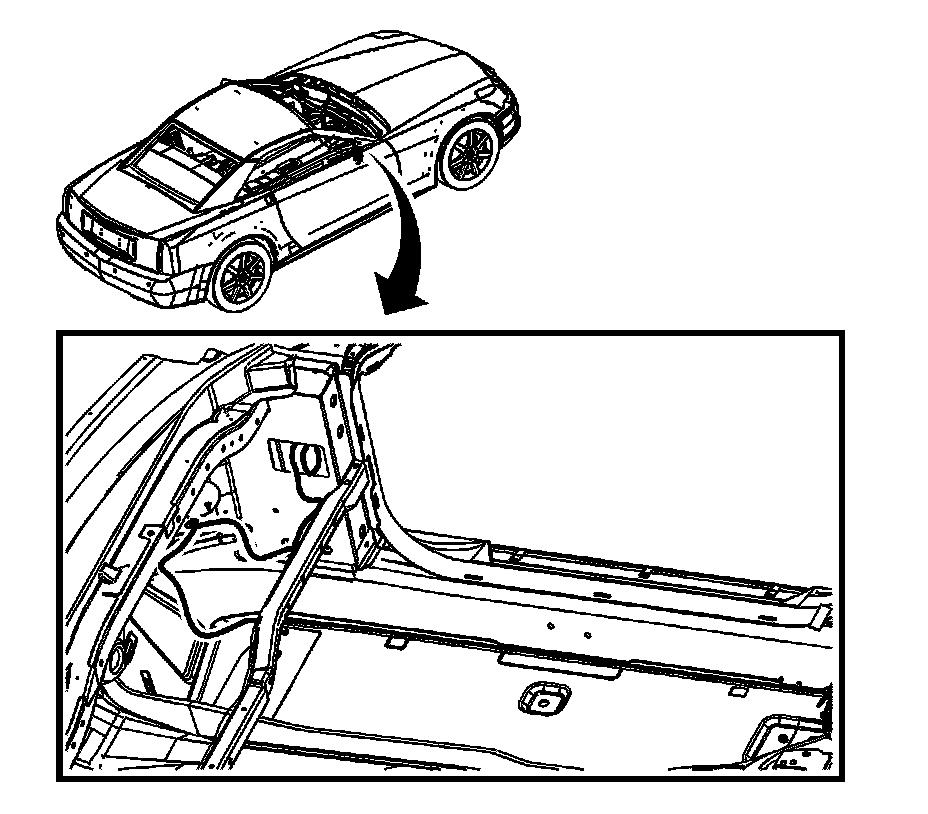
7. Return to the right underside of the IP and look for the harness going through the plastic seal in the pillar to door pass-through. Pull the seal back and locate the connector for the digital antenna. Disconnect it and cut the body side connector off.
8. Remove the left front carpet retainer. Refer to Carpet Retainer Replacement (Service and Repair).
9. Remove the parking brake assembly. Refer to Parking Brake Lever Pedal Assembly Replacement (Service and Repair).
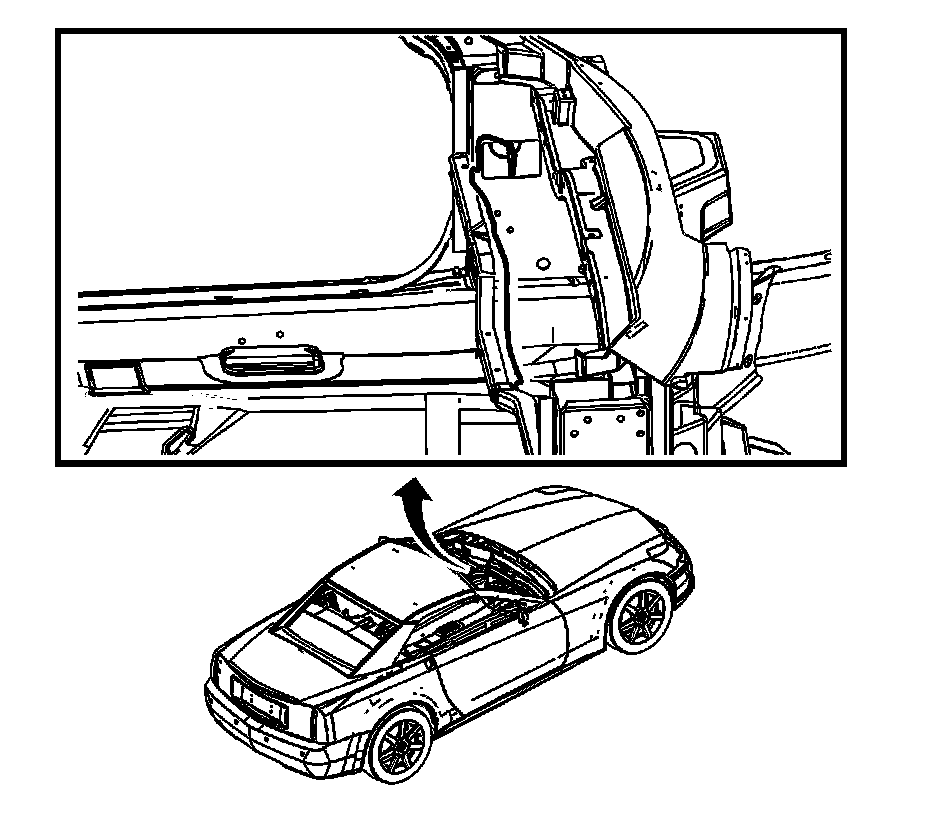
10. Under the left side of the IP look for the harness going through the plastic seal in pillar to door pass-through. Pull the seal back and locate the connector for the digital antenna. Disconnect it and cut the body side connector off.
Installation Procedure
1. Move to the center of the IP area and route a piece of mechanic's wire behind the IP/center console area. Attach the left side of the new antenna cable to the mechanic's wire on the right side of the IP with a piece of tape and pull the wire through the IP/center console area to the left side of the IP. Follow the approximate routing of the old antenna cable when placing the mechanic's wire.
2. Push the new connector through the plastic seal on the left side pillar to door pass-through, reconnect the connector, and reinstall the plastic seal. The seal should snap into place securely. Use tie straps as needed to secure the new antenna cable under left side of dash.
3. Push the new connector through the plastic seal on the right IP pillar to door pass-through, reconnect the connector, and reinstall the plastic seal. The seal should snap into place securely. Use tie straps as needed to secure the new antenna cable under the right side of dash.
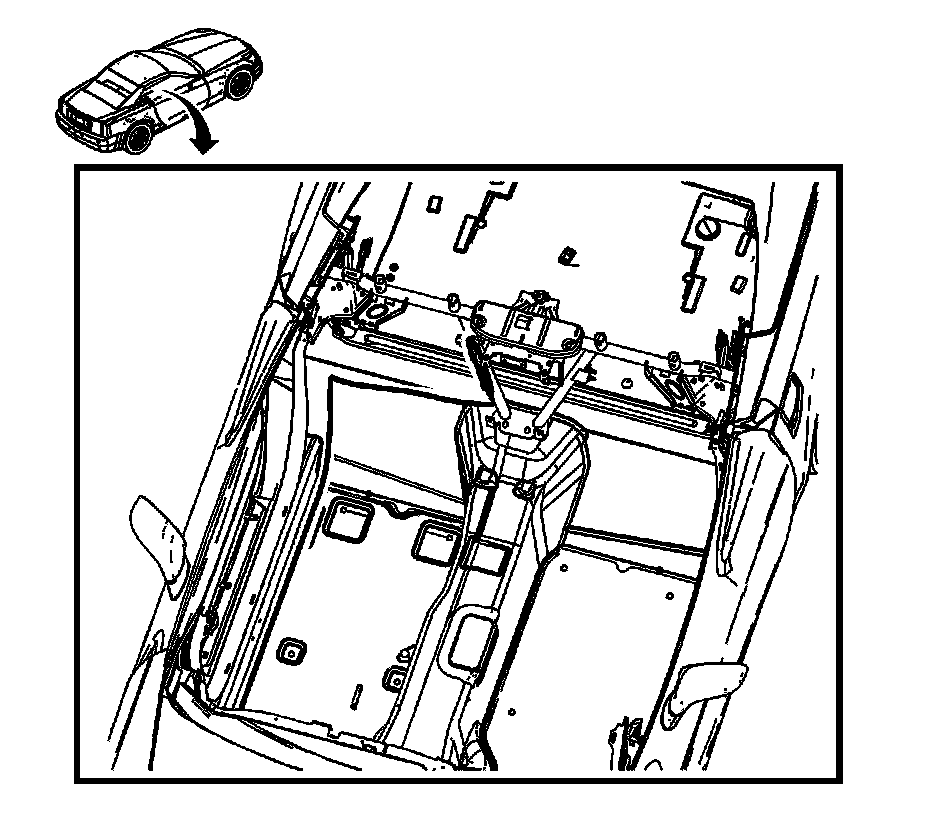
4. Route the new antenna cable along the left side of the body following the approximate routing of old antenna cable behind the carpets and back to the digital receiver. Use tie straps as needed to secure the new cable. Reconnect the antenna cable to the digital receiver.
5. Install the parking brake assembly. Refer to Parking Brake Lever Pedal Assembly Replacement (Service and Repair).
6. Install the left front carpet retainer. Refer to Carpet Retainer Replacement (Service and Repair).
7. Install the right side lock pillar trim. Refer to Body Lock Pillar Trim Panel Replacement (Service and Repair).
8. Install the right front carpet retainer. Refer to Carpet Retainer Replacement (Service and Repair).
9. Install the right side door manual release lever. Refer to Front Side Door Inside Handle Cable Replacement (Service and Repair).
10. Install the right side IP closeout panel. Refer to Instrument Panel Insulator Panel Replacement - Right Side (Service and Repair).