Removal Procedure
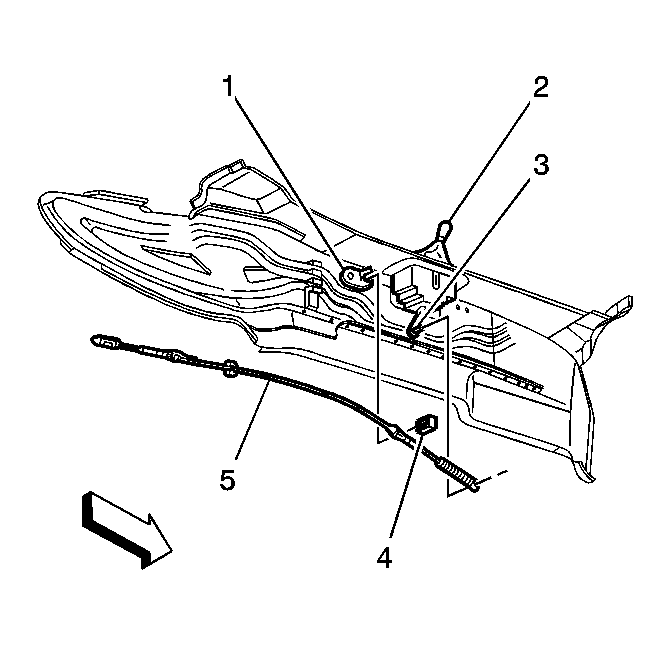 Courtesy of GENERAL MOTORS CORP.
- Raise the vehicle. Refer to Lifting and Jacking the Vehicle
.
- Remove the intermediate exhaust pipe. Refer to Intermediate Pipe Replacement
.
- Remove the floor panel tunnel panel reinforcement. Refer to Floor Panel Tunnel Panel Reinforcement Replacement
.
- Disconnect the shift control cable from the floor shift control ball stud (3).
- Lower the vehicle.
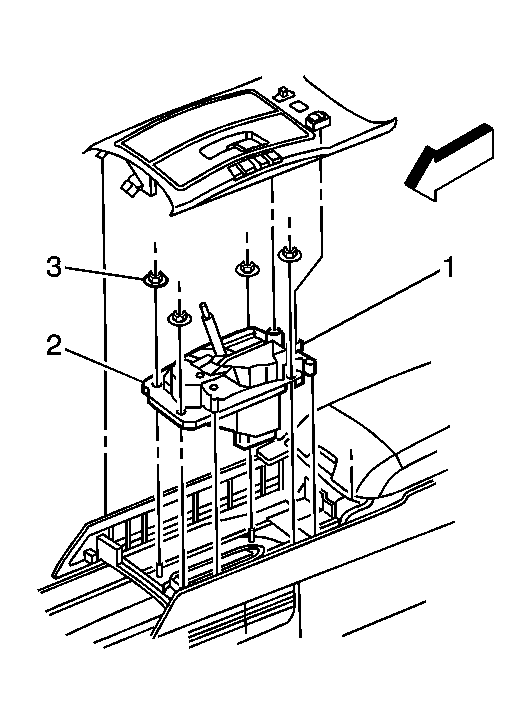 Courtesy of GENERAL MOTORS CORP.
- Remove the shift control trim plate. Refer to Console Trim Plate Replacement
.
- Remove the center console assembly (1). Refer to Console Replacement
.
- Remove the electrical connector from the shift control assembly.
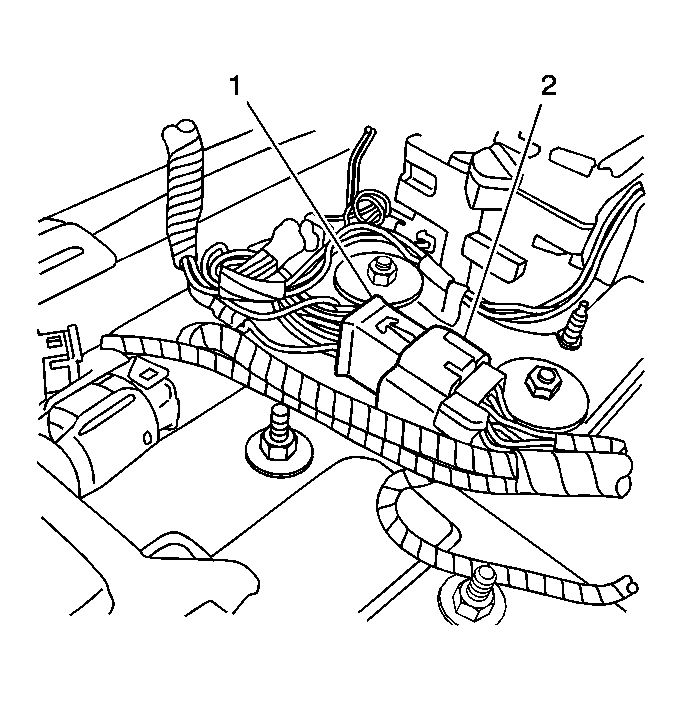 Courtesy of GENERAL MOTORS CORP.
- Disconnect the wiring harness connector (1) from the shift lock control pigtail connector (2).
Courtesy of GENERAL MOTORS CORP.
- Remove the nuts (3) securing the shift control assembly (1) to the tunnel reinforcement.
- Remove the shift control assembly from the tunnel reinforcement.