Rear Brake Pads: Installation
- Inspect the brake caliper bolt suspension boots for cuts, tears, or deterioration. If damaged, replace the brake caliper pin boots. Inspect the brake caliper pin bolts for damage or corrosion. Replace if damaged or corroded. Do not attempt to clean away corrosion. Corrosion is typically caused by damaged pin boots. See DISC BRAKE MOUNTING HARDWARE INSPECTION
in DISC BRAKE SYSTEM under TROUBLE SHOOTING.
- Inspect the brake caliper piston boot for deterioration, repair or replace the brake caliper if damaged. See REAR BRAKE CALIPER
under ADJUSTMENTS & INSPECTIONS.
- Retract the brake caliper piston into the brake caliper bore. Use a spanner type wrench to turn the piston clockwise until it bottoms in the brake caliper bore and align the piston. Align the cutouts in the brake caliper piston to the alignment pins on the brake pads. See Fig 1
. Apply a thin coat of high temperature silicone lube to the rear brake caliper pin bolts.
- Install the brake pad retainers into the brake caliper bracket. Install the inboard and outboard brake pads into the brake caliper bracket. Pivot the brake caliper down over the brake pads and into the brake caliper bracket.
- Insert the lower brake caliper pin bolt. Tighten the brake caliper pin bolt to specification. See TORQUE SPECIFICATIONS
.
- Install the park brake cable guide bolt to the lower control arm. Tighten the park brake cable guide bolt to specification. See TORQUE SPECIFICATIONS
.
- Install the tire and wheel assembly. Lower the vehicle.
- With the engine OFF, gradually apply the brake pedal to approximately 2/3 of its travel distance. Slowly release the brake pedal. Wait 15 seconds, then repeat until a firm brake pedal apply is obtained; this will properly seat the brake caliper pistons and brake pads.
- Fill the brake master cylinder reservoir to the proper level. See MASTER CYLINDER RESERVOIR FILLING
under BLEEDING, FILLING & FLUSHING BRAKE SYSTEM. Burnish the pads and rotors.
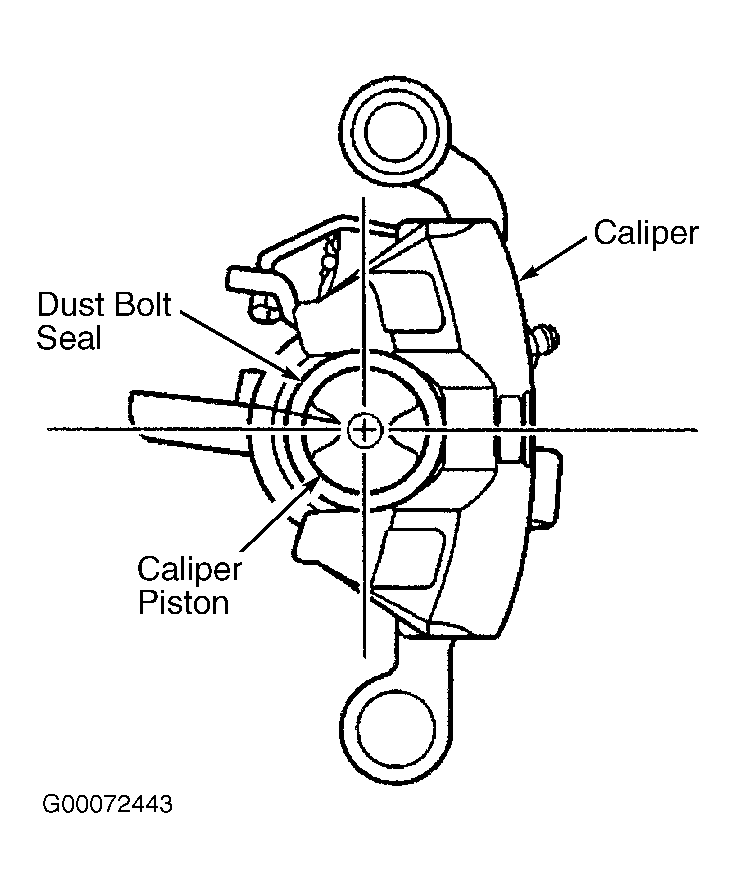 Courtesy of GENERAL MOTORS CORP.
- Inspect the brake caliper bolt suspension boots for cuts, tears, or deterioration. If damaged, replace the pin boots. Inspect the brake caliper pin bolt for damage or corrosion. Replace if damaged or corroded. Do not attempt to clean away corrosion. Corrosion is typically caused by damaged pin boots. See DISC BRAKE HARDWARE
.
- Inspect the brake caliper piston boot for deterioration, repair or replace the brake caliper if damaged. See REAR CALIPERS
under OVERHAUL.
- Install the brake pad retainers into the brake caliper bracket. Install the inboard and outboard brake pads into the brake caliper bracket. Pivot the brake caliper down over the brake pads and into the brake caliper bracket. Apply a thin coat of high temperature silicone lube to the rear brake caliper bolts.
- Install the brake caliper pin bolts. Tighten the brake caliper pin bolts to specification. See TORQUE SPECIFICATIONS
.
- Install the tire and wheel assembly. Tighten to specification. See TORQUE SPECIFICATIONS
. Lower the vehicle.
- With the engine OFF, gradually apply the brake pedal to approximately 2/3 of its travel distance. Slowly release the brake pedal. Wait 15 seconds, then repeat until a firm brake pedal apply is obtained; this will properly seat the brake caliper pistons and brake pads.
- Fill the brake master cylinder reservoir to the proper level. See MASTER CYLINDER RESERVOIR FILLING
under BLEEDING, FILLING & FLUSHING BRAKE SYSTEM. Burnish the pads and rotors.
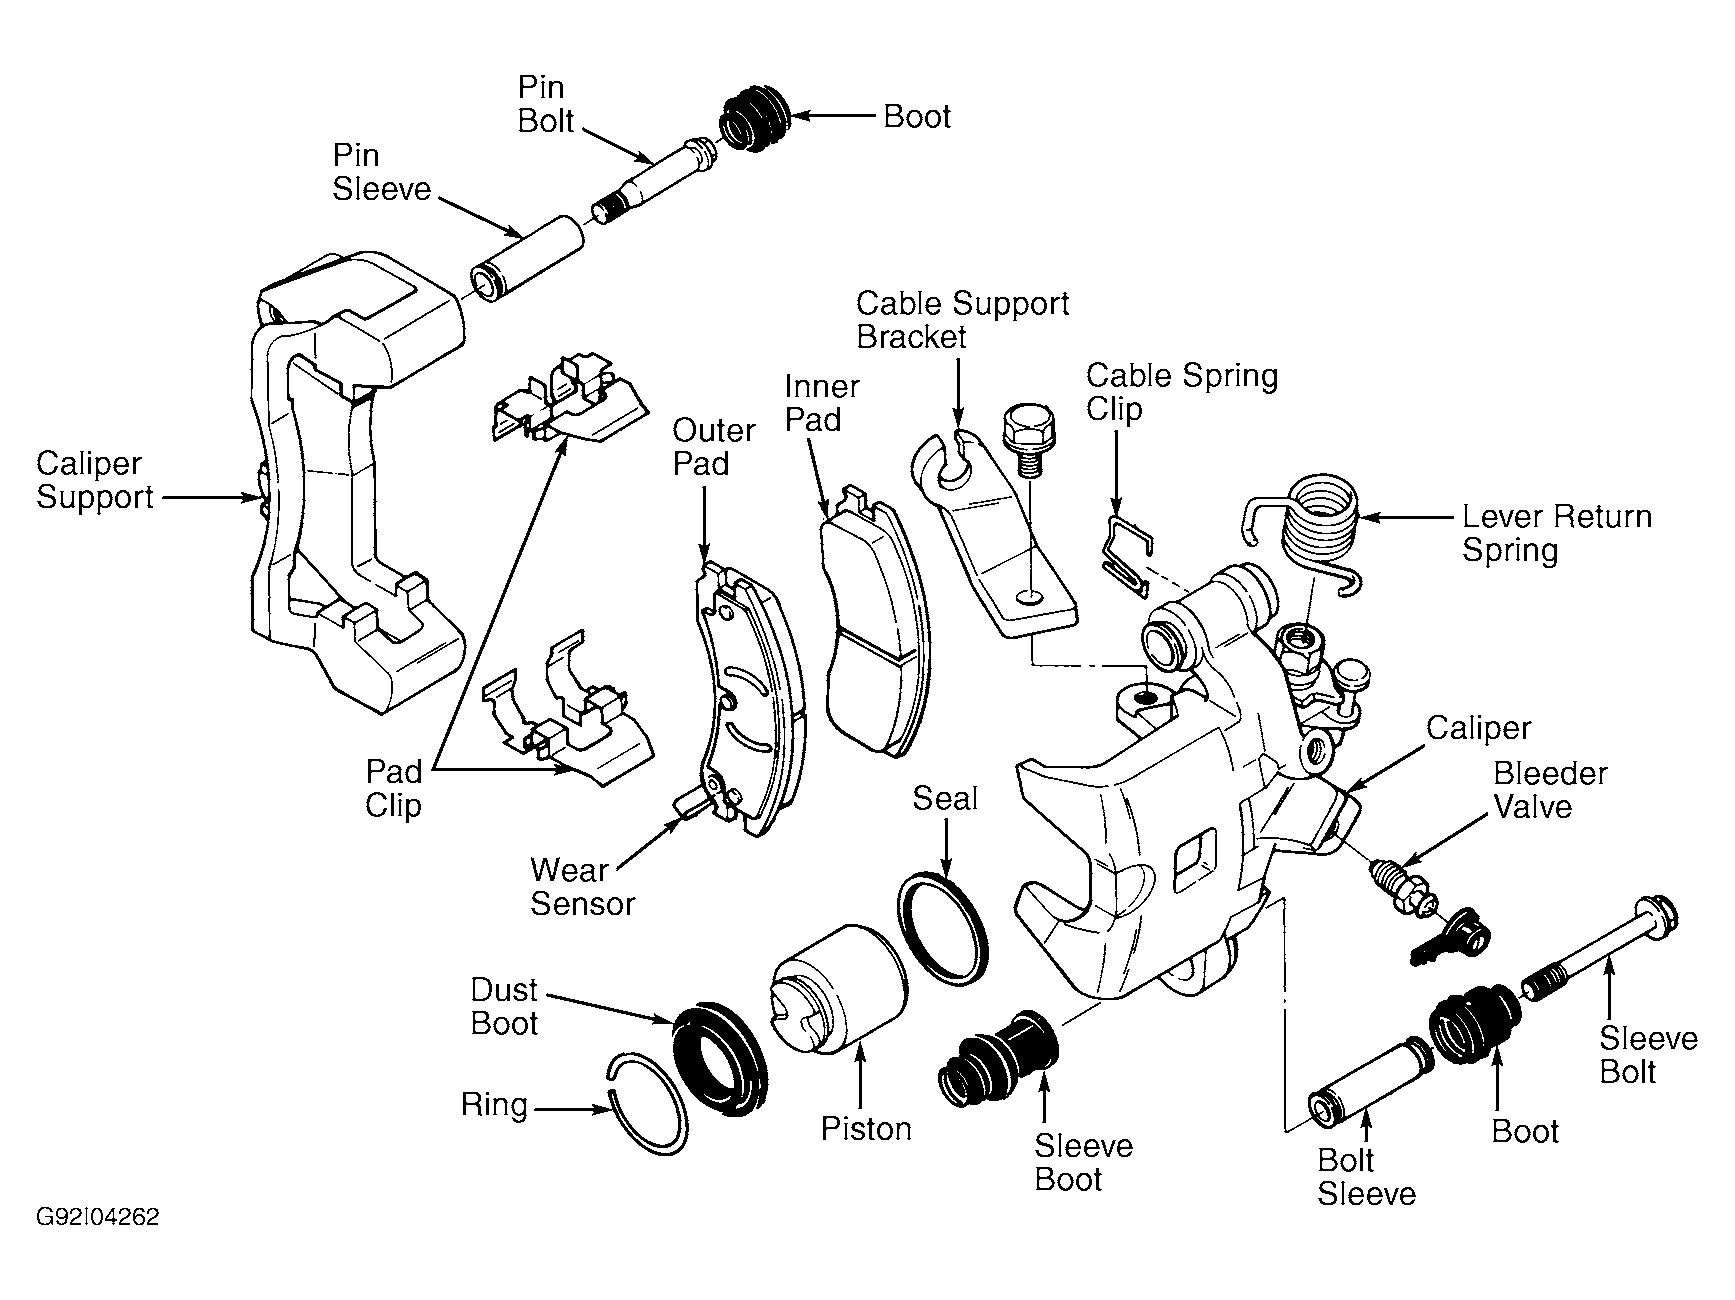 Courtesy of GENERAL MOTORS CORP.