Removal & Installation (Without Telephone)
- Before proceeding, disable air bag system. See AIR BAG RESTRAINT SYSTEMS - DEVILLE, ELDORADO & SEVILLE article.
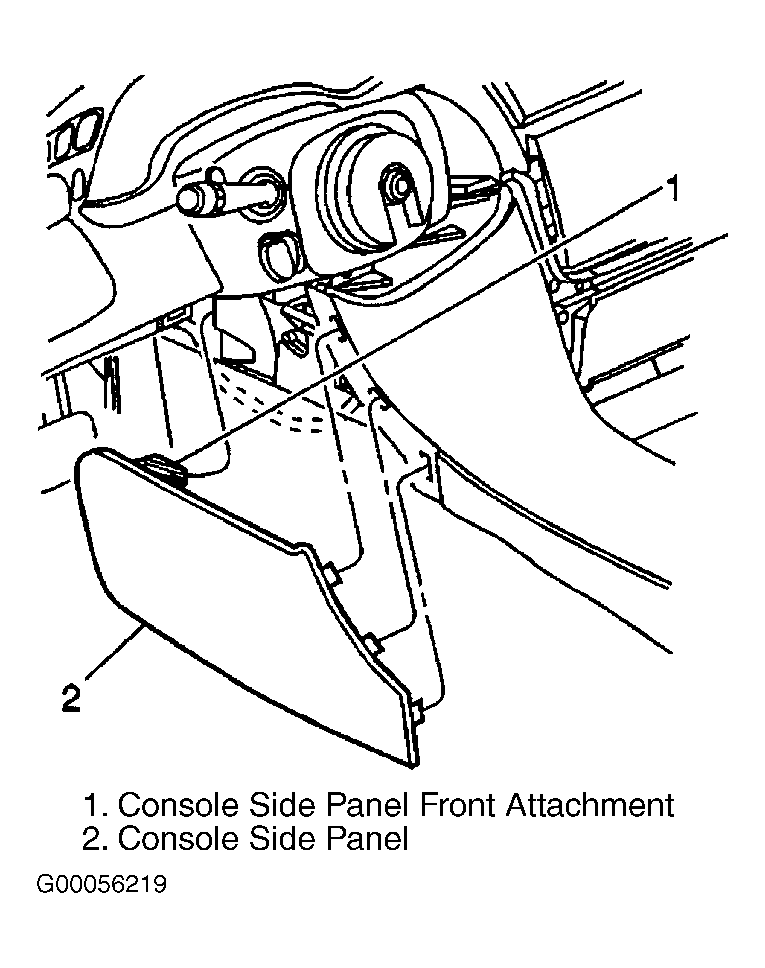
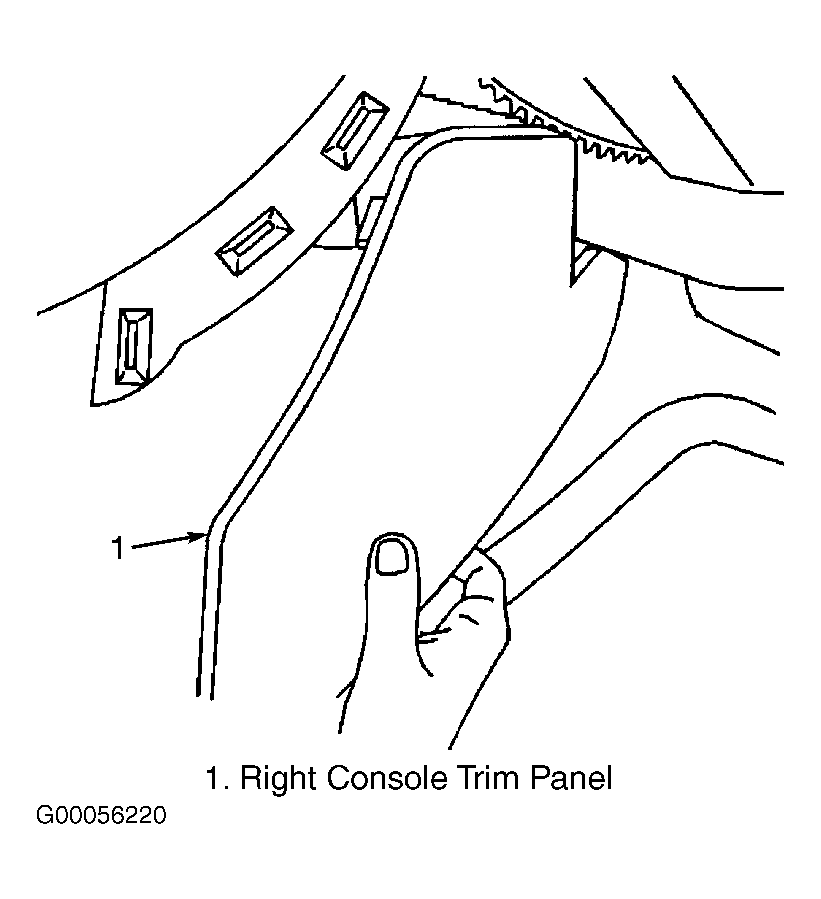
- Move both driver's and passenger's seats to gain access to console screws. Grab the rear edge of the console side panel. See Fig 1. Pull out on the rear of the console side panel to disengage the rear retainers. Push forward on the console side panel to disengage the console side panel front attachment from the Heater Ventilation Air Conditioning (HVAC) cover. Remove the left console side panel. Grab the rear edge of the right console side panel. Pull out on the side panel to disengage retainers. See Fig 2. Remove right console side panel. Remove instrument panel center storage compartment. See INSTRUMENT PANEL CENTER STORAGE COMPARTMENT .
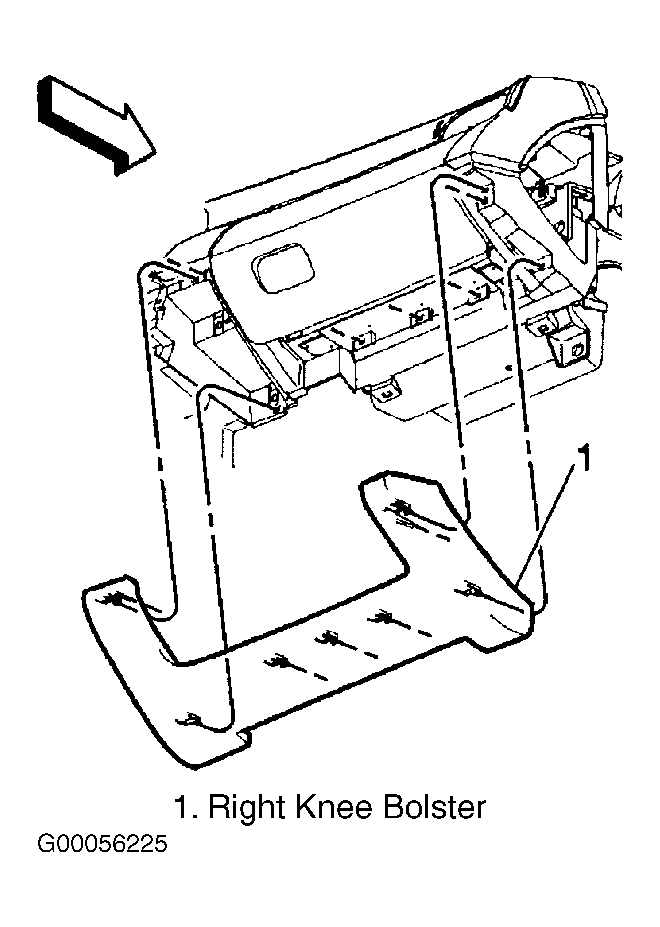
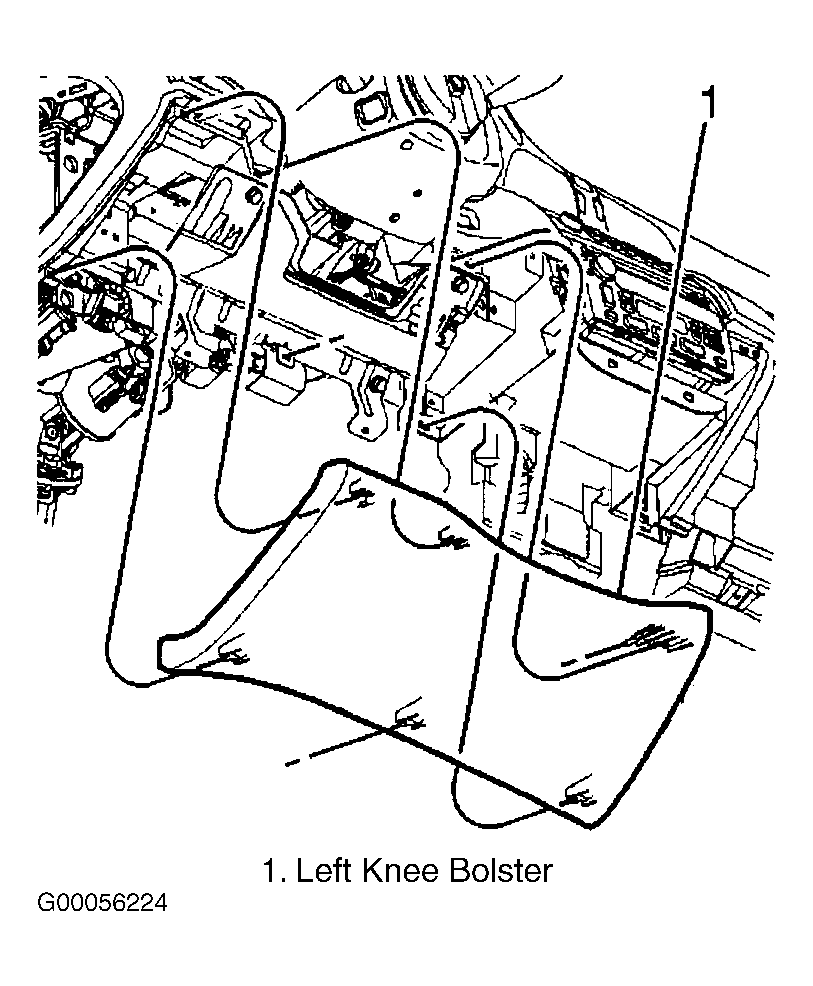
- Remove both left and right knee bolster trim panels by grasping at the top and the bottom and by pulling rearward. Remove the knee bolster trim panels from the vehicle. See Fig 3 and Fig 4
.
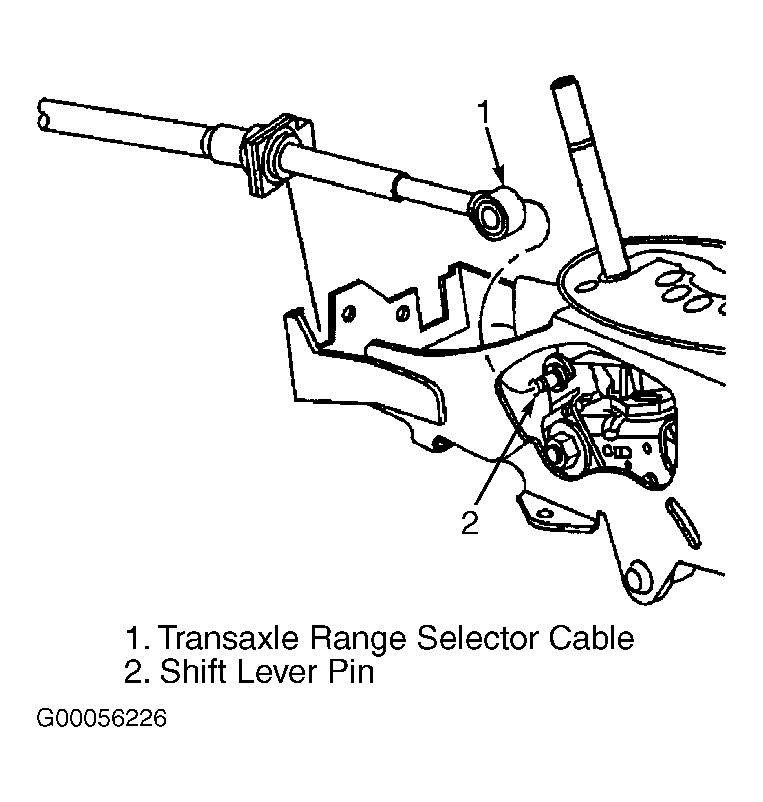
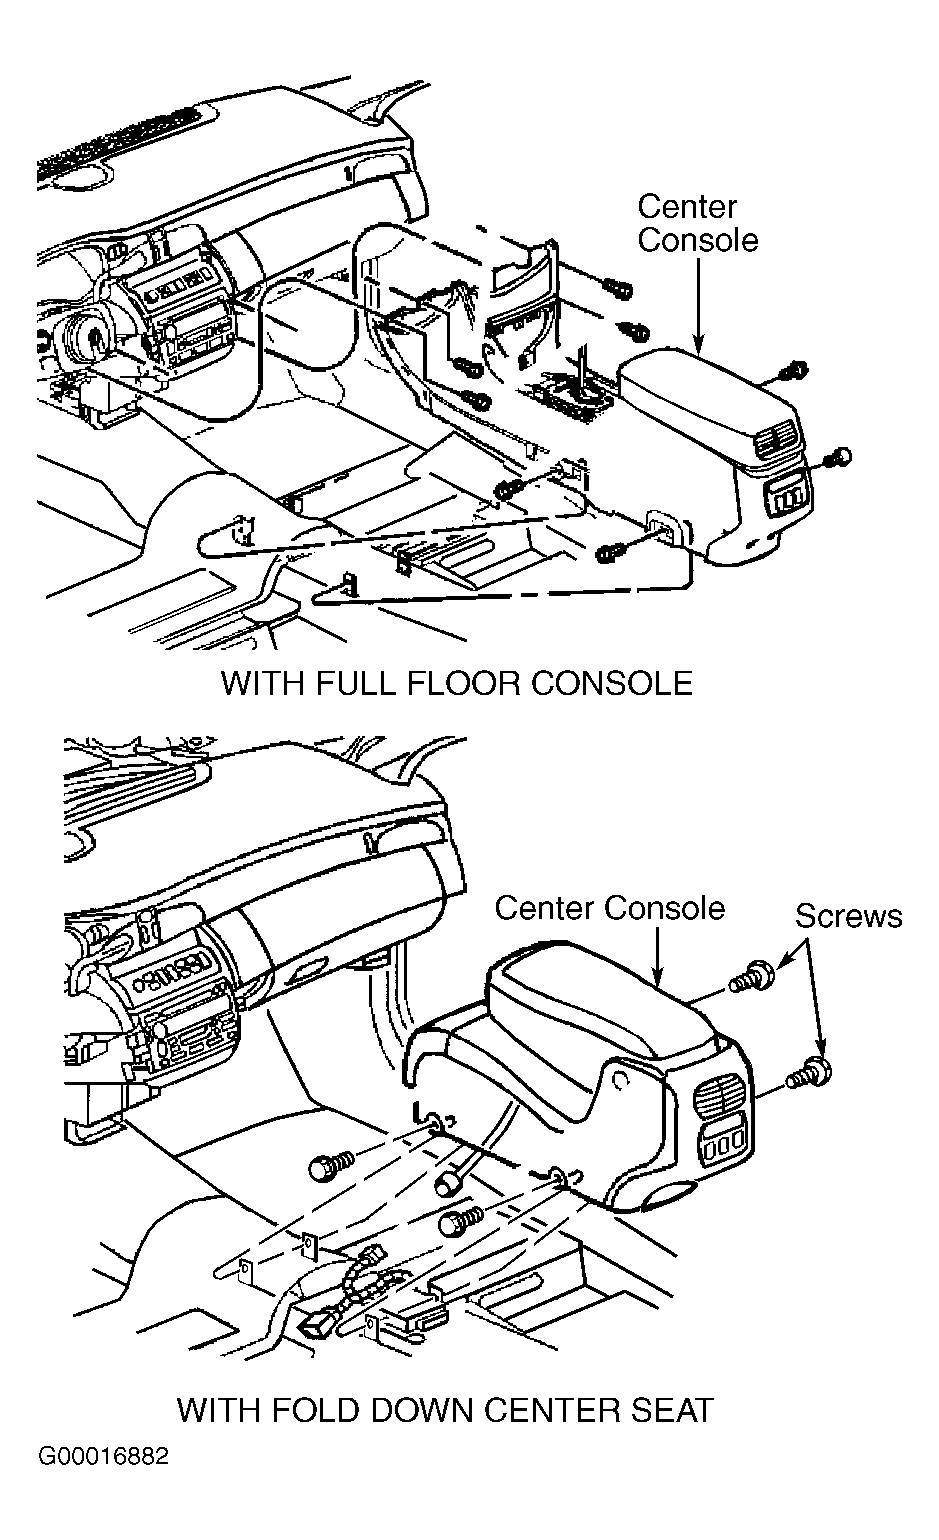
- Disconnect the transaxle range selector cable terminal from the shift lever pin. See Fig 5. Pull the lock release and remove the transaxle shift cable from the console. Remove the 4 console fasteners to the IP. See Fig 6. Adjust the front seats rearward. Remove the 2 front console to floor fasteners. Adjust the front seats forward. Remove the 2 rear console to floor fasteners. Move the console rearward, in order to access the harness connectors. Disconnect the center console harness connectors. Remove the center console. To install, reverse removal procedure.
 Courtesy of GENERAL MOTORS CORP.
 Courtesy of GENERAL MOTORS CORP.
 Courtesy of GENERAL MOTORS CORP.
 Courtesy of GENERAL MOTORS CORP.
 Courtesy of GENERAL MOTORS CORP.
 Courtesy of GENERAL MOTORS CORP.