Terminal Removal Procedure
- Locate the connector position assurance (CPA) on the connector body and pull the CPA out. The CPA is on the wire harness side of connector.
- Disconnect the connector from the component.
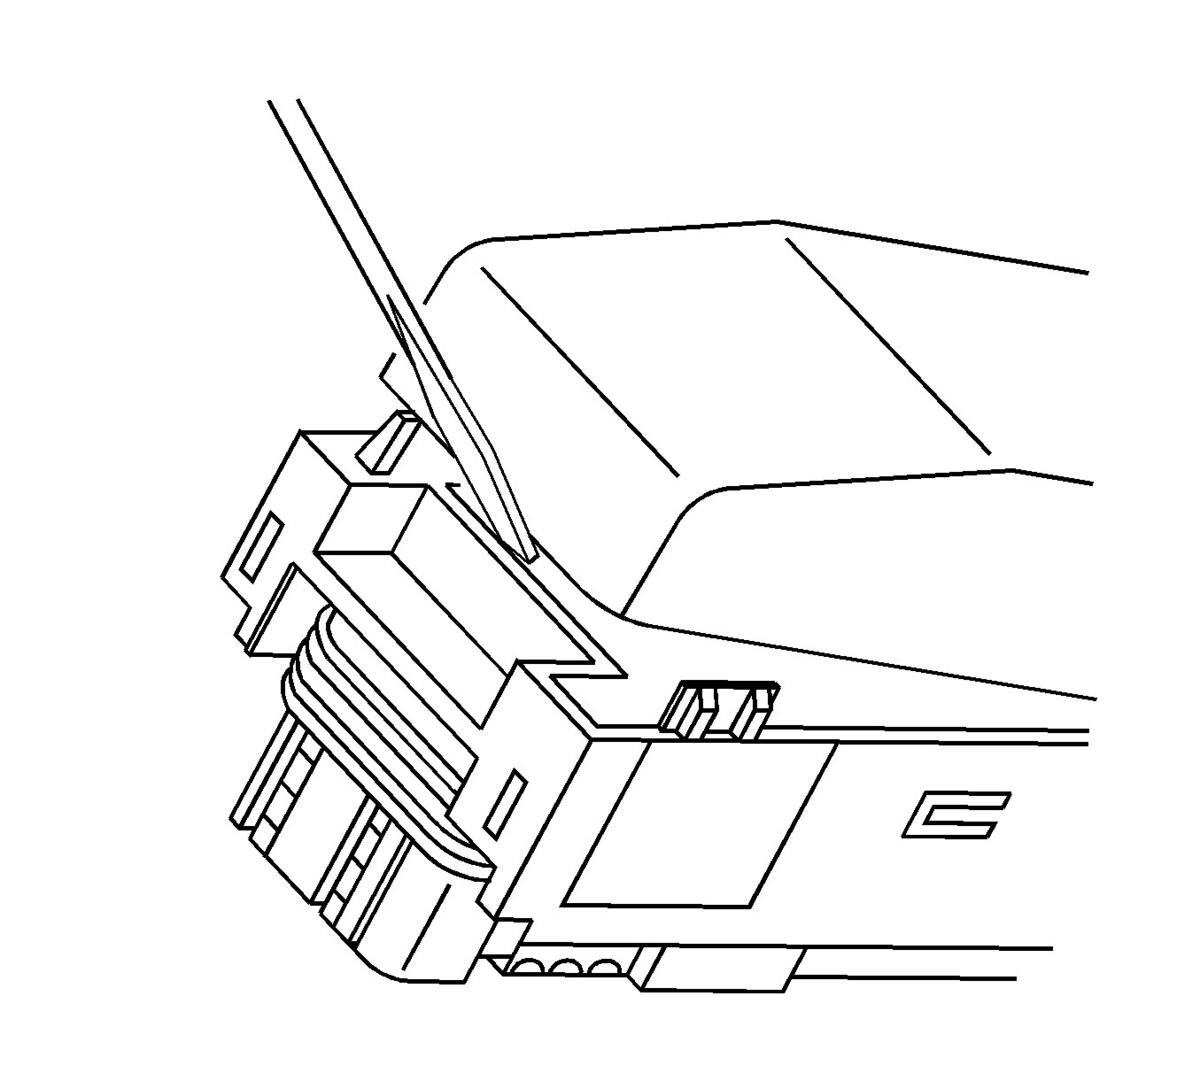 Courtesy of GENERAL MOTORS COMPANY
- Use a small flat-bladed tool to gently pry off the dress cover by inserting the tool under the cover opposite the harness side and prying up.
- Remove the cover.
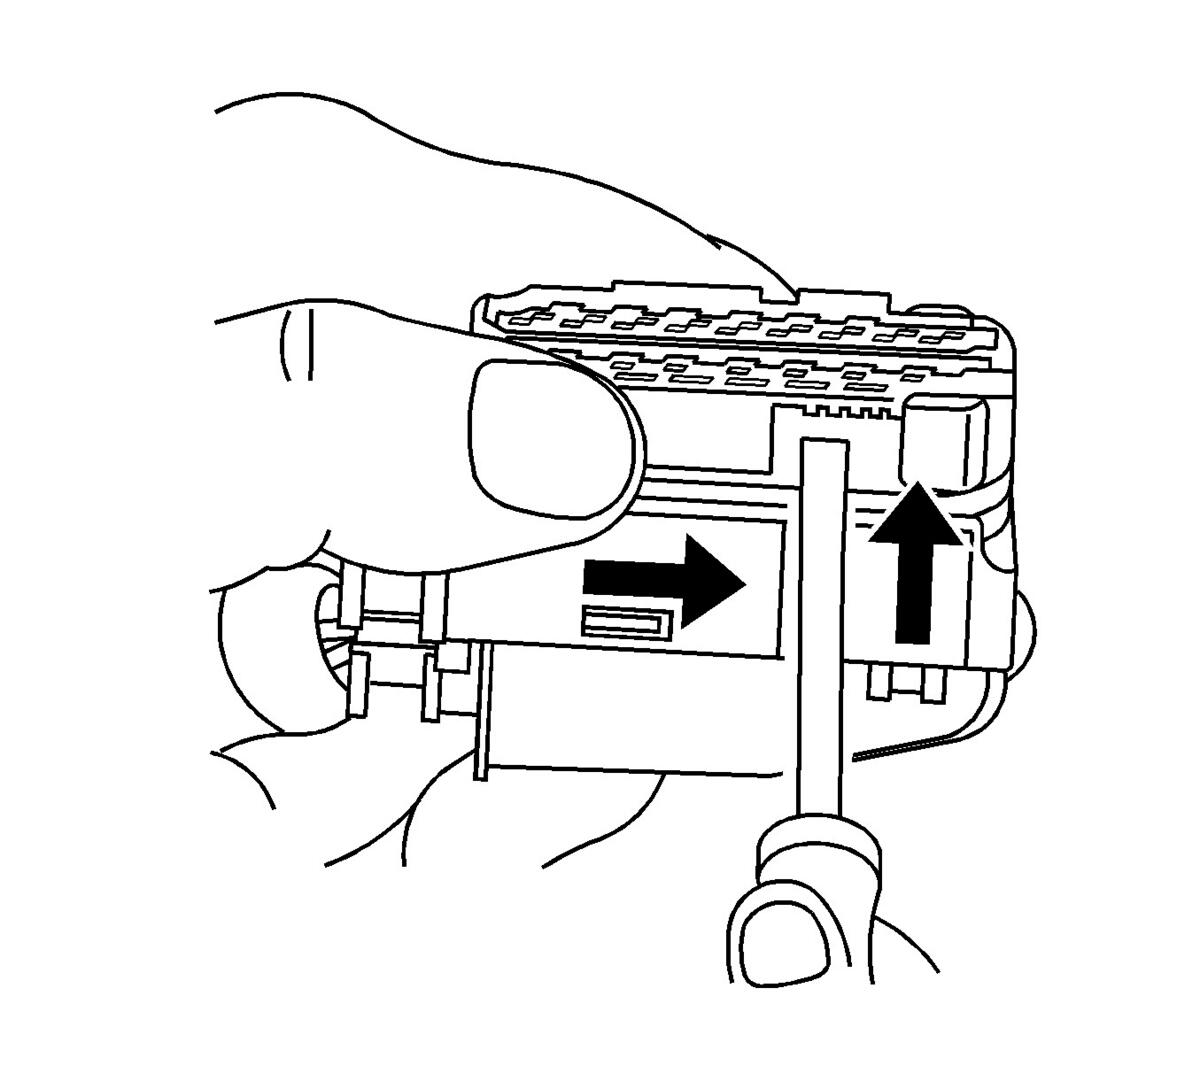 Courtesy of GENERAL MOTORS COMPANY
- Using a small flat-bladed tool, push on the side of the nose piece retainer while pushing the nose piece forward with your thumb. This will release the terminal position assurance (TPA).
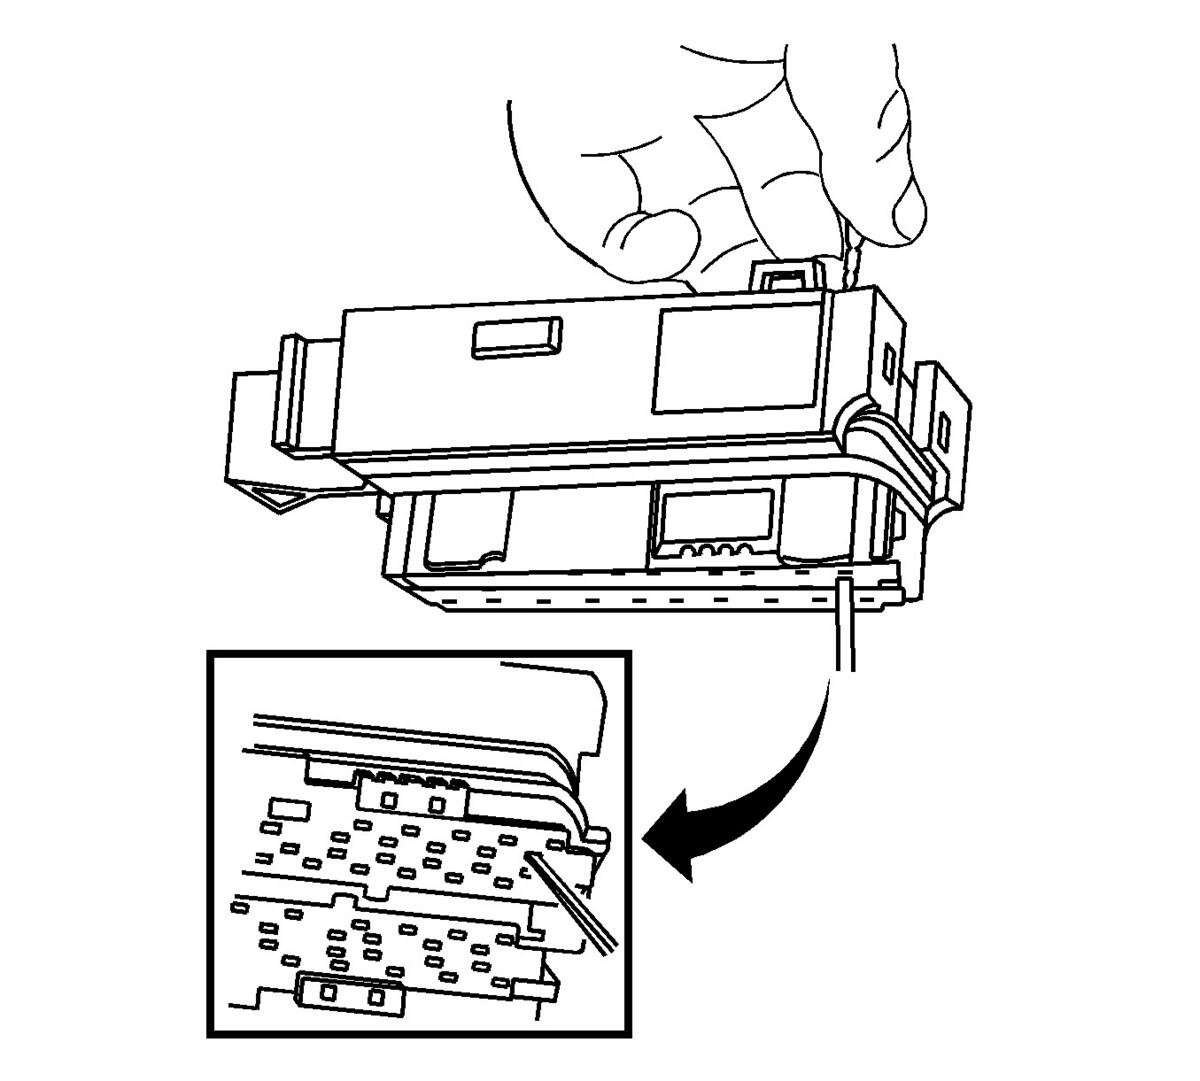 Courtesy of GENERAL MOTORS COMPANY
- Insert the J-38125-12A
tool into the corresponding terminal release cavity. The release cavities are the 2center rows of cavities on one half of the connector.
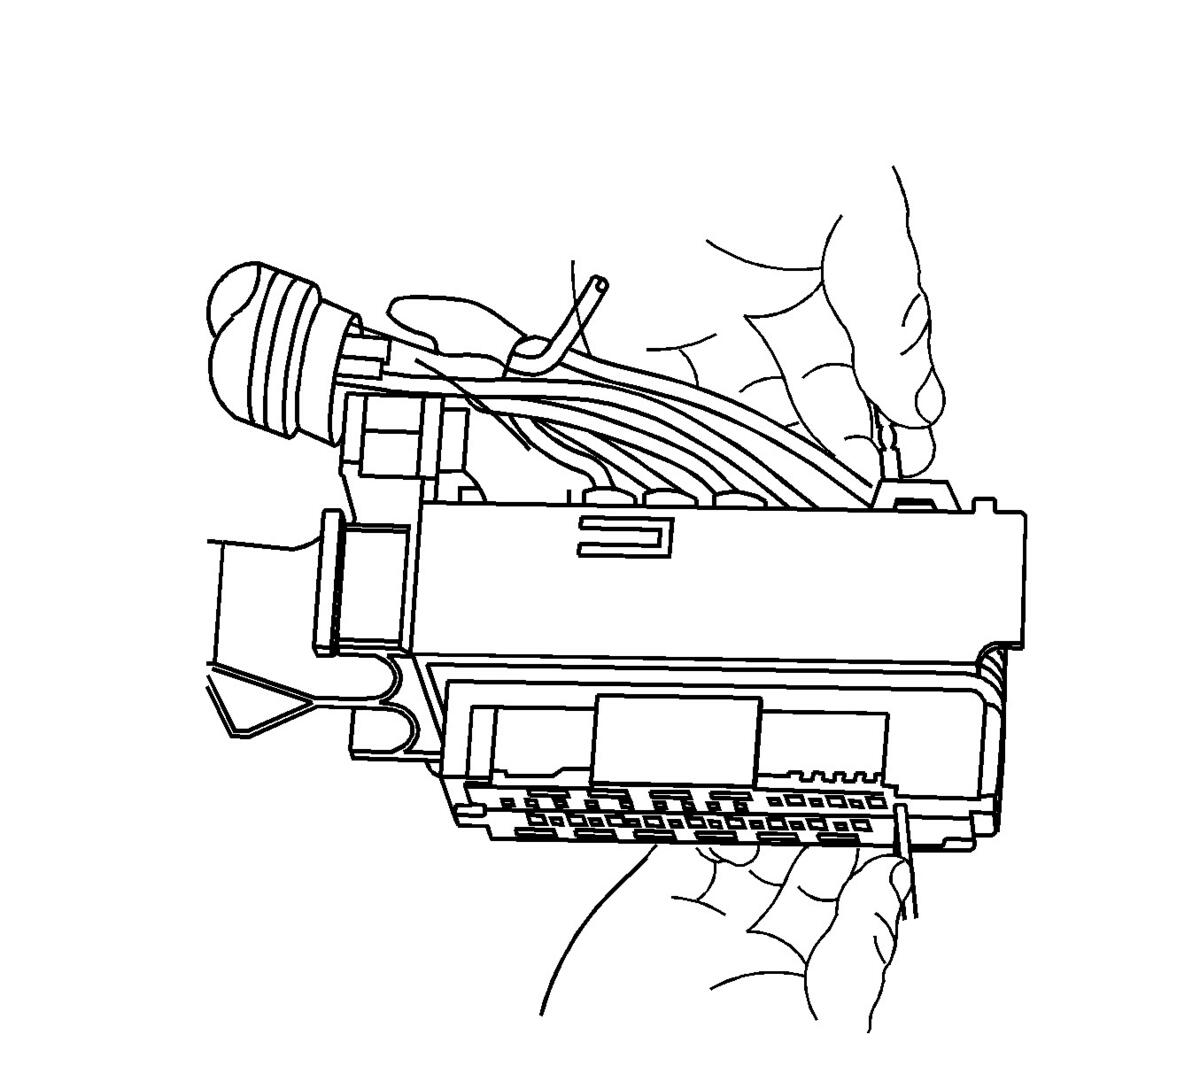 Courtesy of GENERAL MOTORS COMPANY
- Pressing the J-38125-12A
tool in the release cavity of the terminal you are removing, gently pull the wire out of the back of the connector. Always remember never use force when pulling a terminal out of a connector.
- Repair the terminal by following the Repairing Connector Terminals (Terminated Lead Repair) procedure.
- Insert the repaired terminal back into the cavity. Repeat the diagnostic procedure to verify the repair and reconnect the connector bodies.