Terminal Removal Procedure
- Locate the connector position assurance (CPA) on the top of the wire dress cover. Slide the CPA forward.
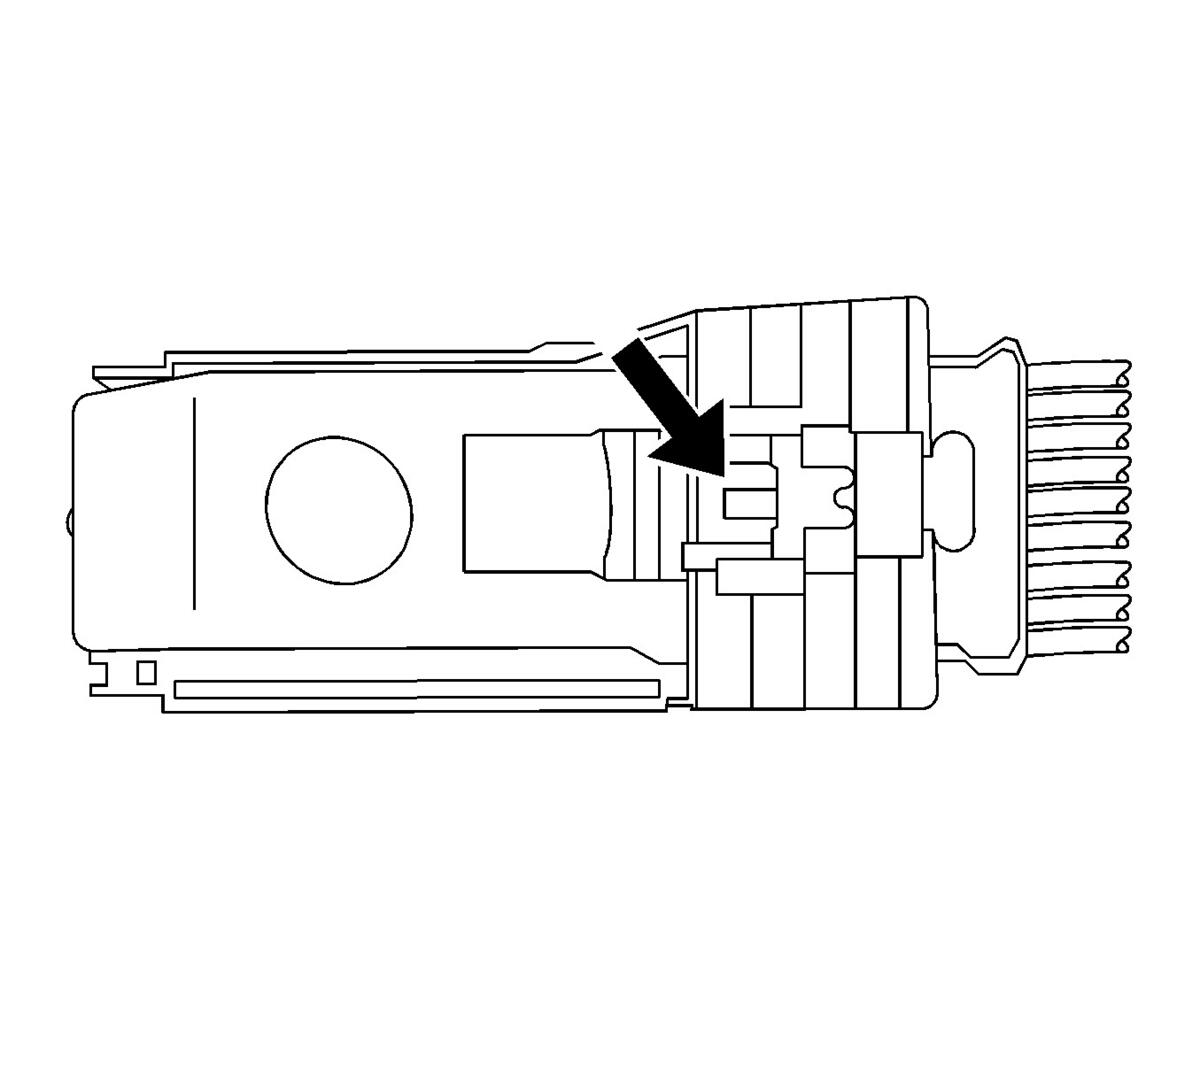 Courtesy of GENERAL MOTORS COMPANY
- Slide the lever lock forward while pressing down on the lever lock release tab.
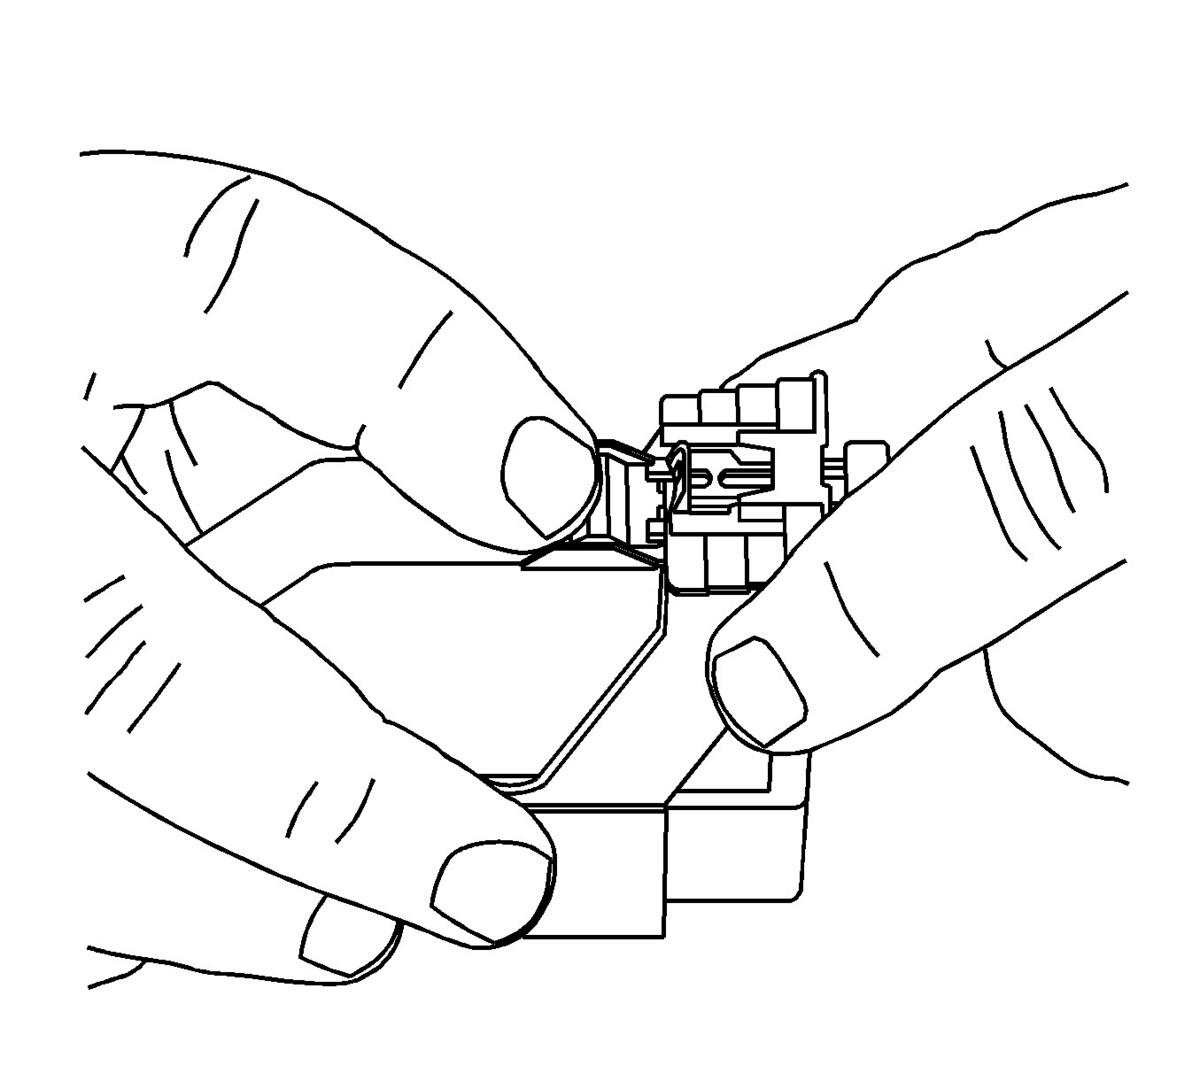 Courtesy of GENERAL MOTORS COMPANY
- The lever should be in the full forward position.
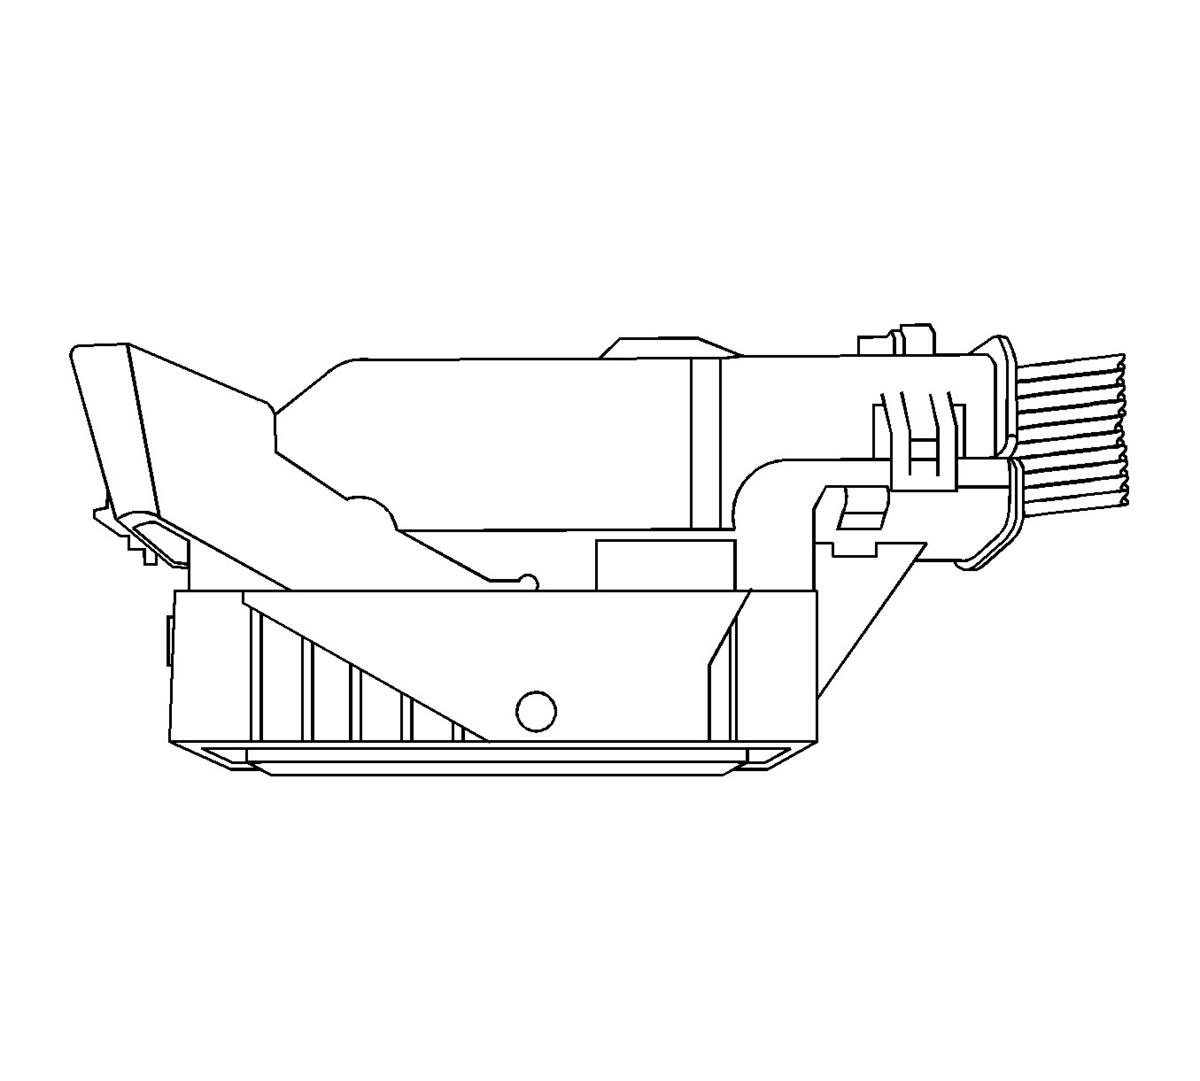 Courtesy of GENERAL MOTORS COMPANY
- Disconnect the connector from the component.
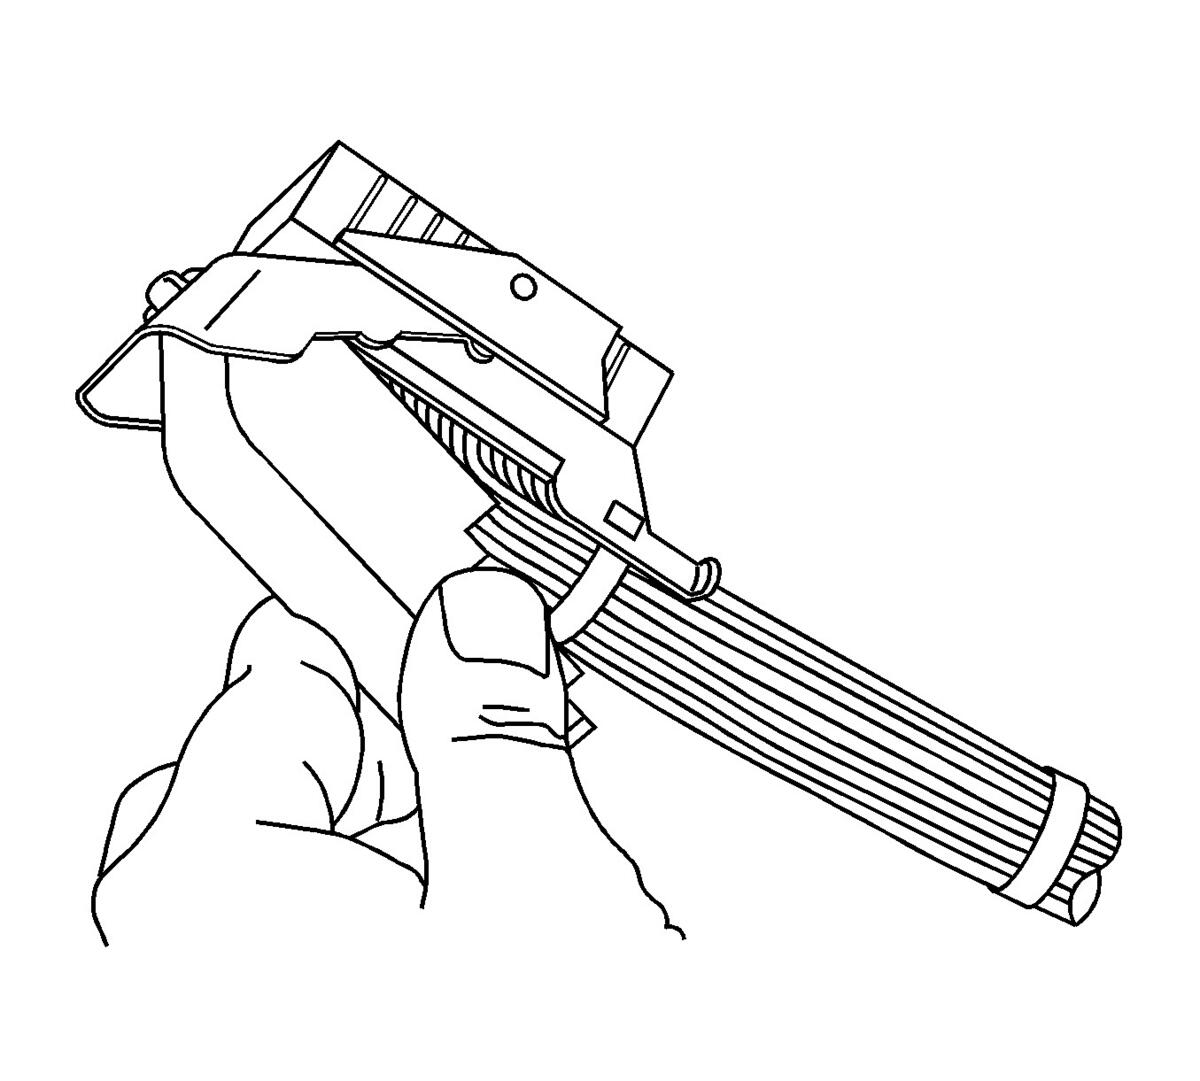 Courtesy of GENERAL MOTORS COMPANY
- Remove the dress cover by using a flat bladed tool to release the dress cover locking tabs and lift up on the dress cover.
- Cut the tie wrap that holds the wires to the connector body.
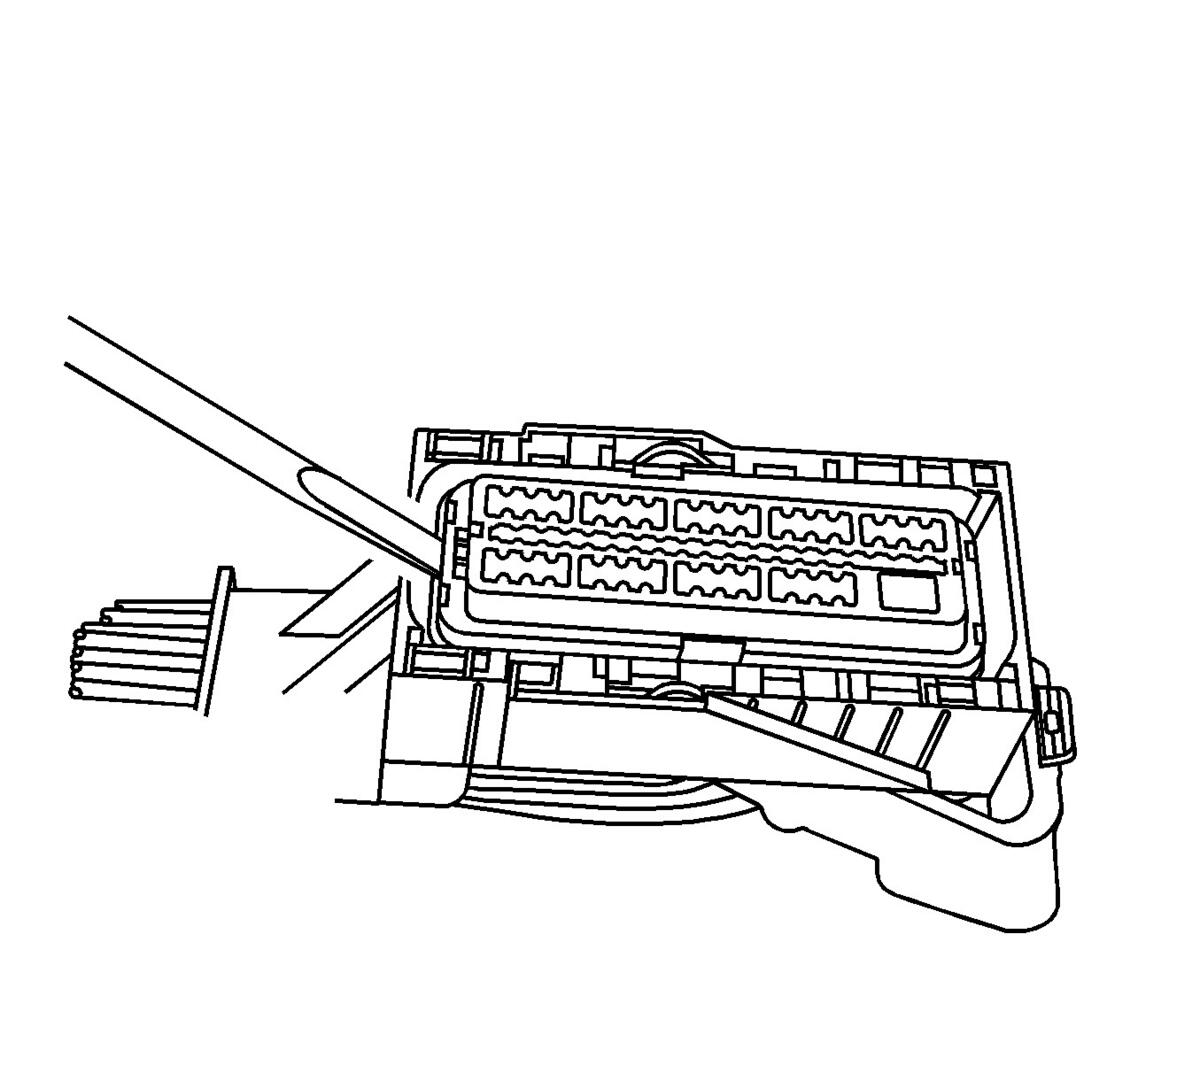 Courtesy of GENERAL MOTORS COMPANY
- Use a small flat-blade tool to pry one side of the nose piece up to the pre-stage position. When the nose piece is in the pre-staged position, the nose piece will be raised above the connector body the length of the step in the nose piece.
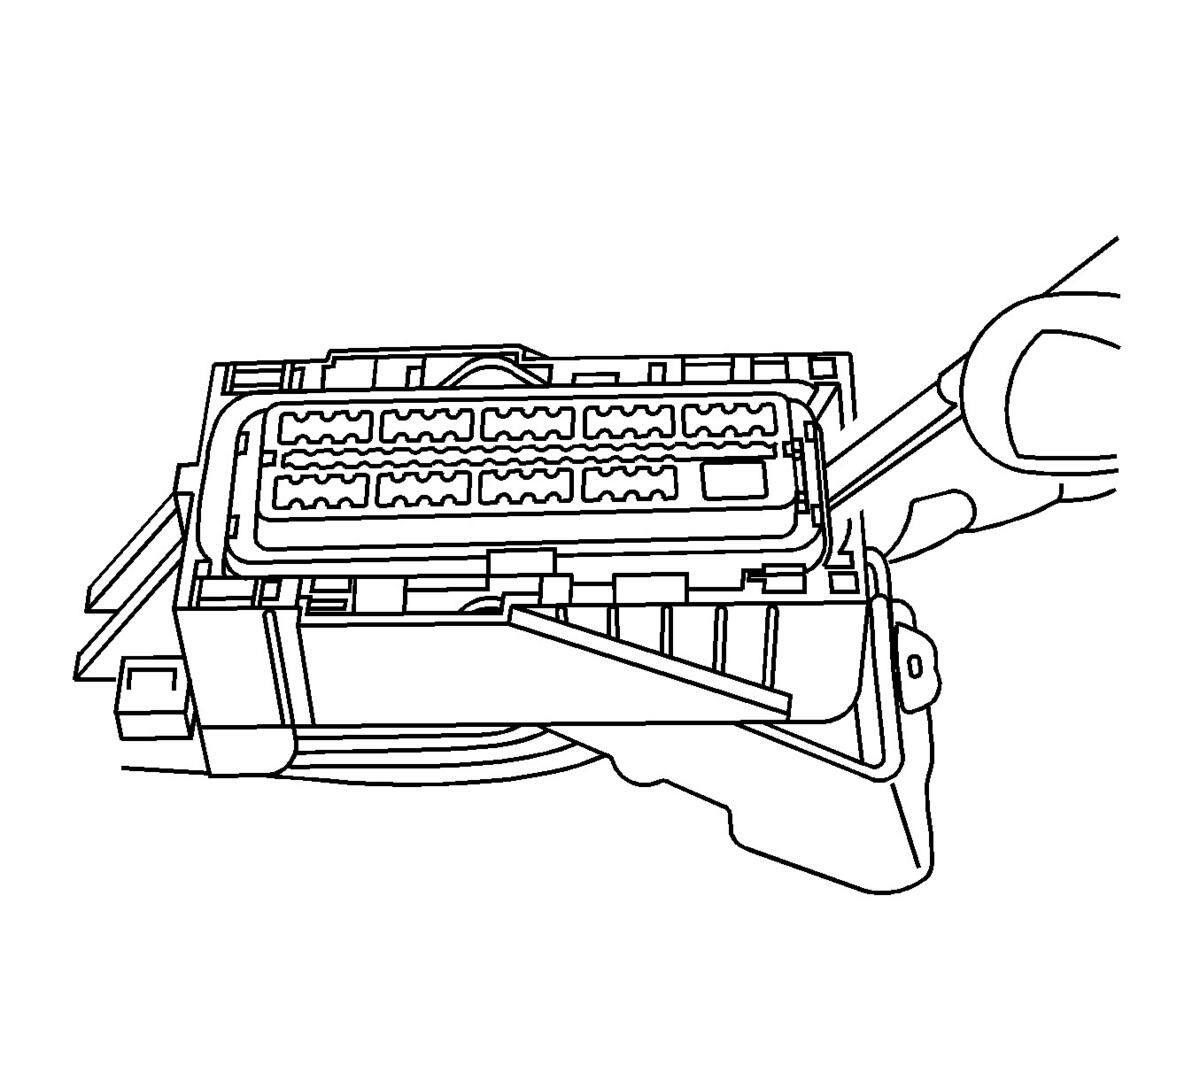 Courtesy of GENERAL MOTORS COMPANY
- Use a small flat-blade tool to pry the other side of the piece to the pre-stage position. If the nose piece is higher than the first step in the nose piece, gently push down on the nose piece until it meets with resistance from the connector body, you should feel the nose piece click into position.
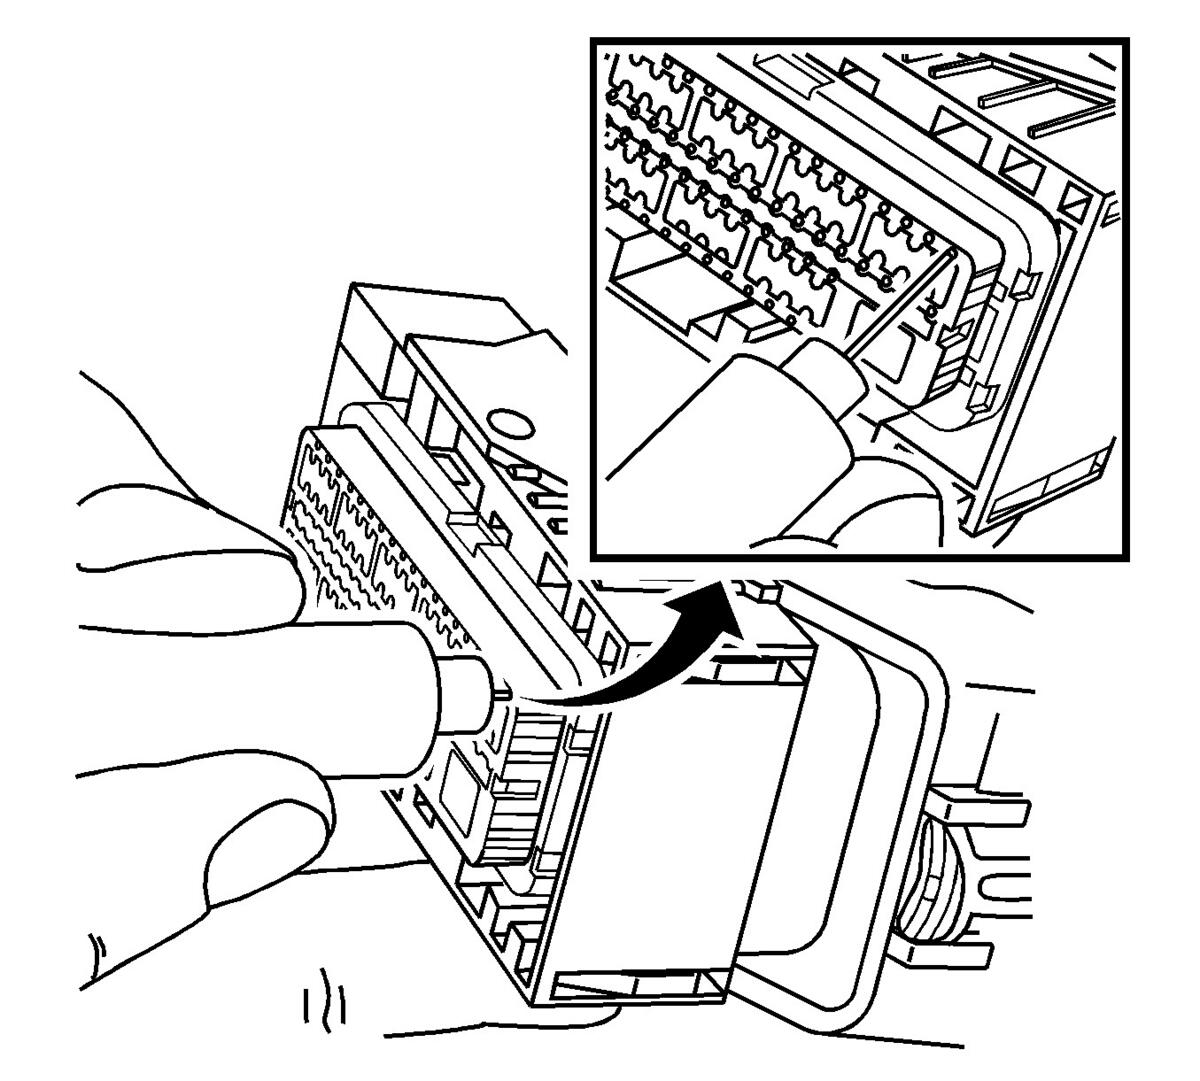 Courtesy of GENERAL MOTORS COMPANY
- Insert the J-38125-213 into the small terminal release hole on the nose piece and gently pull on the back of the wire.
- Repair the terminal by following the Repairing Connector Terminals (Terminated Lead Repair) procedure.
- Insert the repaired terminal back into the cavity. Repeat the diagnostic procedure to verify the repair and reconnect the connector bodies.