Headlining Trim Panel Replacement
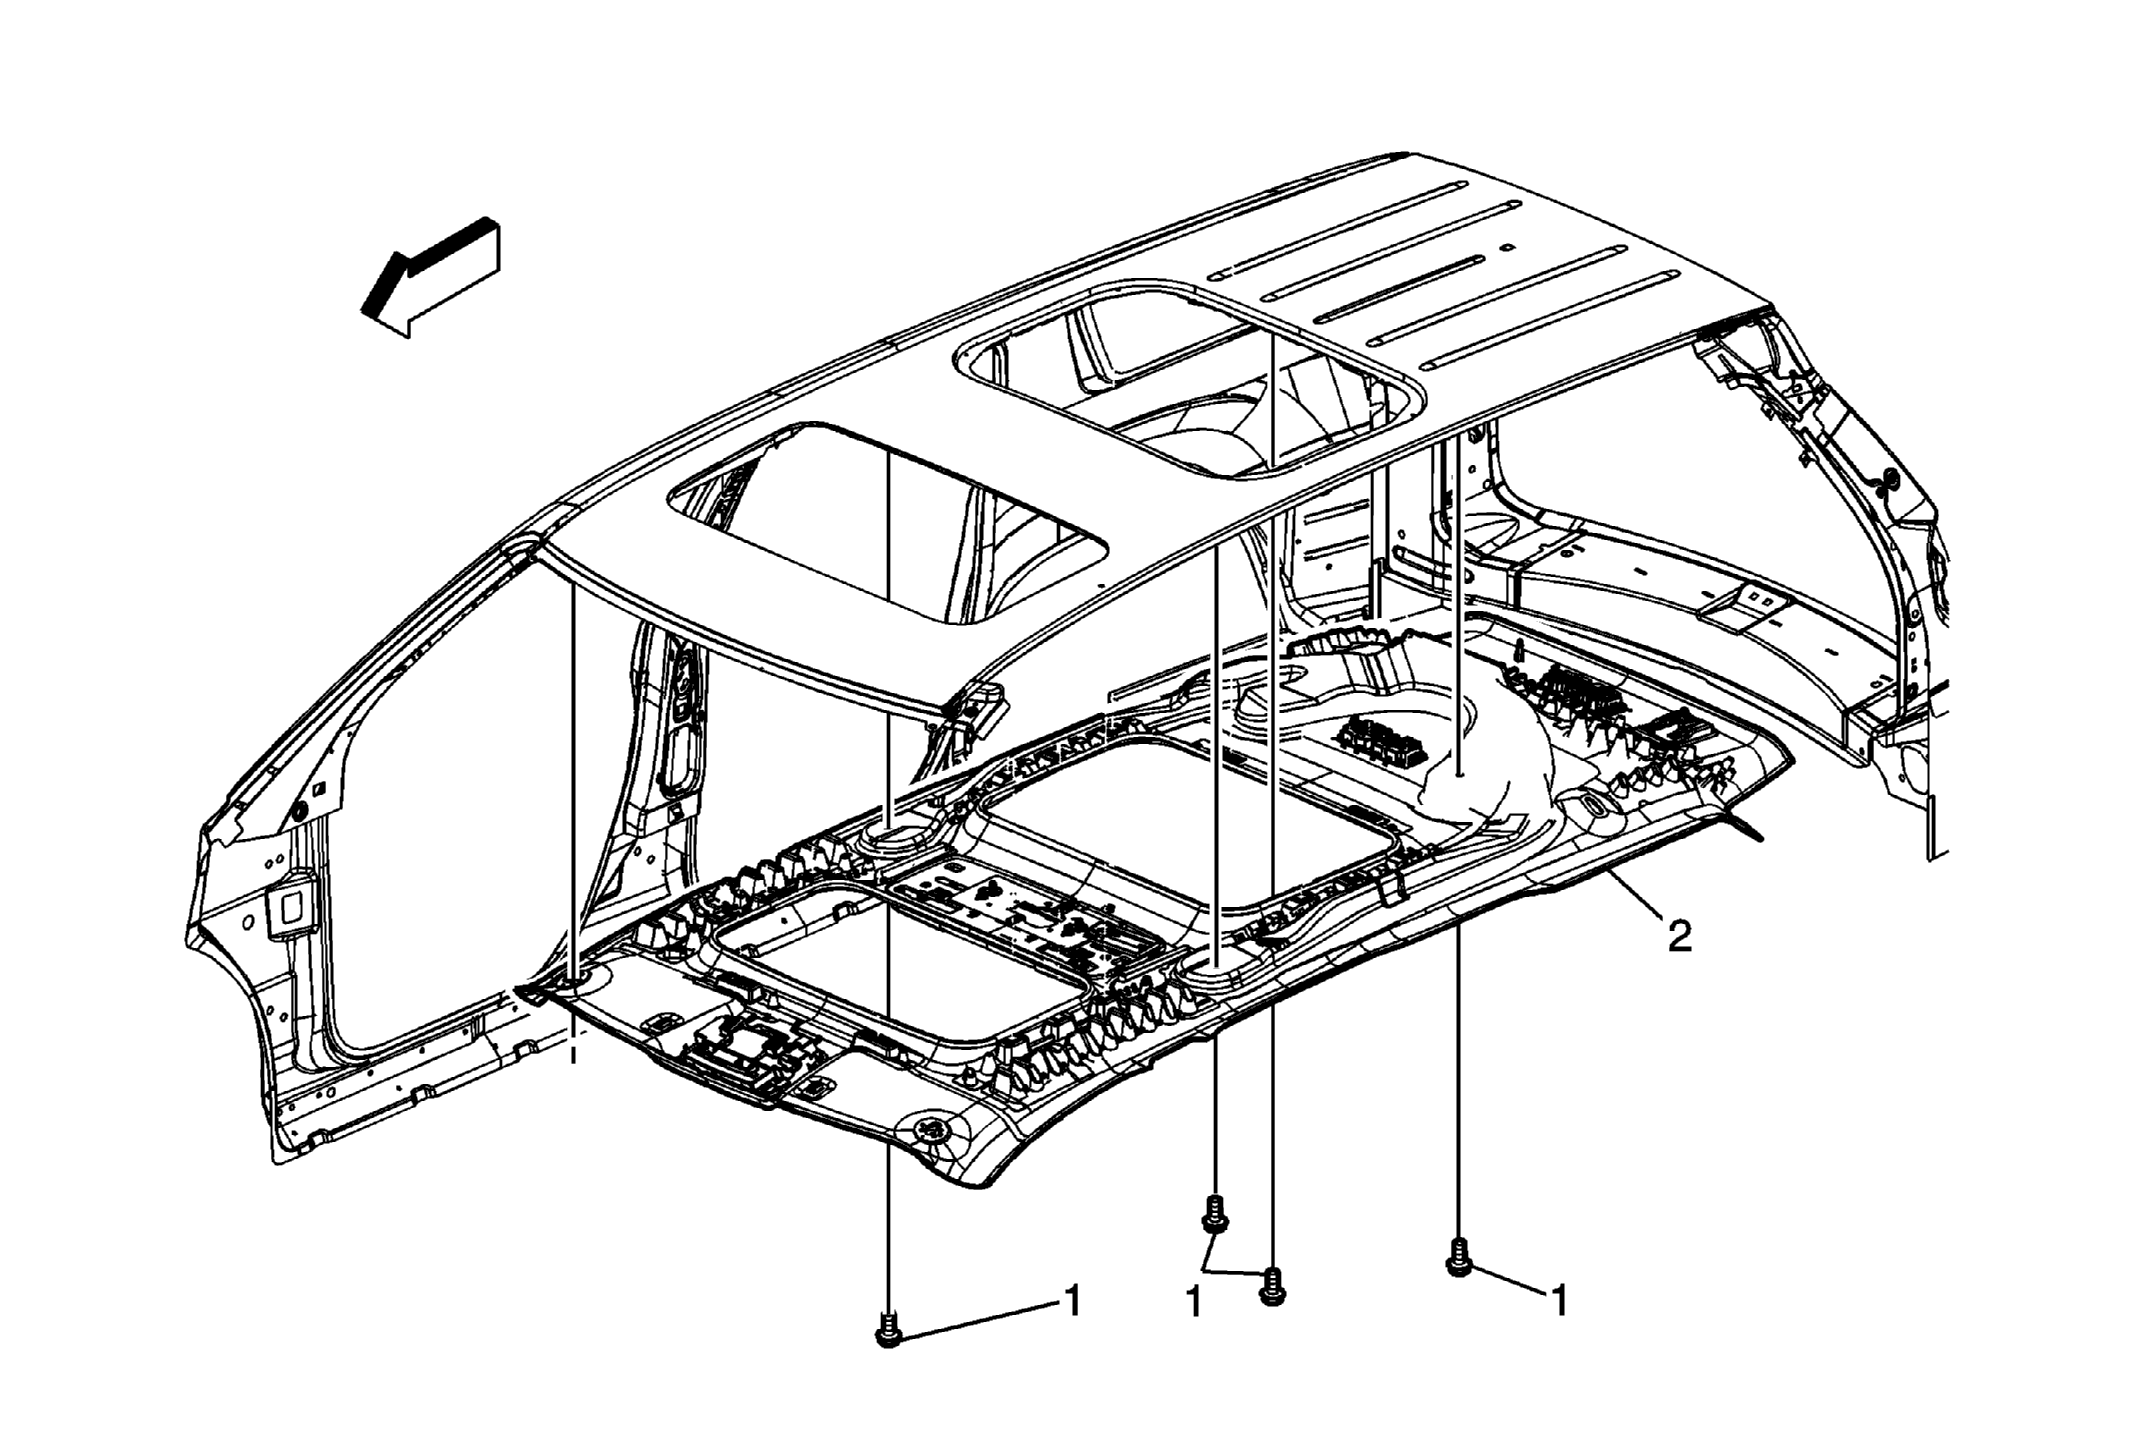 Courtesy of GENERAL MOTORS CORP.
 Headlining Trim Panel Replacement
| Callout |
Component Name |
WARNING:
Do not attempt to repair or alter the head impact energy-absorbing material glued to the headliner or to the garnish trims. If the material is damaged, replace the headliner and/or the garnish trim. Failure to do so could result in personal injury.
CAUTION:
Use care when working around the head curtain inflator module. Sharp tools may puncture the curtain airbag. If the head curtain inflator module is damaged in any way, it must be replaced.
CAUTION:
If a vehicle is equipped with a head curtain inflator module ensure that the inflator module and tether are undamaged. If tether or curtain airbag are damaged in any way, they must be replaced.
Preliminary Procedures
- Disable the roof rail SIR system. Refer to SIR Disabling and Enabling
.
- Remove the center pillar assist handle. Refer to Center Pillar Assist Handle Replacement
.
- Remove the windshield garnish molding. Refer to Windshield Garnish Molding Replacement - Left Side
, and Windshield Garnish Molding Replacement - Right Side
.
- Remove the sunshade anchors. Refer to Sunshade Anchor Replacement
.
- Remove the sunshade assemblies. Refer to Sunshade Replacement
.
- Remove the roof console assembly. Refer to Roof Console Replacement
.
- Remove the body lock pillar upper trim panel. Refer to Body Lock Pillar Upper Trim Panel Replacement
.
- Remove the rear quarter upper trim panel. Refer to Quarter Upper Trim Panel Replacement (TB5)
, Quarter Upper Trim Panel Replacement (TB4)
.
- Remove the coat hooks. Refer to Coat Hook Replacement (Acadia)
, Coat Hook Replacement (Enclave or Traverse)
.
- Remove the rear overhead console. Refer to Roof Rear Console Replacement
.
- Remove the auxiliary air outlets from the headliner by rotating them counter clockwise and pulling down to remove.
|
| 1 |
Headliner Trim Panel Retainer (Qty: 4) |
| 2 |
Headliner Trim Panel Assembly Procedure
- Reposition the weatherstrips as required.
- Route the rear shoulder belt through the bezel.
- Disconnect the front and rear washer solvent hose from the headliner.
- Prior to removal, note the routing of the wire harness to aid in reassembly and to ensure proper installation.
- Disconnect the electrical connectors.
- If replacing the headliner assembly, transfer all necessary components.
TIP:
When installing a new headliner, tape any unused connector to the headliner with a high adhesive tape. |