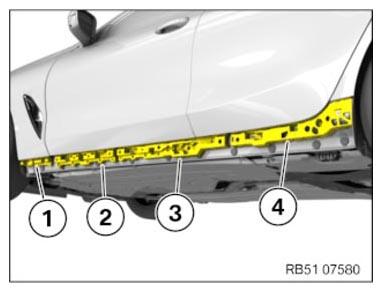
- Check the retaining strips (1) to (4) for damage, replace if necessary.
 Courtesy of BMW OF NORTH AMERICA, INC. Courtesy of BMW OF NORTH AMERICA, INC.
|
NOTE:
Schematic diagram is for example purposes. Some parts may differ in certain details.
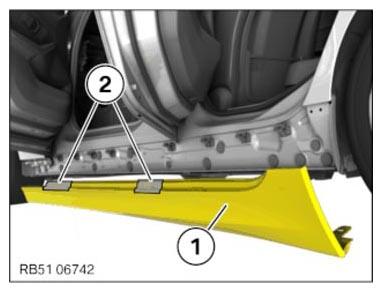
- Use an adhesive tape to mask the door sill trim panel (1) in areas (2).
 Courtesy of BMW OF NORTH AMERICA, INC. Courtesy of BMW OF NORTH AMERICA, INC.
|
- Position door sill trim panel.
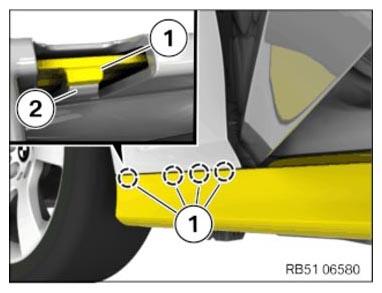
- Clip in the door sill trim panel with the detents (1) in the front retaining strip (2).
 Courtesy of BMW OF NORTH AMERICA, INC. Courtesy of BMW OF NORTH AMERICA, INC.
|
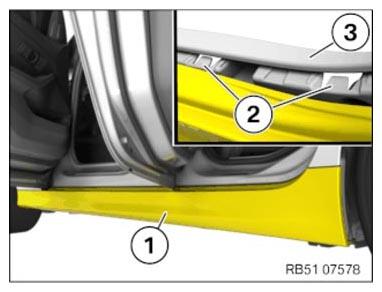
- Clip in the door sill trim panel (1) continuing to the rear into the detents (2) of the retaining strip (3).
 Courtesy of BMW OF NORTH AMERICA, INC. Courtesy of BMW OF NORTH AMERICA, INC.
|
NOTE:
Schematic diagram is for example purposes. Some parts may differ in certain details.
- Tighten nut (2).
 Courtesy of BMW OF NORTH AMERICA, INC. Courtesy of BMW OF NORTH AMERICA, INC.
|
TIGHTENING TORQUE SPECIFICATION
| Undershield to door sill trim panel |
| Plastic nut Coarse thread |
tightening torque |
3 Nm |
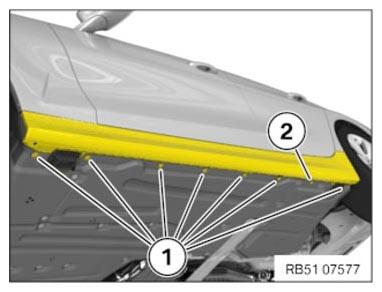
- Tighten down screws (1).
TIGHTENING TORQUE SPECIFICATION
| Undershield to door sill trim panel |
| Hexagon screw for thermoplastic |
tightening torque |
3 Nm |
NOTE:
Schematic diagram is for example purposes. Some parts may differ in certain details.
- Remove the adhesive tape (1).