Refer to 11 31 005 CHECKING CAMSHAFT TIMING (S62) .
CAUTION:
When the engine is switched off, VANOS moves the camshafts to a position which is advantageous to engine starting. The camshafts must "not" be adjusted in this position. The camshafts must be rotated back to their initial position beforehand and the camshaft timing checked, refer to 11 31 005 CHECKING CAMSHAFT TIMING (S62) .
Remove special tool 11 2 300. Rotate crankshaft in direction of rotation a further revolution up to overlap TDC position.
Cylinder bank 1 to 4:
Slacken six accessible bolts 1/4 turns.
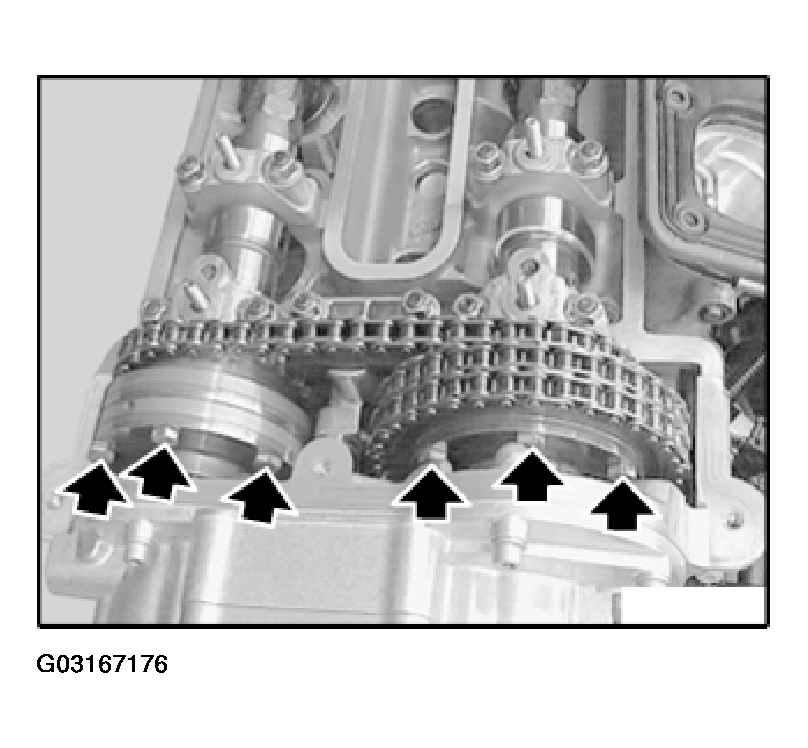 Courtesy of BMW OF NORTH AMERICA, INC.
Cylinder bank 5 to 8:
Slacken six accessible bolts 1/4 turns.
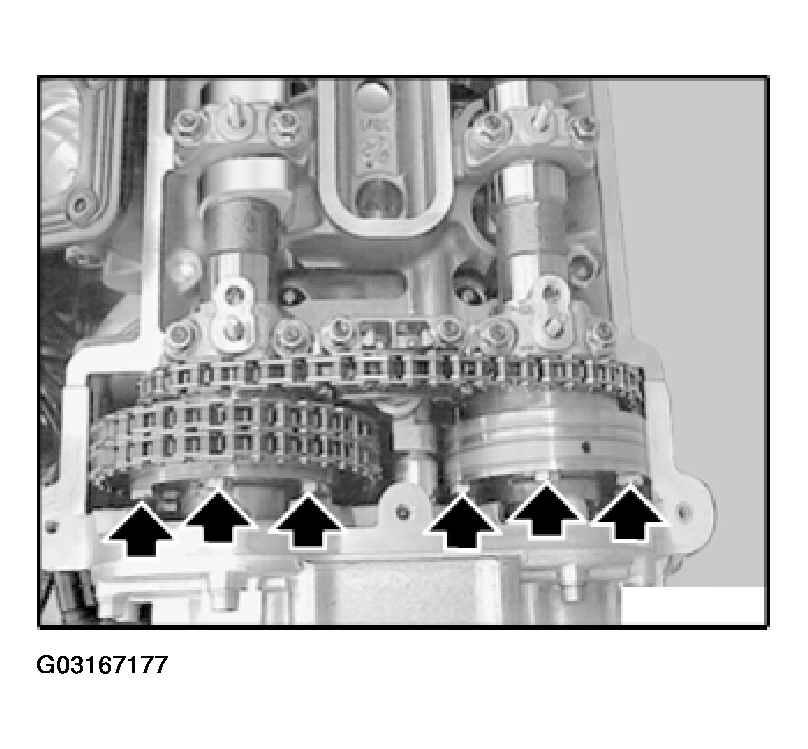 Courtesy of BMW OF NORTH AMERICA, INC.
Crank engine at central bolt in direction of rotation until 1st cylinder is at TDC firing position. Secure vibration damper with special tool 11 2 300.
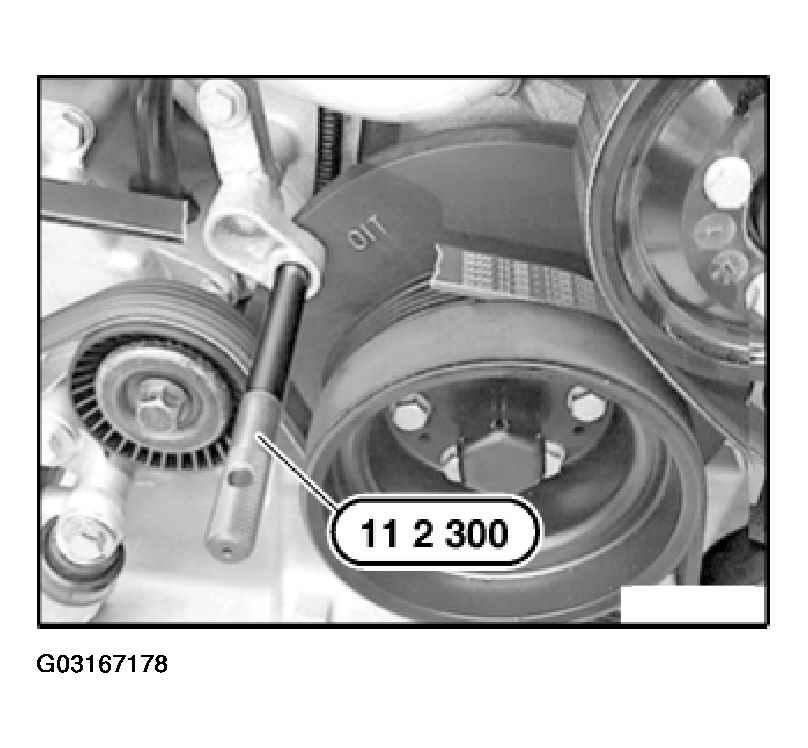 Courtesy of BMW OF NORTH AMERICA, INC.
Cylinder bank 1 to 4:
Slacken remaining six bolts 1/4 turns.
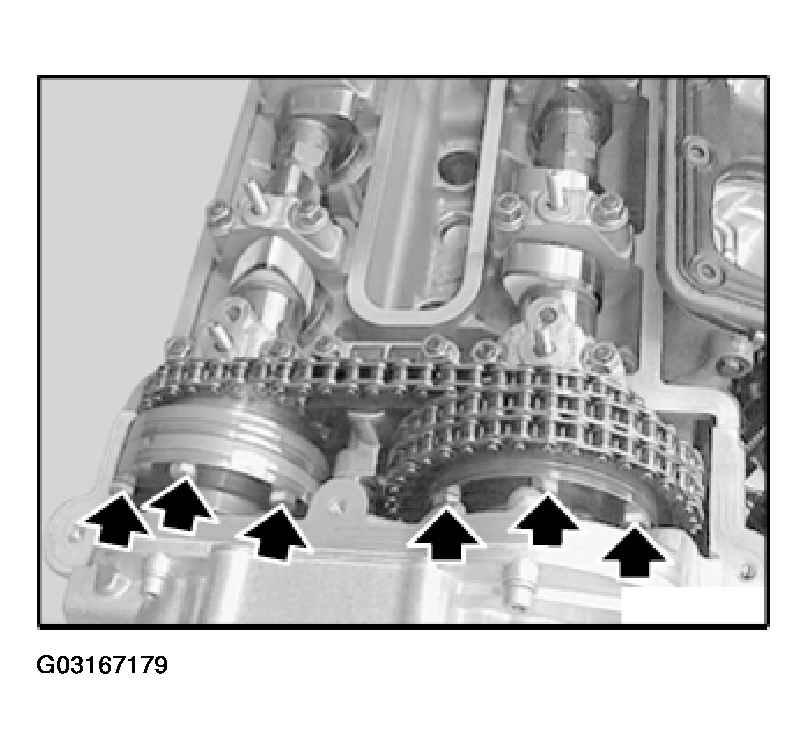 Courtesy of BMW OF NORTH AMERICA, INC.
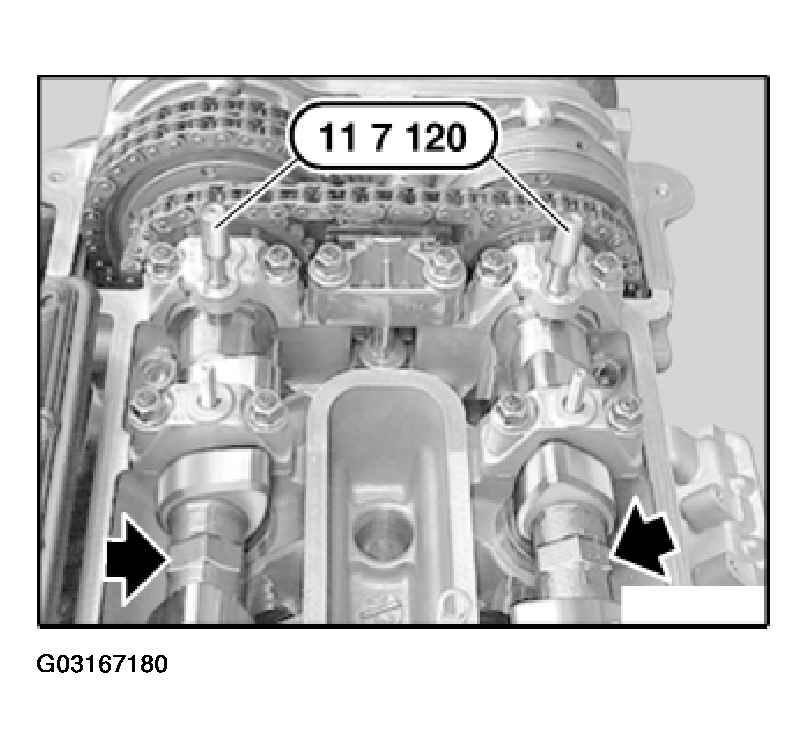
Cylinder bank 1 to 4:
NOTE:
The camshafts have an opening. The 1st bearing caps have a locating bore.
Align camshafts so that camshaft openings line up with locating bore in bearing cap.
Secure camshafts with special tool 11 7 120.
 Courtesy of BMW OF NORTH AMERICA, INC.
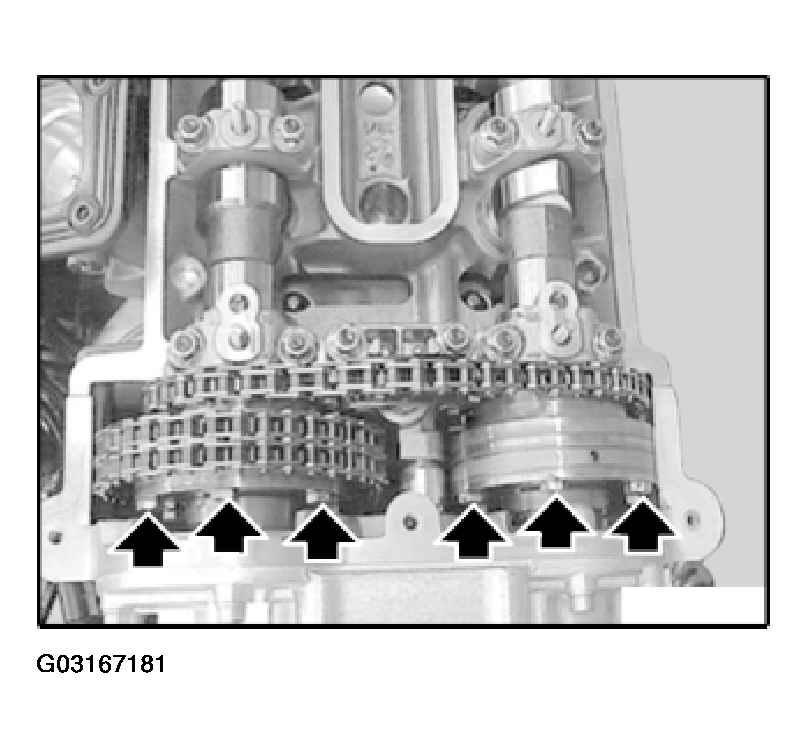
Cylinder bank 5 to 8:
Slacken remaining six bolts 1/4 turns.
 Courtesy of BMW OF NORTH AMERICA, INC.
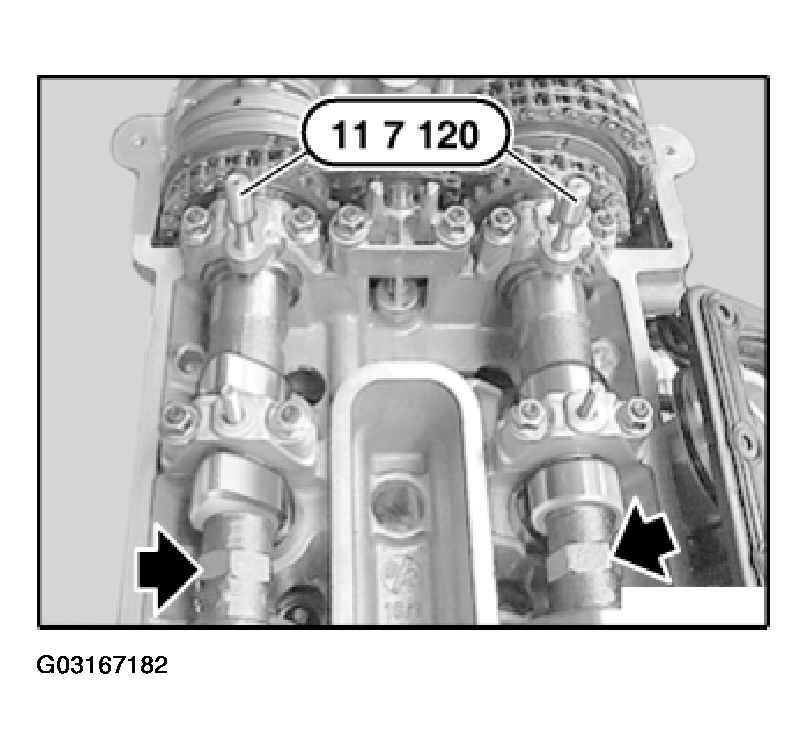
Cylinder bank 5 to 8:
NOTE:
The camshafts have an opening. The 1st bearing caps have a locating bore.
Align camshaft opening to locating bore in bearing cap and secure in position with special tool 11 7 120.
 Courtesy of BMW OF NORTH AMERICA, INC.
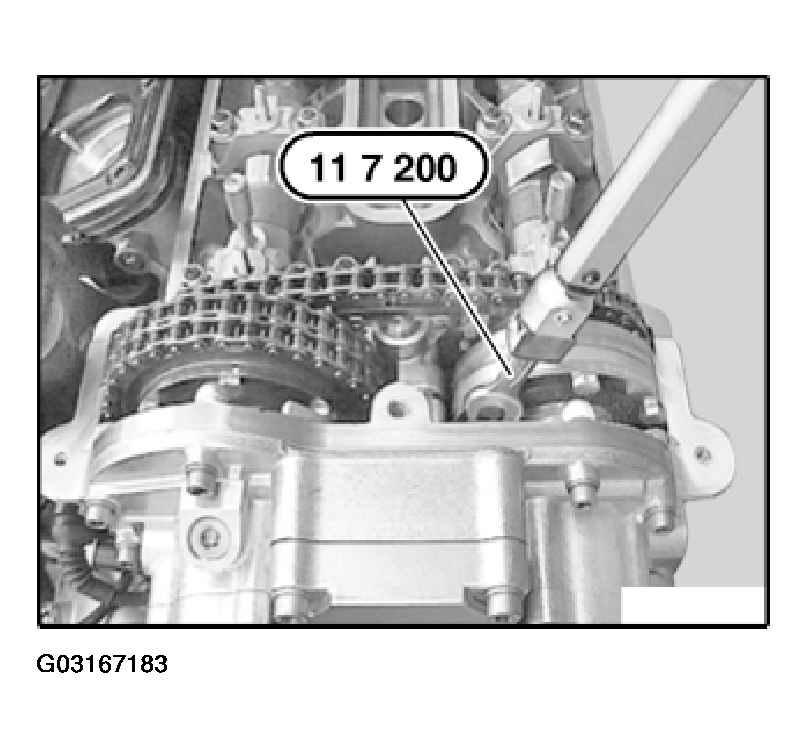
Cylinder bank 5 to 8:
NOTE:
Use special tool 11 7 200 to tighten down bolts on VANOS gear.
Tighten down six accessible bolts (three on exhaust side and three on inlet side) on VANOS gear to 10 N.m.
 Courtesy of BMW OF NORTH AMERICA, INC.
Cylinder bank 5 to 8:
Remove special tool 11 7 120.
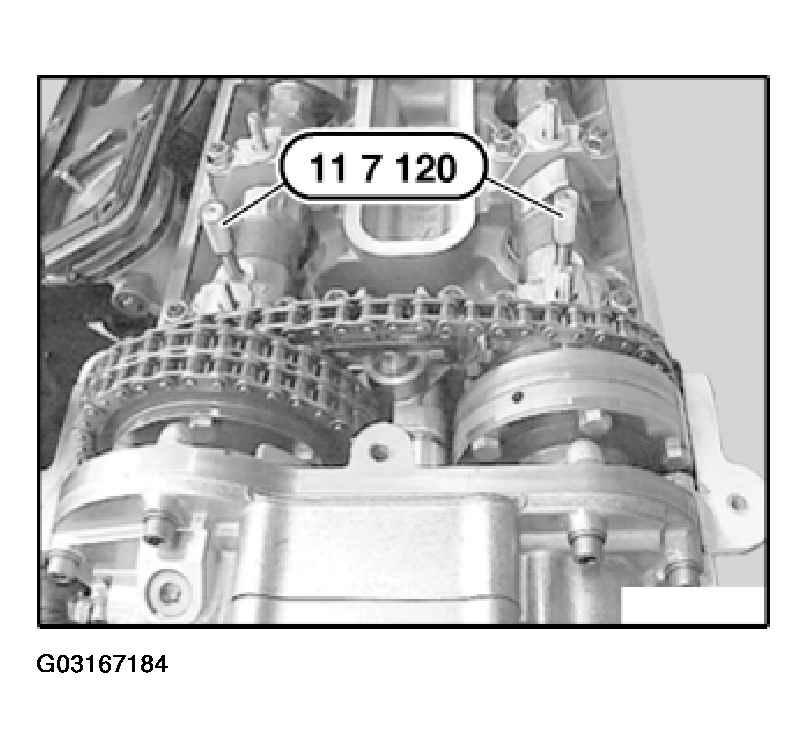 Courtesy of BMW OF NORTH AMERICA, INC.
Cylinder bank 1 to 4:
NOTE:
Use special tool 11 7 200 to tighten down bolts on VANOS gear.
Tighten down six accessible bolts on VANOS gear to 10 N.m.
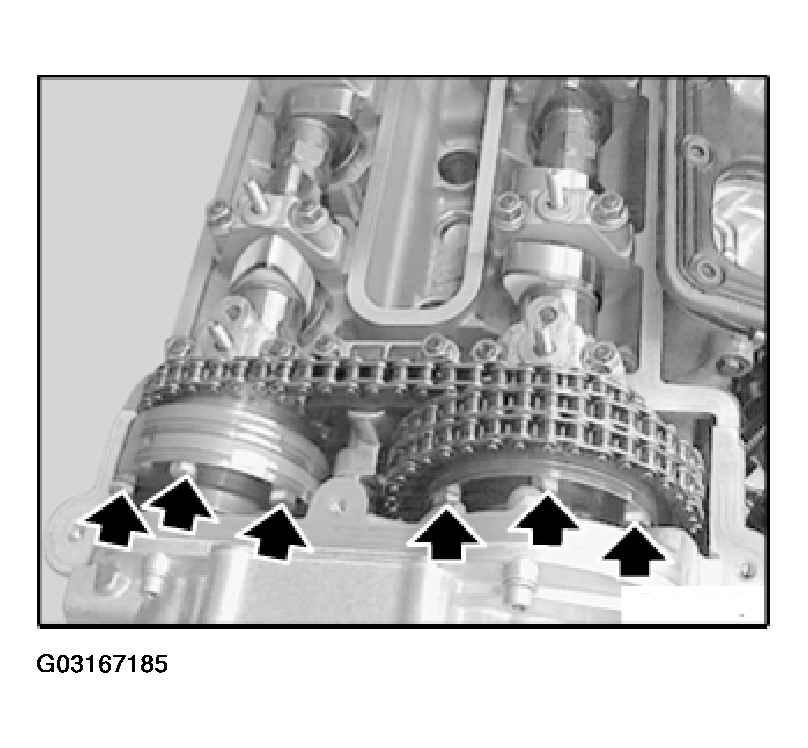 Courtesy of BMW OF NORTH AMERICA, INC.
Cylinder bank 1 to 4:
Remove special tool 11 7 120.
Remove special tool 11 2 300. Crank engine at central bolt in direction of rotation a further revolution up to overlap TDC position.
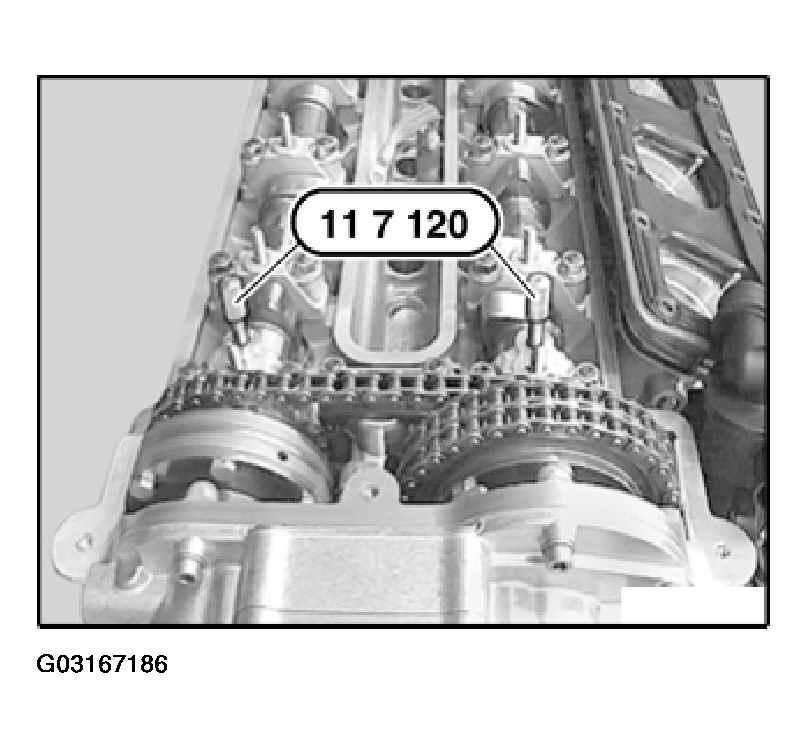 Courtesy of BMW OF NORTH AMERICA, INC.
Cylinder bank 1 to 4:
NOTE:
Use special tool 11 7 200 to tighten down bolts on VANOS gear.
Tighten down remaining six bolts on VANOS gear to 10 N.m.
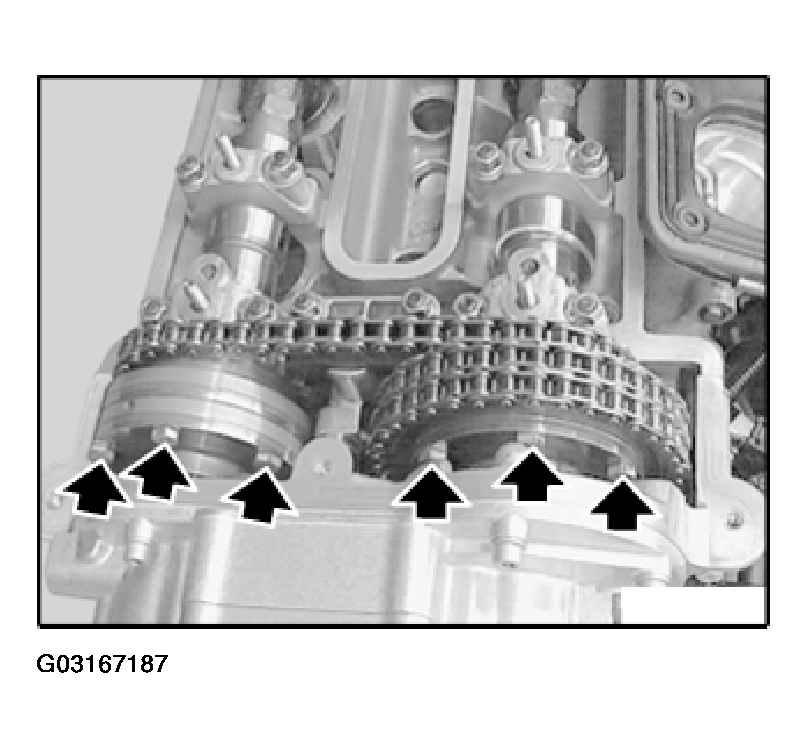 Courtesy of BMW OF NORTH AMERICA, INC.
Cylinder bank 5 to 8:
NOTE:
Use special tool 11 7 200 to tighten down bolts on VANOS gear.
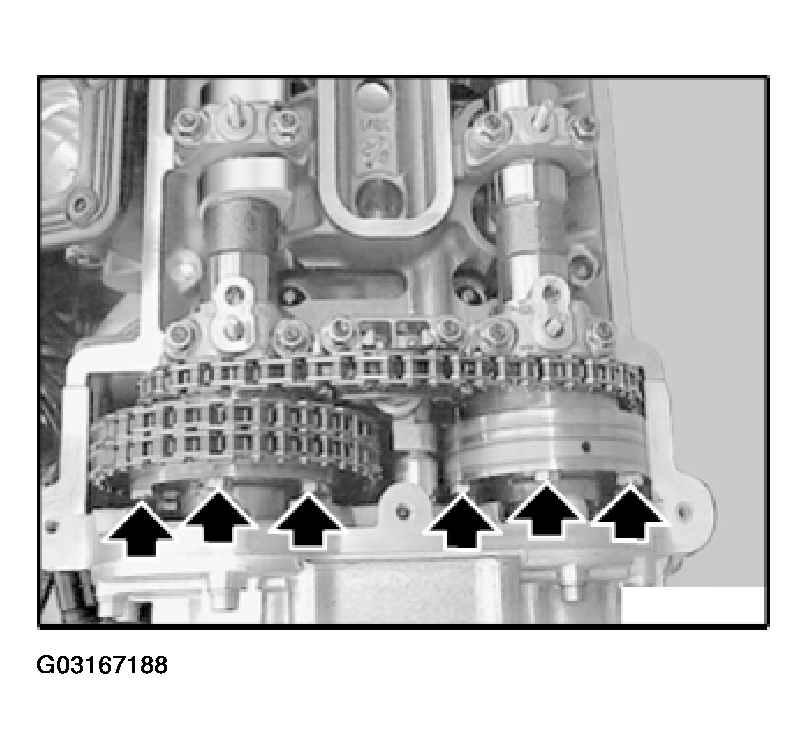 Courtesy of BMW OF NORTH AMERICA, INC.
Tighten down remaining six bolts on VANOS gear to 10 N.m. Assemble engine.
CAUTION:
There is air in the VANOS system once it is opened. In the first few seconds after startup this results in a clearly discernible "rattling noise". This rattling noise does "not" indicate incorrect assembly. The rattling noise will disappear as soon as the oil pressure has built up and the system has vented.