Damper/Spring Disassembly, Inspection, and Reassembly: Reassembly
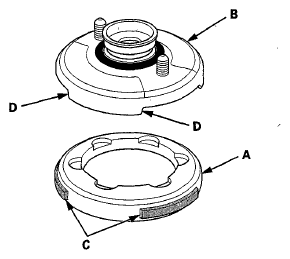
- Install the spring mounting cushion (A) on the damper mounting base (B) by aligning the tabs (C) and the notches (D).
 Courtesy of AMERICAN HONDA MOTOR CO., INC.
- Install all the parts except the damper mounting washer and the self-locking nut onto the damper unit by referring to the Exploded View.
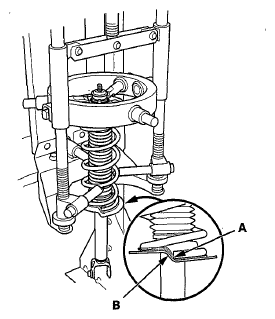
- Compress the damper spring using a strut spring compressor. Do not compress the spring excessively.
- Align the lower end (A) of the damper spring with the stepped part (B) of the dust cover lower mount and the lower spring seat on the damper unit.
 Courtesy of AMERICAN HONDA MOTOR CO., INC.
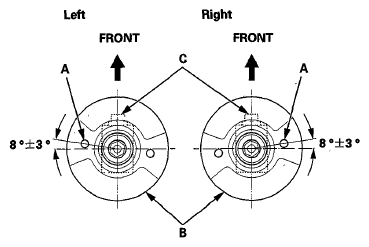
- Align the angle of the stud (A) on the damper mounting base (B) with the welded nut (C) on the bottom of the damper unit as shown.
 Courtesy of AMERICAN HONDA MOTOR CO., INC.
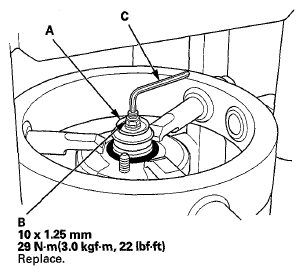
- Install the damper mounting washer (A), and loosely install the new self-locking nut (B).
 Courtesy of AMERICAN HONDA MOTOR CO., INC.
- Hold the damper shaft with a hex wrench (C), and tighten the self-locking nut to the specified torque.
- Remove the damper/spring from the strut spring compressor.