Wiper Motor Replacement
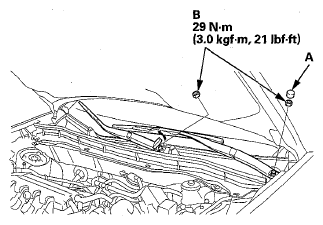
- Open the hood. Remove the cap (A) and nuts (B).
 Courtesy of AMERICAN HONDA MOTOR CO., INC.
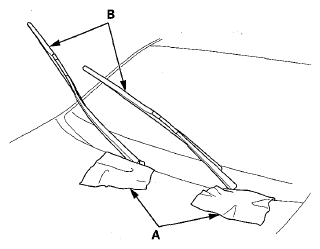
- Close the hood, then spread protective cloths (A) on the hood to avoid scratching the hood edge.
 Courtesy of AMERICAN HONDA MOTOR CO., INC.
- Raise the wiper arms (B) off the windshield, then remove the wiper arms.
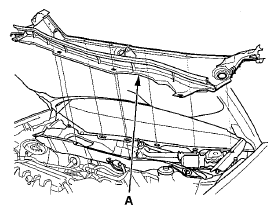
- Remove the hood seal and cowl covers (A).
 Courtesy of AMERICAN HONDA MOTOR CO., INC.
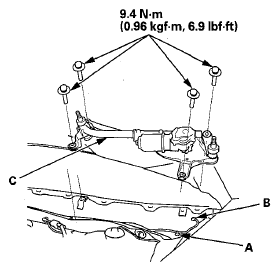
- Disconnect the harness clip (A) and 4P connector (B) from the windshield wiper motor.
 Courtesy of AMERICAN HONDA MOTOR CO., INC.
- Remove the four bolts and wiper linkage assembly (C).
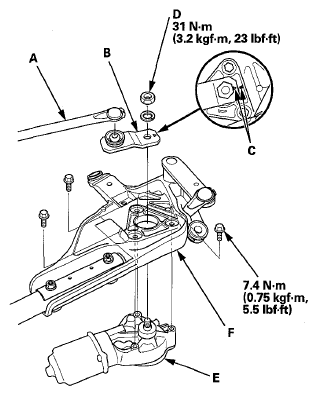
- Separate the linkage (A) from the link (B).
 Courtesy of AMERICAN HONDA MOTOR CO., INC.
- Note the alignment marks (C), then remove the nut (D) and the link from the wiper motor (E).
- Remove the three bolts, and separate the wiper motor from the linkage (F).
- Before installing the motor, connect the 4P connector to the wiper motor, and turn the wiper/washer switch ON to (LO) or (HI) position, then OFF to return the motor shaft to the park position.
NOTE:
- Do not use the wiper/washer switch (INT) position in this step.
- If necessary, replace any damaged clips.
- Apply multipurpose grease to the moving parts.
- Install the wiper motor to the wiper linkage assembly in the reverse order of removal.
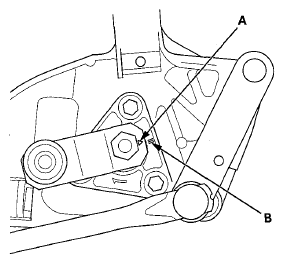
- Install the link to the wiper motor shaft, then align the mark (A) of the link and the mark (B) of the wiper linkage assembly.
 Courtesy of AMERICAN HONDA MOTOR CO., INC.
- After installation, adjust the wiper arms (see
WIPER ARM/NOZZLE ADJUSTMENT ).