Drive Belt Tensioner: Testing and Inspection
Drive Belt Auto-Tensioner Inspection
Special Tools Required
- Belt Tension Release Tool Snap-on TK9317, commercially available
*: Available through the Acura Tool and Equipment Program, 888-424-6857.
1. Remove the engine compartment covers Service and Repair.
2. Turn the ignition switch to ON (II), or press the engine start/stop button to select the ON mode, and make sure to turn the A/C switch OFF, then turn the ignition switch to LOCK (0), or press the engine start/stop button to select the OFF mode.
3. Check the position of the auto-tensioner indicator (A). Start the engine, then check the position again with the engine idling. If the position of the indicator moves or fluctuates a lot, replace the auto-tensioner Drive Belt Auto-Tensioner Replacement.
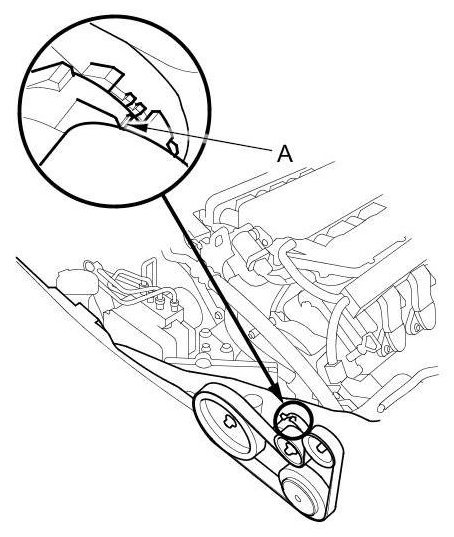
4. Check for abnormal noise from the tensioner pulley. If you hear any abnormal noise, replace the tensioner pulley Drive Belt Auto-Tensioner Pulley Replacement.
5. Remove the drive belt Service and Repair.
6. Move the auto-tensioner within its limit using the belt tension release tool (TK9317) in the direction shown. Check that the auto-tensioner moves smoothly and without any abnormal noise. If the auto-tensioner does not move smoothly, or you hear abnormal noises, replace the auto-tensioner Drive Belt Auto-Tensioner Replacement.
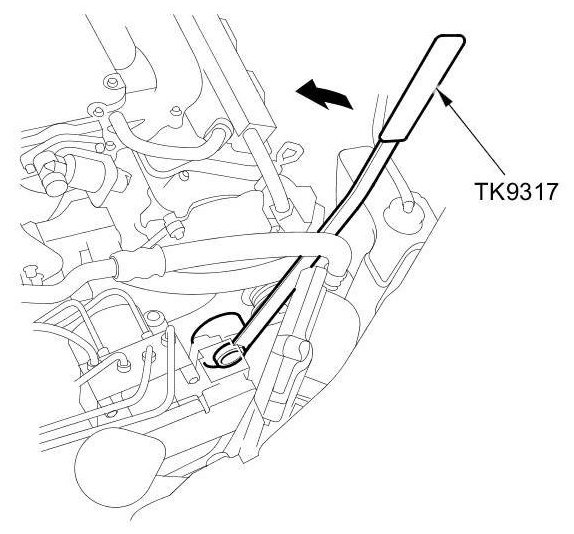
7. Remove the auto-tensioner Drive Belt Auto-Tensioner Replacement.
8. Clamp the auto-tensioner (A) by using a 10 mm bolt (B), an 8 mm bolt (C), and a vise (D) as shown. Do not clamp the auto-tensioner itself.
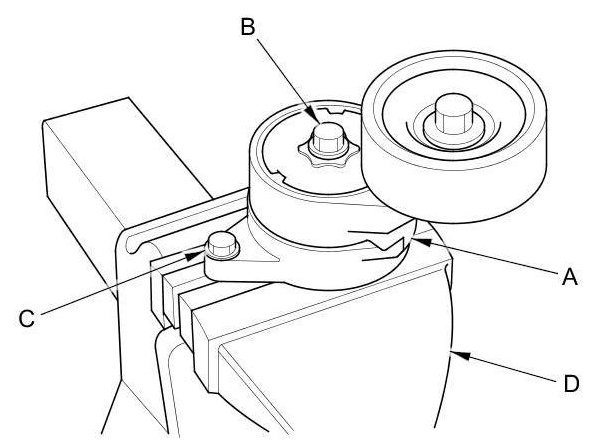
9. Attach a torque wrench (A) to the pulley bolt. Measure the torque when the tensioner is turned counterclockwise. If the torque is less than the specified value, replace the auto-tensioner Drive Belt Auto-Tensioner Replacement.

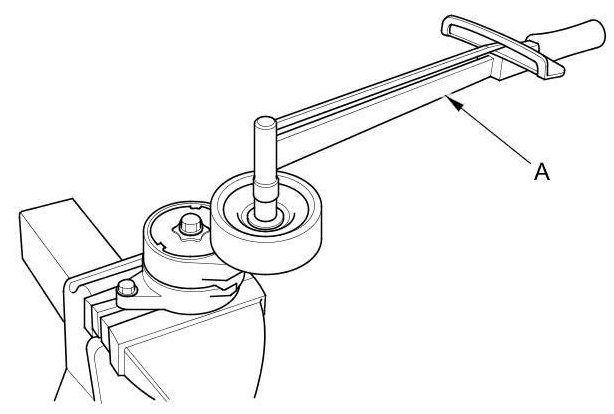
10. Install the auto-tensioner in the reverse order of removal.
11. Install the engine compartment covers Service and Repair.