Trailing Arm: Service and Repair
Rear Trailing Arm Removal/Installation
1. Raise and support the vehicle Service and Repair.
2. Remove the rear wheel.
3. Remove the parking brake shoe Removal and Replacement.
4. Remove the parking brake cable from the backing plate Service and Repair.
5. Remove the parking brake cable (A) from the trailing arm (B).
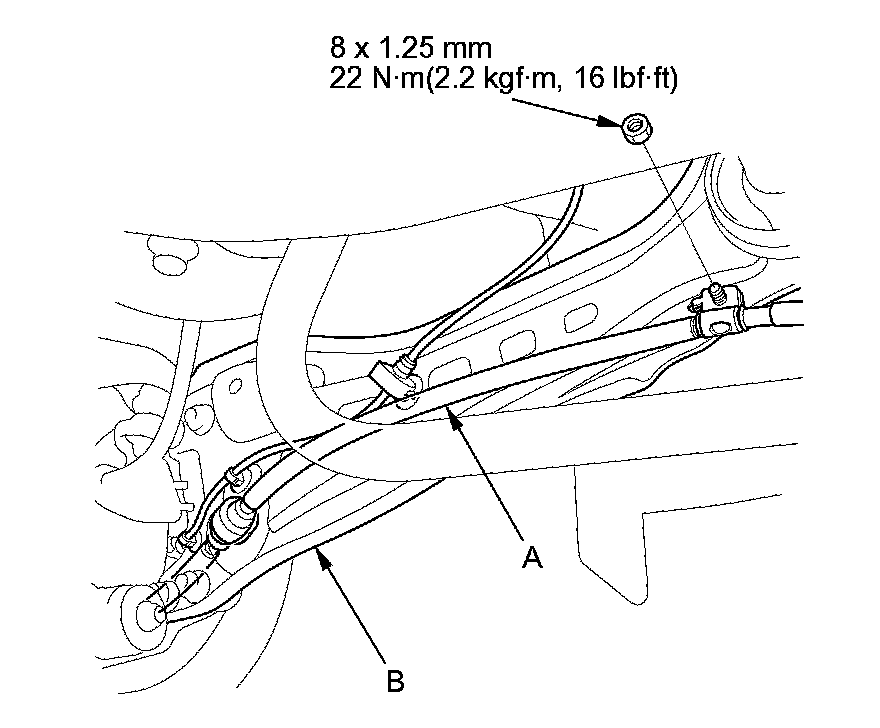
6. Remove the brake hose mounting bracket from the trailing arm.
7. Position a floor jack at the connecting point of the lower arm and the knuckle.
8. Remove the self-locking nuts (A) and the flange bolts (B) from the trailing arm.
NOTE: Use a new flange bolt and a new self-locking nut during reassembly.
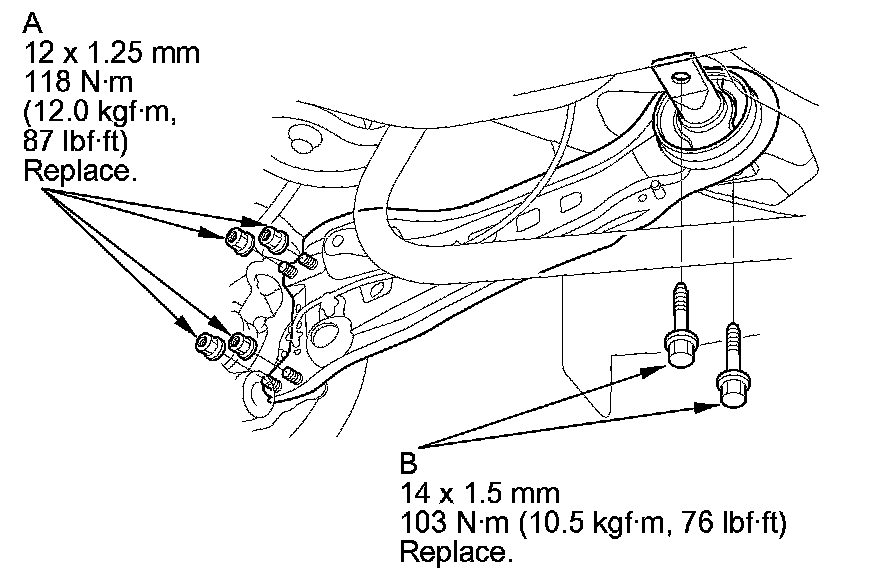
9. Install the trailing arm in the reverse order of removal, and note these items:
- First install all the components and lightly tighten the bolts and nuts, then raise the suspension by loading it with the vehicle's weight before fully tightening to the specified torque.
- Check the brake hose and line joint for leaks, and tighten if necessary.
- Check the brake hose for interference and twisting.
- Before installing the wheel, clean the mating surfaces on the brake disc/drum and the inside of the wheel.
- After installation, check for leaks at the line joint, and retighten if necessary. Check the rear wheel alignment, and adjust it if necessary Service and Repair.