Rear Spring Replacement
Rear Spring Replacement
Exploded View
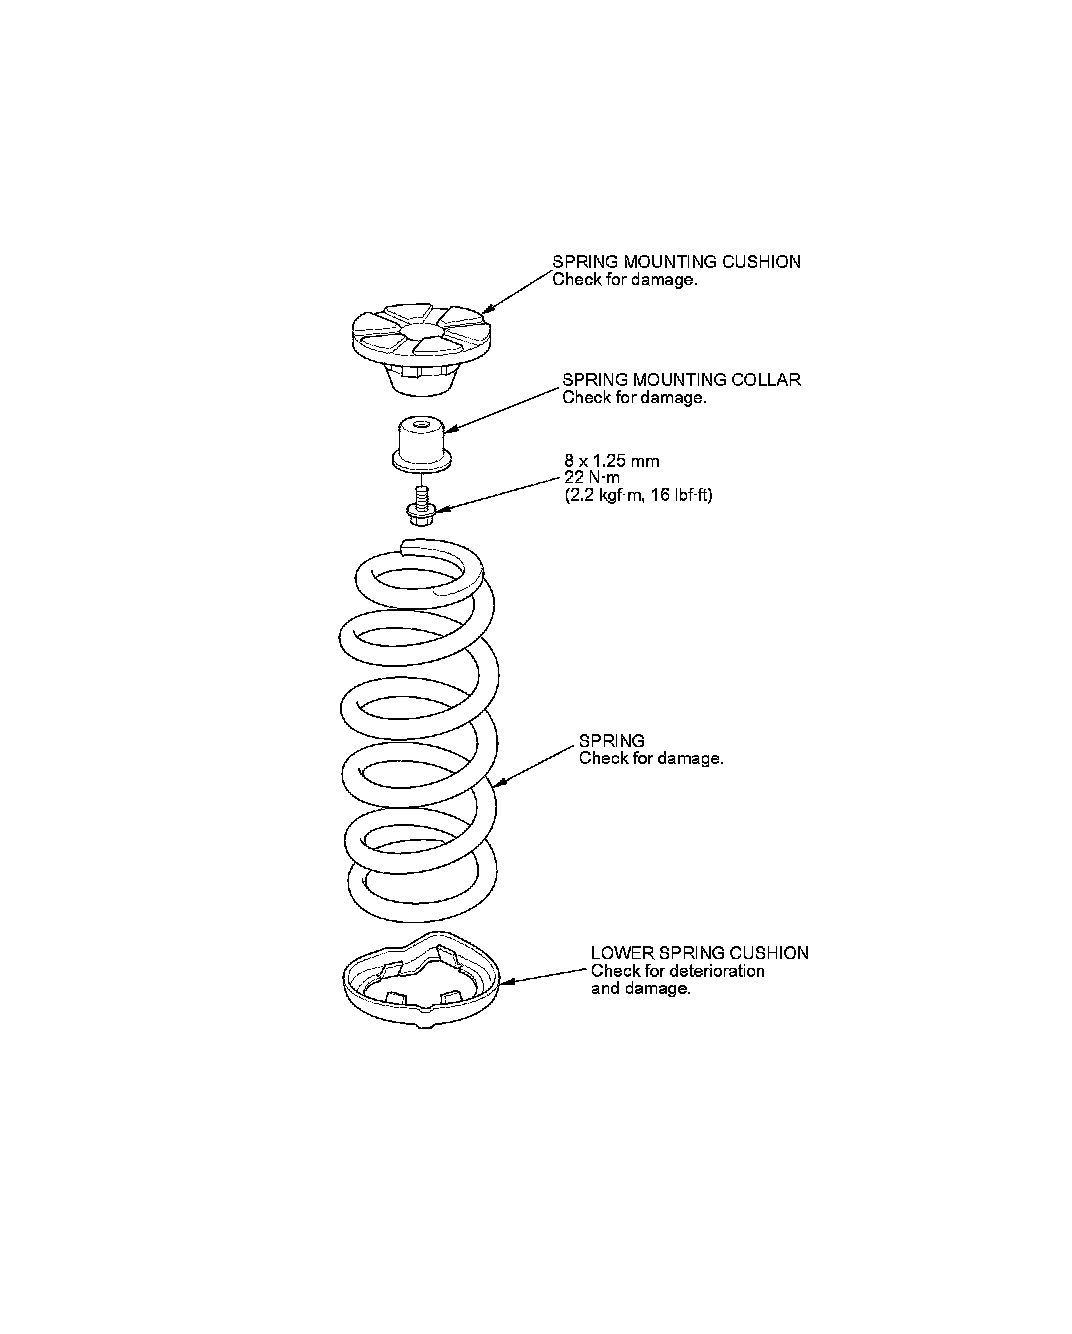
Removal
1. Raise and support the vehicle Service and Repair.
2. Remove the rear wheels.
3. Position the floor jack at the connecting point of lower arm B and the lower damper mount.
4. Disconnect the stabilizer link from the lower arm B Rear Stabilizer Link Removal/Installation.
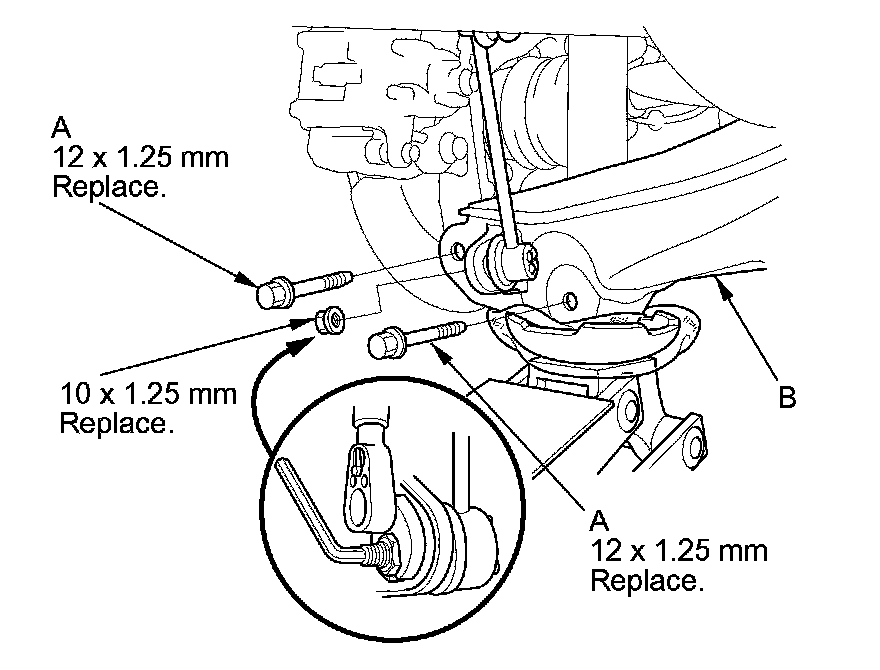
5. Remove the flange bolts (A) from the lower arm B.
6. Lower the floor jack gradually.
7. Remove the spring (A) and the lower spring cushion (B).
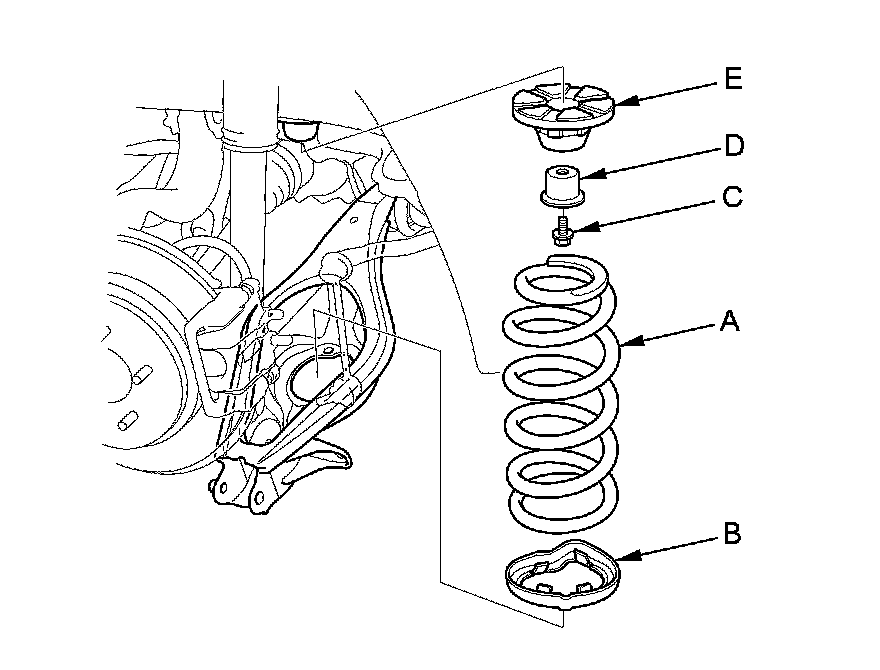
8. Remove the flange bolt (C) that connects to the body, and remove the spring mounting collar (D) and the spring mounting cushion (E) if necessary.
Installation
1. Install the spring mounting cushion (A) and the spring mounting collar (C), then tighten the flange bolt (D) to the specified torque.
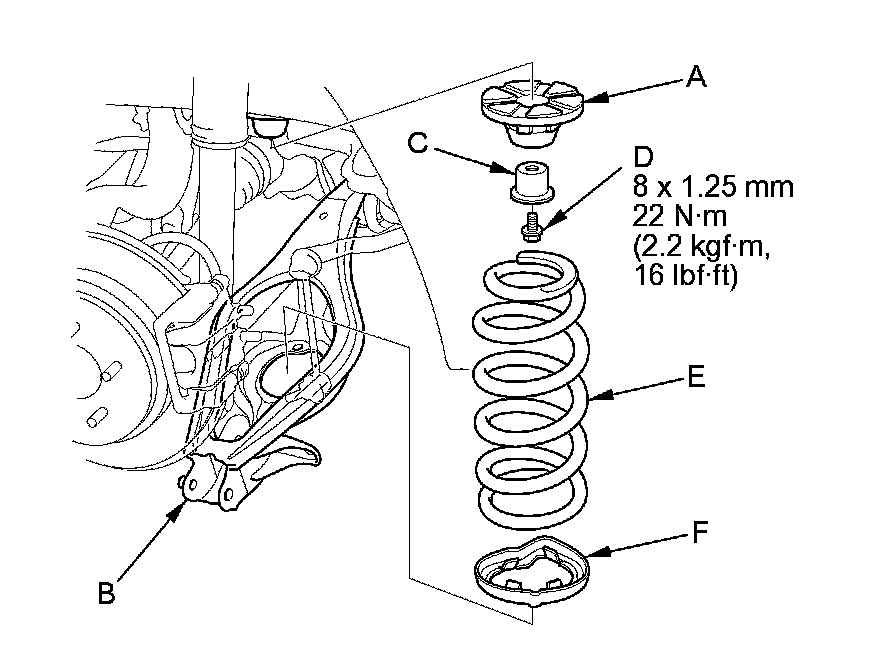
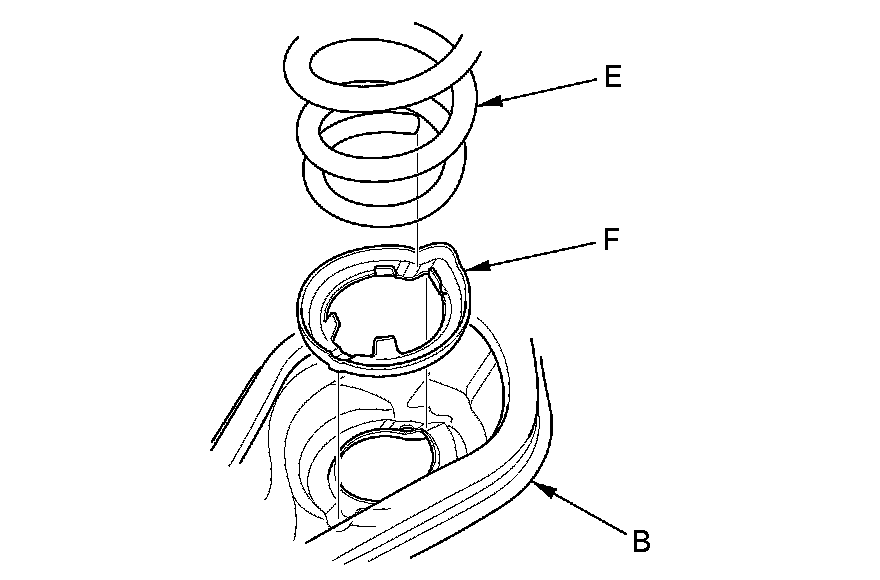
2. Install the spring (E) and the lower spring cushion (F). Align the bottom of the spring and the lower spring cushion with lower arm B as shown.
3. Position the floor jack at the connecting point of lower arm B and the knuckle.
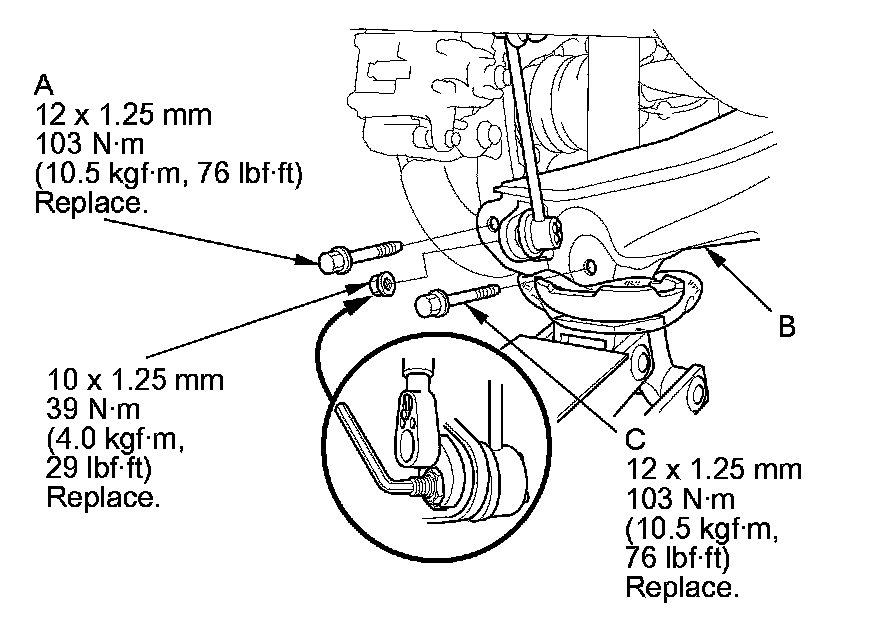
4. Slowly raise the floor jack until you align the bolt hole with the holes in lower arm B and the knuckle, then loosely install the new flange bolt (A).
5. Compress the damper by hand until you can align the bolt hole with the holes in lower arm B and the damper, then loosely install the new flange bolt (C).
6. Connect the stabilizer link to the lower arm B Rear Stabilizer Link Removal/Installation.
7. Raise the rear suspension with the floor jack until the vehicle just lifts off the lift, then tighten the flange bolts and the self-locking nut to the specified torque.
8. Clean the mating surface of the brake disc/drum and the inside of the wheel, then install the rear wheel.
9. Check the rear wheel alignment, and adjust it if necessary Service and Repair.