Front Stabilizer Link Removal/Installation
Front Stabilizer Link Removal/Installation
1. Raise and support the vehicle Service and Repair.
2. Remove the front wheel.
3. Remove the flange nuts (A) while holding the respective joint pin (B) with a hex wrench (C), then remove the stabilizer link (D).
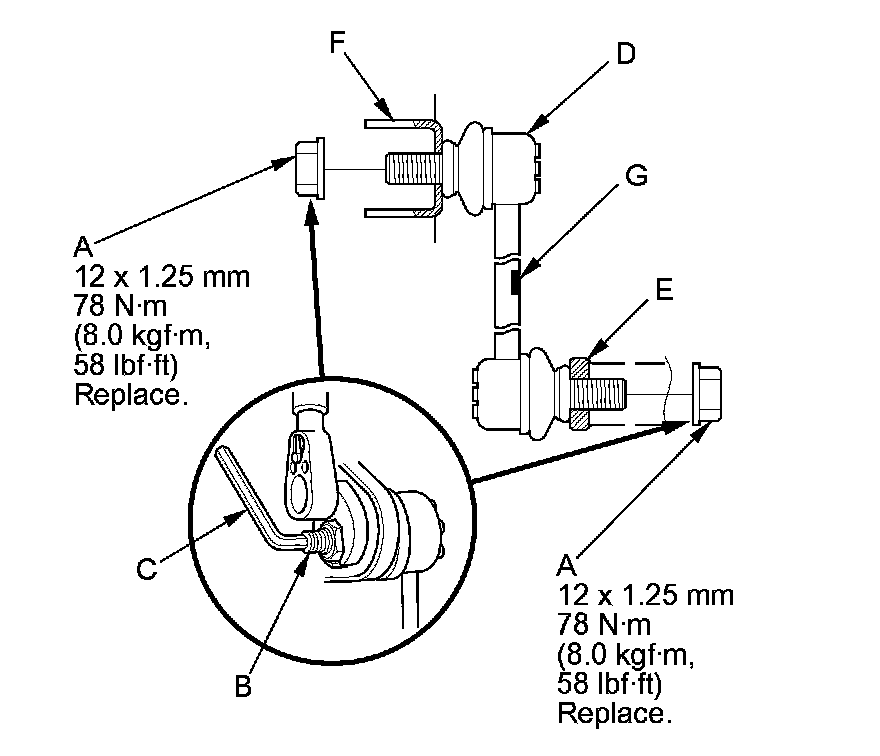
4. Install the stabilizer link on the stabilizer bar (E) and the damper (F) with the joint pins set at the center of their range of movement.
NOTE: The stabilizer link has a paint mark (G). Align the paint mark on the stabilizer link facing inward.
5. Install the new flange nuts, and lightly tighten them.
6. Clean the mating surface of the brake disc and the inside of the wheel, then install the front wheel.
7. Tighten the flange nuts to the specified torque while holding the respective joint pin with a hex wrench.
8. Test-drive the vehicle.