Rear Seat Belt Replacement
Rear Seat Belt Replacement
Rear Seat Belt
NOTE:
- Check the rear seat belts for damage Testing and Inspection, and replace them if necessary.
- Put on gloves to protect your hands.
- Take care not to tear or damage the seat covers.
1. Pull on the front of the seat cushion, then tilt the seat cushion forward.
2. Remove the rear door sill trim Service and Repair.
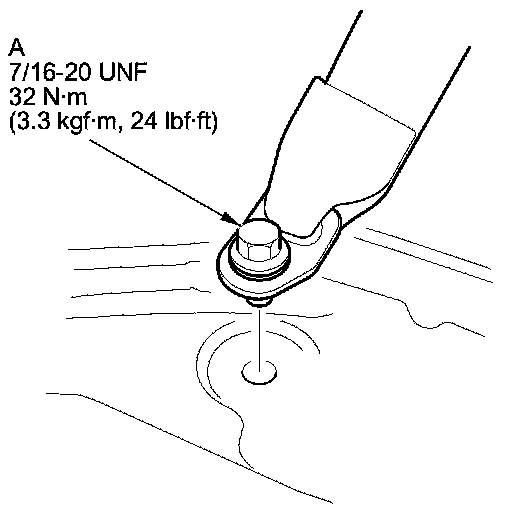
3. Pull back the carpet, and remove the lower anchor bolt (A).
4. Remove these items:
- Rear seat-back, fold down Rear Seat Removal/Installation
- Rear seat side bolsters, both sides
- Cargo area side trim panels, both sides Interior Trim Removal/Installation - Rear Side Area
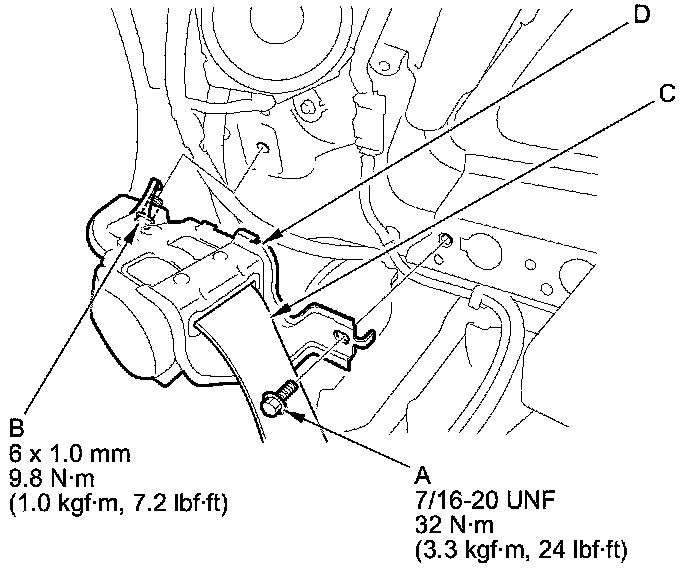
5. Remove the front retractor bolt (A) and rear retractor bolt (B), then remove the rear seat belt (C) and the retractor (D).
6. Install the rear seat belt and the retractor in the reverse order of removal, and note these items:
- Apply medium strength liquid thread lock to the anchor bolts before reinstallation.
- Check that the retractor locking mechanism functions as described Testing and Inspection.
- Before installing the anchor bolt, make sure there are no twists or kinks in the rear seat belt.
Center Seat Belt and Seat Belt Buckle
NOTE:
- Check the center seat belt for damage Testing and Inspection, and replace it if necessary.
- Put on gloves to protect your hands.
- Take care not to tear or damage the seat covers.
1. Pull up on the front of the rear seat cushion, then tilt the rear seat cushion forward. Pull back the carpet as needed.
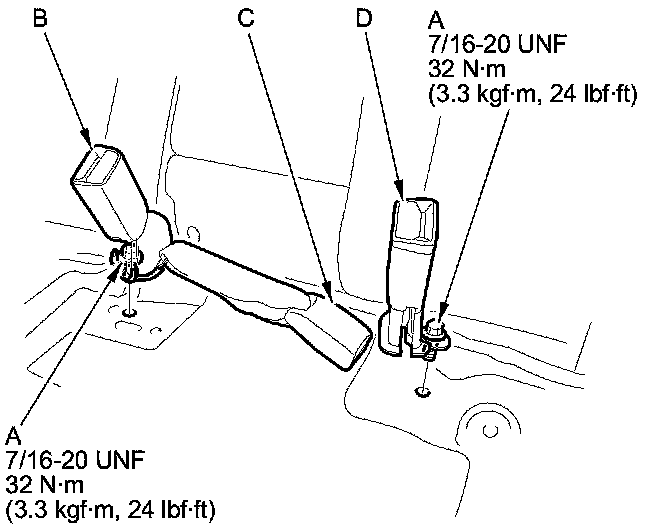
2. Remove the center anchor bolts (A), then remove the right seat belt buckle (B), the center seat belt buckle (C), and the left seat belt buckle (D).
3. Remove the left seat-back Rear Seat Removal/Installation.
4. Remove the rear seat-back cover Rear Seat-Back Cover/Pad Replacement.
5. Remove the screws, then remove the cover (A) on the seat back frame.
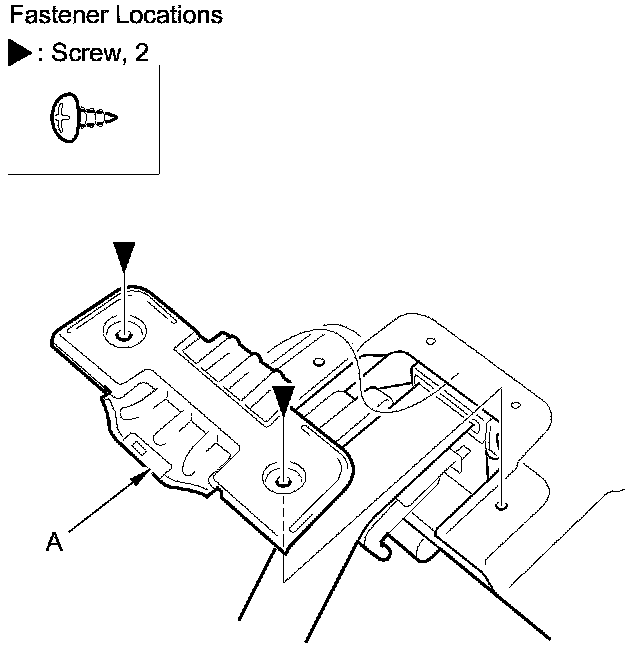
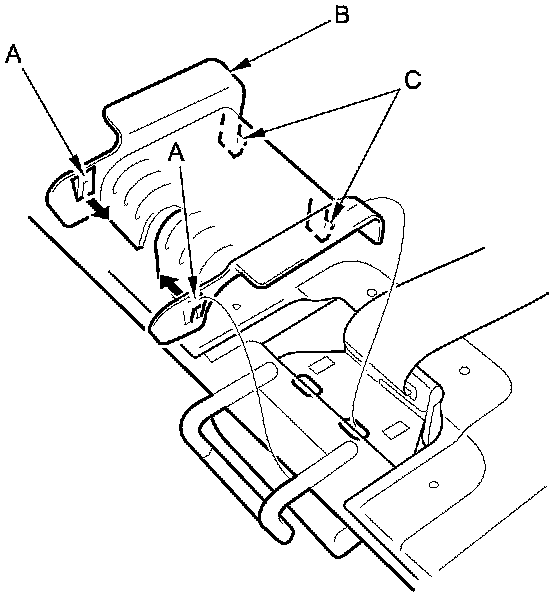
6. Push in the tabs (A) and pull the belt guide trim (B) to release the hooks (C), then remove it.
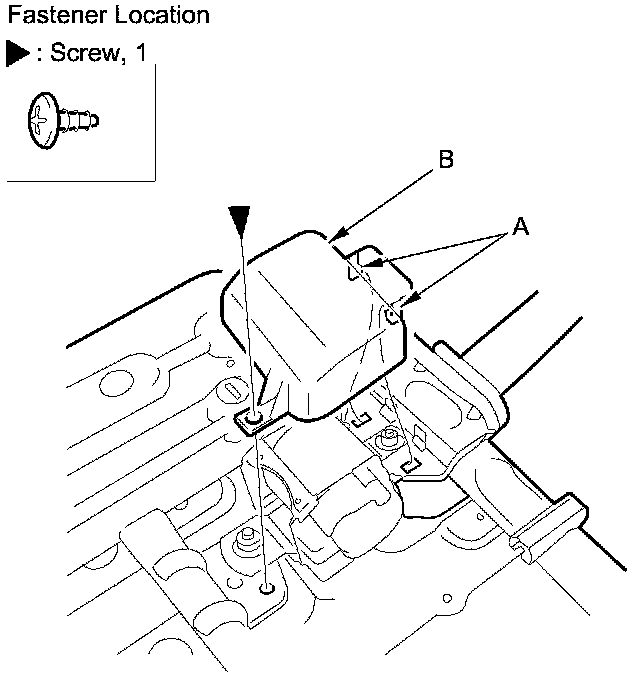
7. Remove the screw, and release the hooks (A) by pulling the protector (B), then remove it.
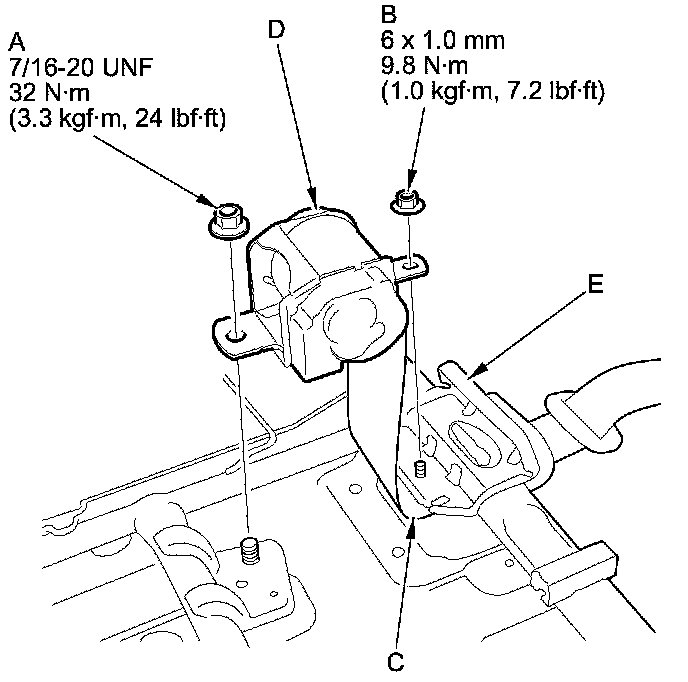
8. Remove the retractor mounting nut (A) and the retractor nut (B), then remove the center seat belt (C) and the retractor (D) from the seat-back frame (E).
9. Install the seat belt and the buckles in the reverse order of removal, and note these items:
- Apply medium strength liquid thread lock to the center anchor bolts before reinstallation.
- Tighten the bolts by hand first, then tighten to the specified torque.
- Check that the retractor locking mechanism functions Testing and Inspection.
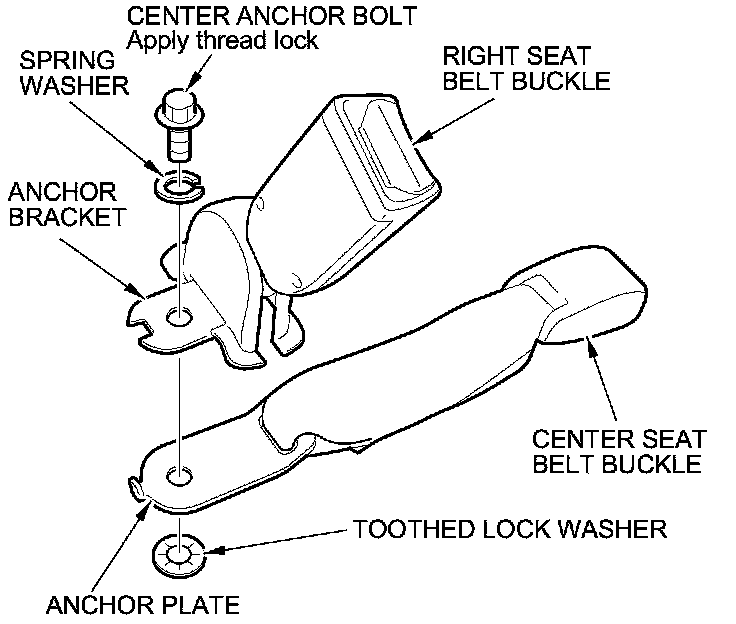
- Assemble the washers on the center anchor bolt as shown.
- Before installing the center anchor bolt, make sure there are no twists or kinks in the center belt.
- Make sure the rear center emergency locking retractor (ELR) is pointing straight forward.
- When installing the rear seat cushion, make sure the seat belt buckles comes out from the space of the cushions.
Center anchor bolt installation