Clutch Master Cylinder: Service and Repair
Clutch Master Cylinder Replacement
NOTE:
- Use fender covers to avoid damaging painted surfaces.
- Do not spill brake fluid on the vehicle; it may damage the paint or plastic. If brake fluid does contact the paint or plastic, wash it off immediately with water.
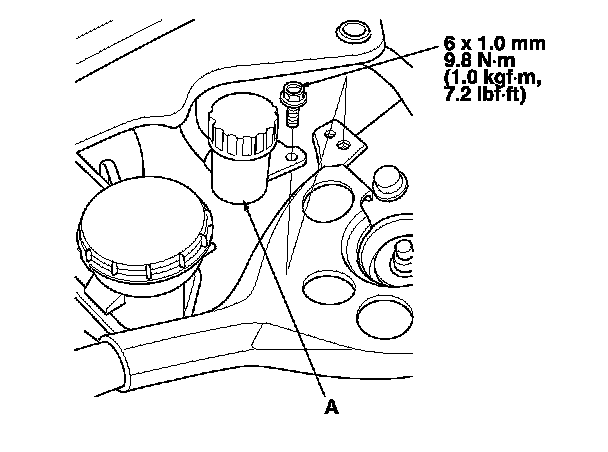
1. Remove and discard the brake fluid from the clutch master cylinder reservoir with a syringe or other suitable device.
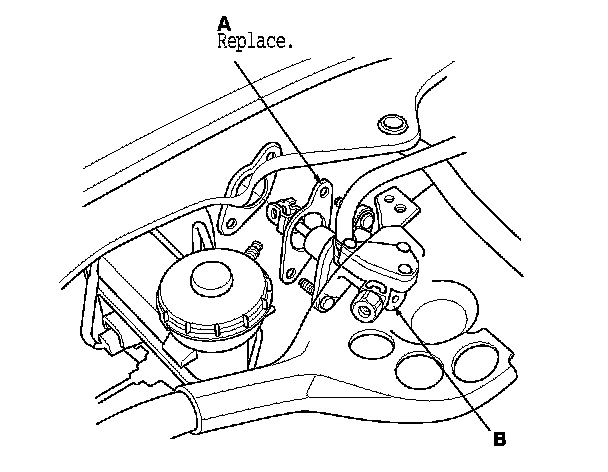
2. Remove the clutch master cylinder reservoir (A).
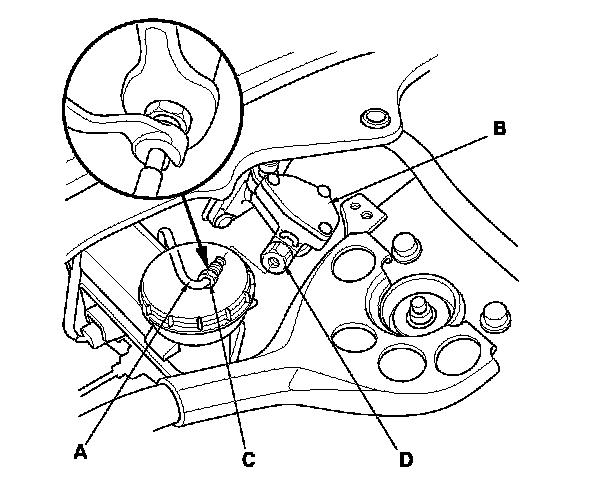
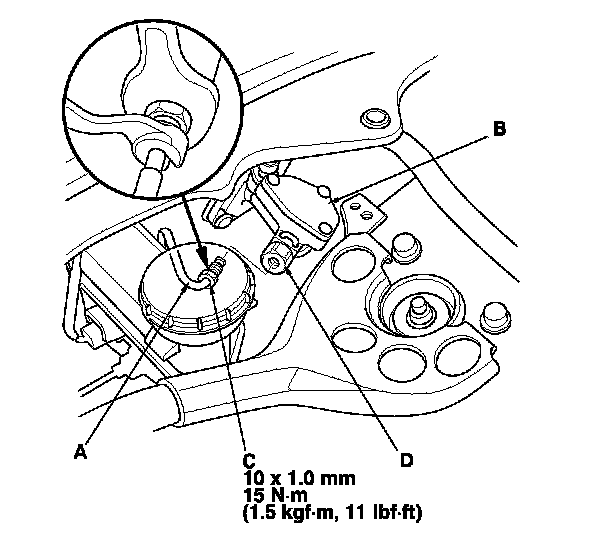
3. Disconnect the clutch line (A) from the clutch master cylinder (B). To prevent spills, cover the line joint with rags or shop towels.
NOTE: Loosen the flare nut (C) while holding the clutch line connector (D) using a wrench.
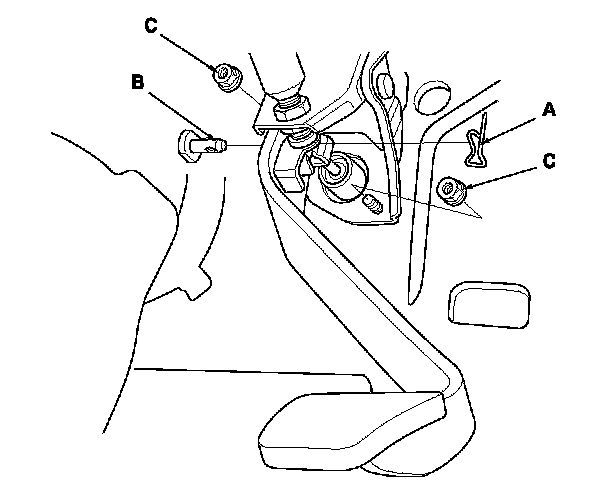
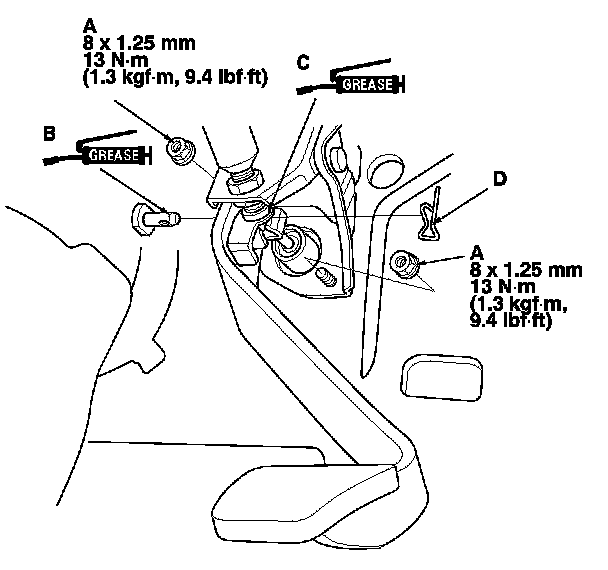
4. Pry out the lock pin (A), and pull the clevis pin (B) out of the clevis. Remove the master cylinder mounting nuts (C).
5. Remove the clutch master cylinder (A) and the master cylinder seal (B).
6. Remove the reservoir hose (C).
NOTE: Inspect the hose. If the hose has damage, leaks, interference, or twisting, replace it.
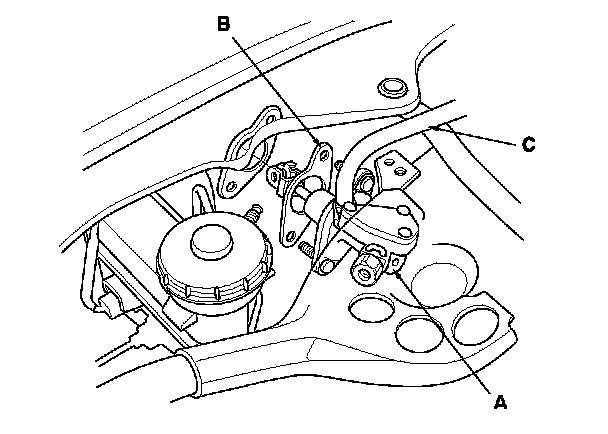
7. Remove the retaining clip (A), then remove the clutch line connector (B) and the O-ring (C) from the master cylinder (D).
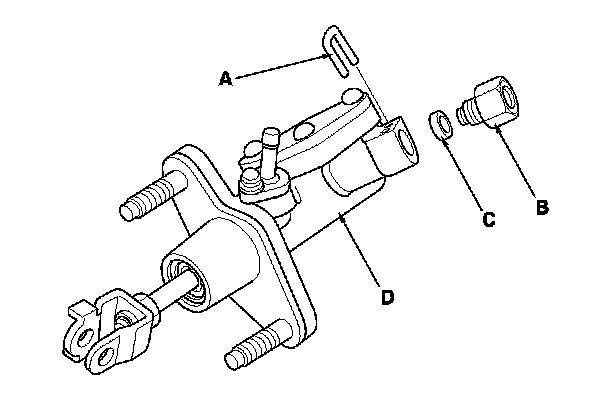
8. Install the clutch line connector (A) with a new O-ring (B), then set in a new retaining clip (C) to the master cylinder (D).
NOTE:
- Apply the silicone grease (P/N 08C30-B0234M) on the O-ring and the joint part (E) of the clutch line connector.
- Make sure not to get any silicone grease on the terminal part of the connectors and switches, especially if you have silicone grease on your hands or gloves.
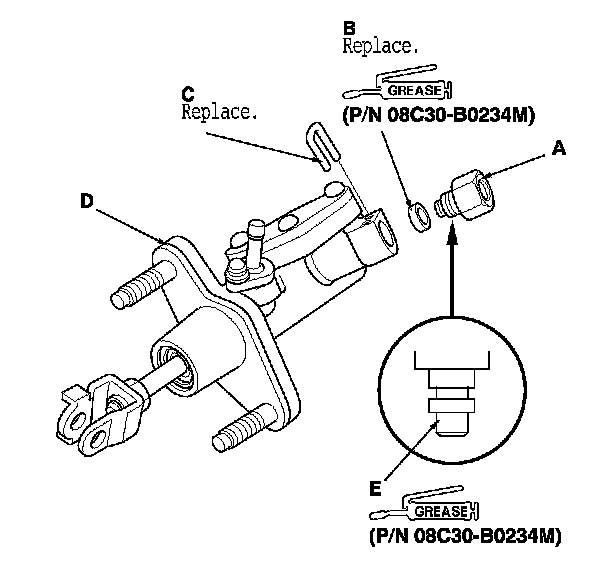
9. To prevent the retaining clip (A) from coming off, pry apart the tip (B) of the clip with a screwdriver.
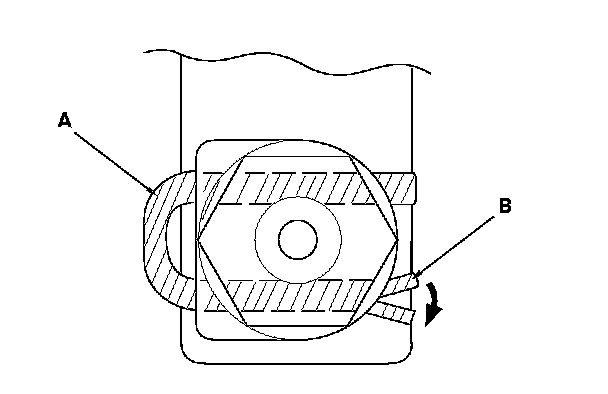
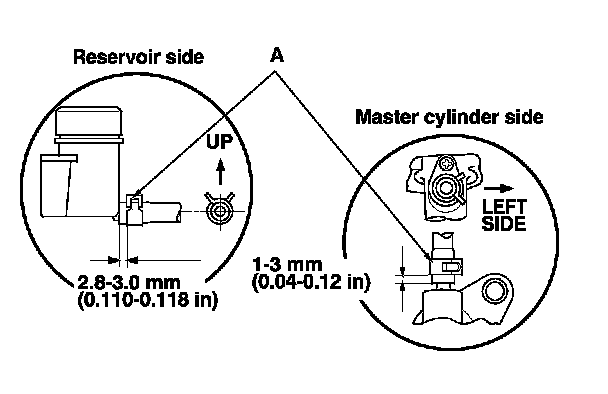
10. Install the reservoir hose, and adjust the hose clamp (A) positions and its direction.
NOTE: When attaching the reservoir hose, align the yellow mark on the hose to the rib on reservoir connection area, and the blue mark on the hose to the rib on the clutch master cylinder connection area.
11. Install a new master cylinder seal (A) and the clutch master cylinder (B).
12. Install the master cylinder mounting nuts (A).
13. Apply multipurpose grease to the clevis pin (B), and the mating surfaces (C) of the clevis and the pedal. Slide the clevis pin into the clevis, then install the lock pin (D).
14. Connect the clutch line (A) to the clutch master cylinder (B).
NOTE: Tighten the flare nut (C) while holding the clutch line connector (D) using a wrench.
15. Install the clutch master cylinder reservoir (A).
16. Bleed the clutch hydraulic system. Service and Repair
17. Adjust the clutch pedal, the clutch pedal position switch, and the clutch interlock switch. Adjustments
18. Check the clutch operation, and check for leaks.
19. Test-drive the vehicle.