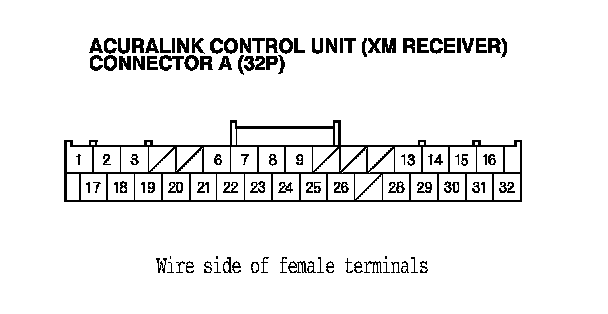
Symptom Troubleshooting
Symptom Troubleshooting: XM radio display is blank and no station information is displayed
XM radio display is blank and no station information is displayed (with AcuraLink)
NOTE:
- Check the vehicle battery condition first. Testing and Inspection
- Check the connectors for poor connections or loose terminals.
- If you replace the AcuraLink control unit (XM receiver), the AcuraLink must be reactivated by Acura Client Services.
1. Turn the ignition switch to LOCK (0).
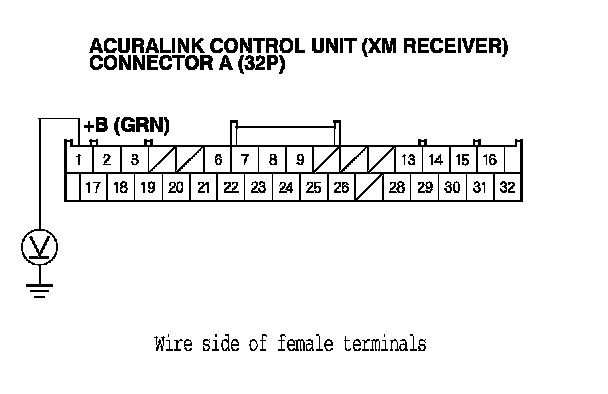
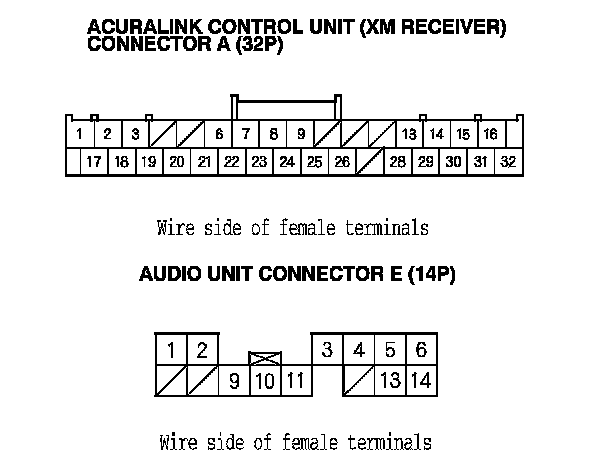
2. Measure the voltage between AcuraLink Control unit (XM receiver) connector A (32P) terminal No. 1 and body ground.
Is there battery voltage?
YES - Go to step 3.
NO - Repair an open in the wire between No. 15 (10 A) fuse in the under-hood fuse/relay box and AcuraLink control unit (XM receiver) connector A (32P) terminal No. 1.
3. Turn the ignition switch to ON (II).
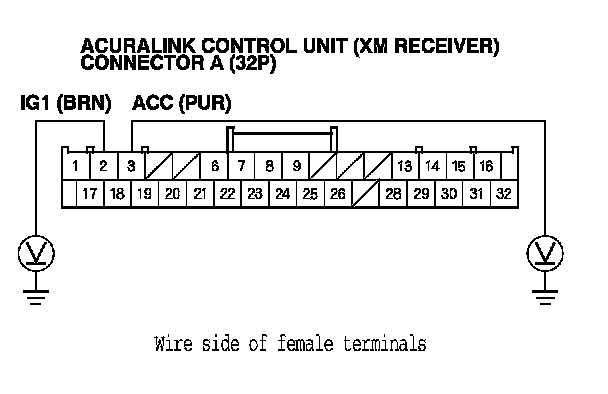
4. Measure the voltage between body ground and AcuraLink control unit (XM receiver) connector A (32P) terminals No. 2 and No. 3 individually.
Is there battery voltage?
YES - Go to step 5.
NO - Repair an open in the wire between the No. 5 (7.5 A) fuse in the driver's under-dash fuse/relay box and AcuraLink control unit (XM receiver) connector A (32P) terminal No. 2, or repair an open in the wire between the No. 18 (7.5 A) fuse in the driver's under-dash fuse/relay box and AcuraLink control unit (XM receiver) connector A (32P) terminal No. 3.
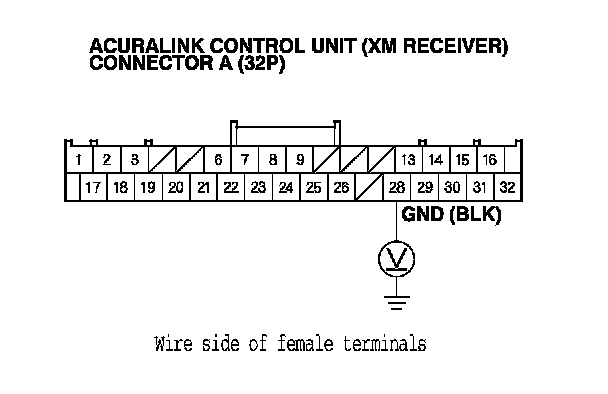
5. Measure the voltage between AcuraLink control unit (XM receiver) connector A (32P) terminal No. 28 and body ground.
Is there less than 0.2 V?
YES - Go to step 6.
NO - Repair an open or high resistance in the wire between AcuraLink control unit (XM receiver) connector A (32P) terminal No 28 and body ground (G651).
6. Turn the ignition switch to LOCK (0).
7. Disconnect there items:
- Audio unit connector E (14P)
- AcuraLink control unit (XM receiver) connector A (32P)
- HandsFreeLink control unit 28P connector
- USB adapter unit connector A (14P)
- Navigation display unit 28P connector
8. Check for continuity between AcuraLink control unit (XM receiver) connector A (32P) and audio unit connector E (14P) according to the table.

Is there continuity?
YES - Go to step 9.
NO - There is an open in the wire(s) between the audio unit and the AcuraLink control unit (XM receiver). Replace the affected shielded harness.
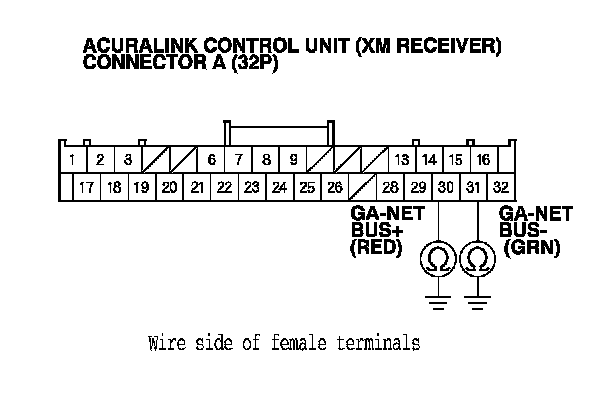
9. Check for continuity between body ground and AcuraLink control unit (XM receiver) connector A (32P) terminals No. 30 and No. 31 individually.
Is there continuity?
YES - There is a short to body ground in the wire(s) between the audio unit and the AcuraLink control unit (XM receiver). Replace the affected shielded harness.
NO - Go to step 10.
10. Check for continuity between the terminals of AcuraLink control unit (XM receiver) connector A (32P) according to the table.
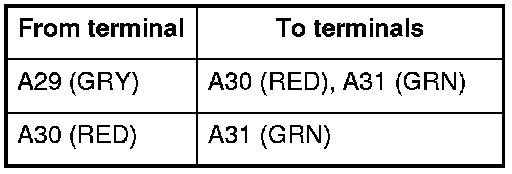
Is there continuity between any of the terminals?
YES - There is a short in the wire(s) between the audio unit and the AcuraLink control unit (XM receiver). Replace the affected shielded harness.
NO - Substitute a known-good audio unit, Audio Unit Removal/Installation (With ELS Audio System) and recheck. If the symptom/indication goes away, replace the original audio unit. If the symptom is still present, substitute a known-good AcuraLink control unit (XM receiver), and recheck. Update the AcuraLink control unit if it does not have the latest software, then recheck. If the software is the latest, replace the AcuraLink control unit. AcuraLink Control Unit (XM Receiver) Removal/Installation