Glove Compartment Lock Cylinder: Service and Repair
Glove Box Lock Cylinder Replacement
NOTE: Take care not to scratch the glove box.
1. Remove the glove box. Glove Box Removal/Installation
2. Remove the document tray. Document Tray Removal/Installation
3. Remove the screw securing the glove box damper wire to the glove box. Glove Box Damper Replacement
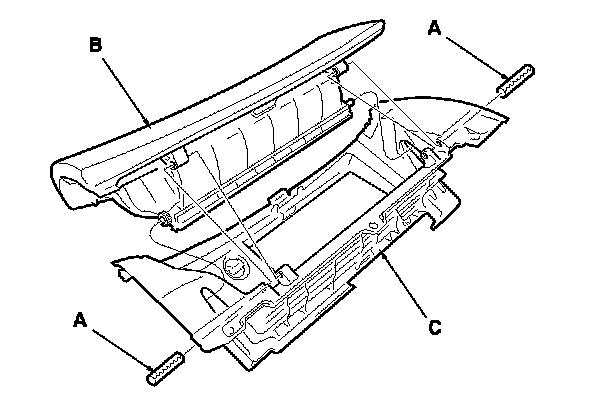
4. Remove the spring pins (A) from both sides, then remove the glove box lid (B) from the glove box housing (C).
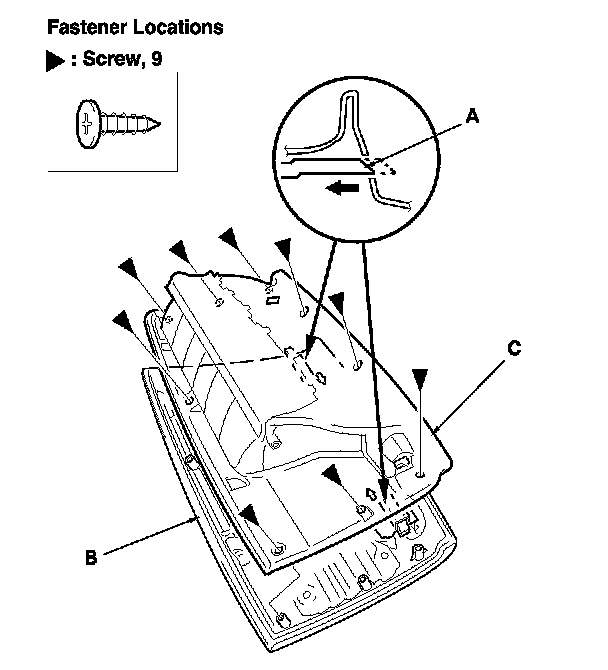
5. Remove the screws, and release the hooks (A) from both sides, then remove the glove box front trim (B) from the glove box (C).
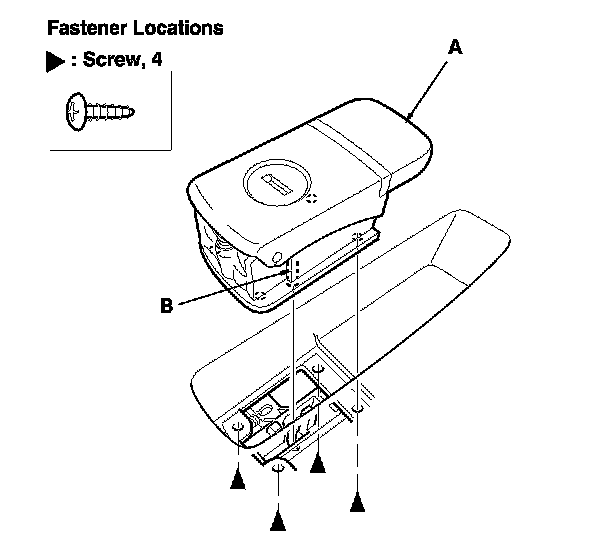
6. Remove the glove box lock lever body (A) by removing the screws. Disconnect the pin (B) from the link.
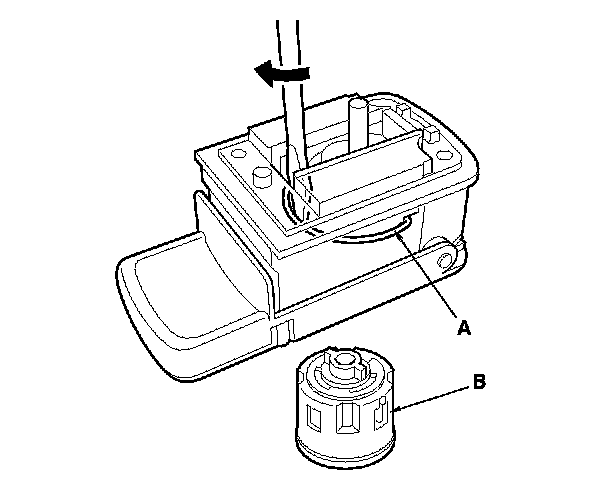
7. Using a flat-tip screwdriver, pry up the retainer (A), then remove the glove box lock cylinder (B).
NOTE: Wear eye protection when doing this step.
8. Set the retainer into the lock body, then push the lock cylinder into the lock cylinder body until it snaps into the retainer.
9. Install the lock lever body in the reverse order of removal, and note these items:
- Before installing the lock lever body to the glove box, make sure the lock cylinder operates properly.
- Replace the spring pins with new ones.
- Before installing the spring pins, apply grease to them.