Combination Light Switch Test/Replacement
- Remove the driver's dashboard lower cover (see
DRIVER'S DASHBOARD LOWER COVER REMOVAL/INSTALLATION
).
- Remove the steering column covers (see
COLUMN COVER REMOVAL/INSTALLATION
).
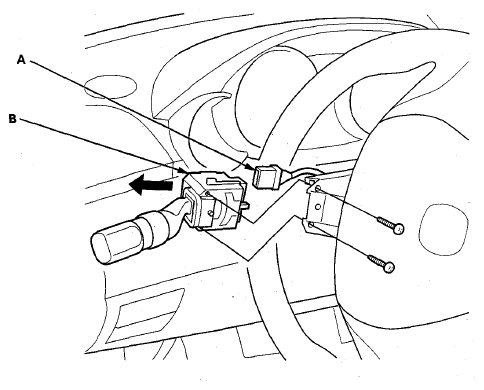
- Disconnect the combination light switch 10P connector (A) from the combination light switch (B).
 Courtesy of AMERICAN HONDA MOTOR CO., INC.
- Remove the two screws, then slide out the combination light switch.
- inspect the connector terminals to be sure they are all making good contact.
- If the terminals are bent, loose, or corroded, repair them as necessary, and recheck the system.
- If the terminals look OK, check for continuity between the terminals in each switch position according to the tables.
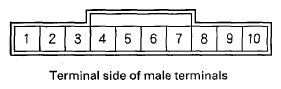 Courtesy of AMERICAN HONDA MOTOR CO., INC.
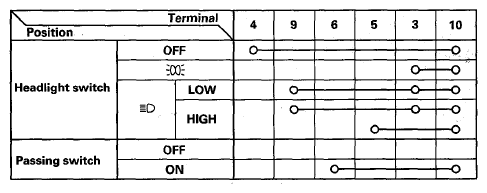 Courtesy of AMERICAN HONDA MOTOR CO., INC.
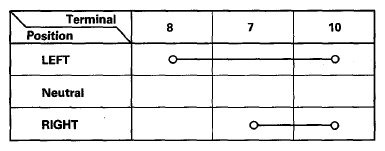 Courtesy of AMERICAN HONDA MOTOR CO., INC.
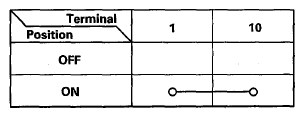 Courtesy of AMERICAN HONDA MOTOR CO., INC.
- If the continuity is not as specified, replace the switch.