- Raise the rear of the vehicle, and support it with safety stands in the proper locations (see
LIFT AND SUPPORT POINTS
)
- Remove the rear wheel
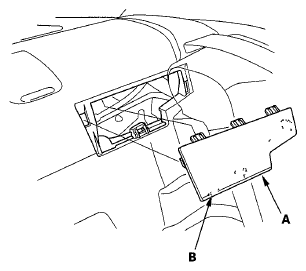
- Fold down the rear seat-back, then remove the lid (A)
NOTE:
Lift up the tab (B) inside underneath the lid first using a flat-tipped screwdriver, then release the hooks
 Courtesy of AMERICAN HONDA MOTOR CO., INC.
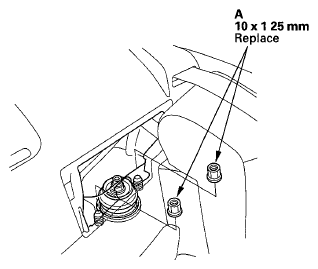
- Remove the damper mounting nuts (A) from the top of the damper
 Courtesy of AMERICAN HONDA MOTOR CO., INC.
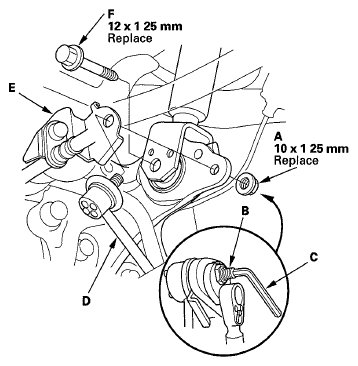
- Remove the self-locking nut (A) while holding the joint pin (B) with a hex wrench (C), then disconnect the stabilizer link (D) from the knuckle, and remove the brake hose bracket (E)
NOTE:
Use a new self-locking nut during reassembly
 Courtesy of AMERICAN HONDA MOTOR CO., INC.
- Remove the damper lower mounting bolt (F)
NOTE:
Use the new mounting bolt during reassembly
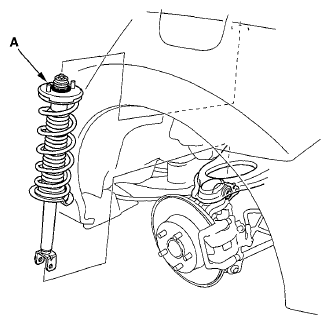
- Remove the damper/spring (A) by lowering the rear suspension
NOTE:
Be careful not to damage the body
 Courtesy of AMERICAN HONDA MOTOR CO., INC.