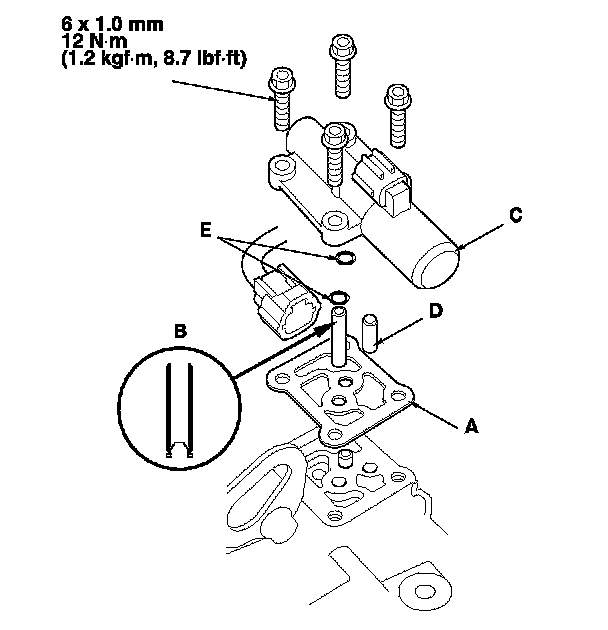
A/T Clutch Pressure Control Solenoid Valve C Replacement
A/T Clutch Pressure Control Solenoid Valve C Replacement
1. Do the battery removal procedure. Removal and Replacement
2. Remove the under-hood subfuse box from its bracket, and remove the bracket from the battery base.
3. Remove the intake air duct and air cleaner housing.
4. Remove the battery base and battery base bracket.
5. Disconnect the A/T clutch pressure control solenoid valve C connector.
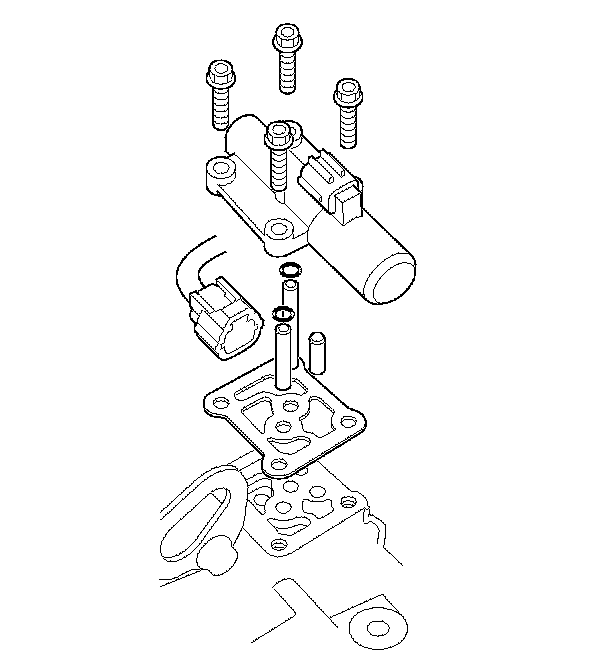
6. Remove A/T clutch pressure control solenoid valve C.
7. Remove the ATF joint pipes, O-rings, ATF pipe, and gasket.
8. Clean the mounting surface and the fluid passage of the solenoid valve body and transmission housing.
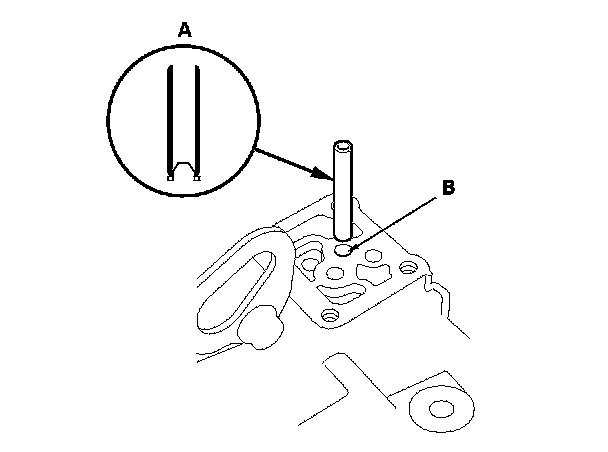
9. Install the 8 x 53 mm ATF joint pipe (A) with the filter end into its mounting hole (B).
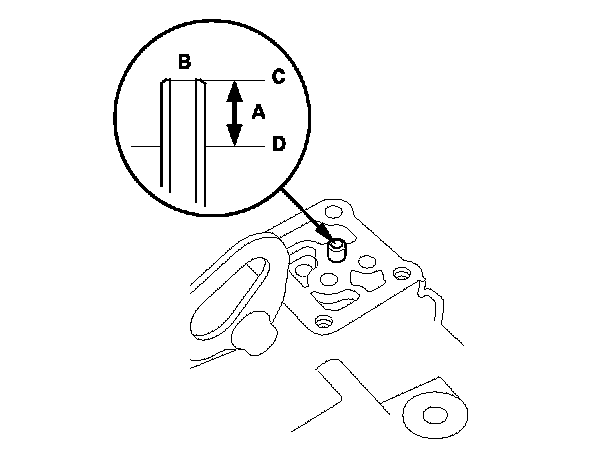
10. Check the height (A) of the 8 x 53 mm ATF joint pipe (B) between the top (C) of the pipe and solenoid valve body mounting surface (D). The height is about 7 mm (0.3 in.). If the height is over 7 mm (0.3 in.), push the pipe until it bottoms in the accumulator body.
11. Install the new gasket (A) on the transmission housing, and install the 8 x 34.5 mm ATF joint pipe (B) with the filter end into the transmission housing and 8 x 25.2 mm ATF pipe (D).
12. Install the new O-rings (E) over the ATF joint pipes.
13. Install A/T clutch pressure control solenoid valve C.
14. Check the connector for rust, dirt, or oil, then connect it securely.
15. Install the battery base bracket and battery base.
16. Install the air cleaner housing and intake air duct.
17. Install the under-hood subfuse box on the battery base, and install the subfuse box on its bracket.
18. Do the battery installation procedure. Removal and Replacement