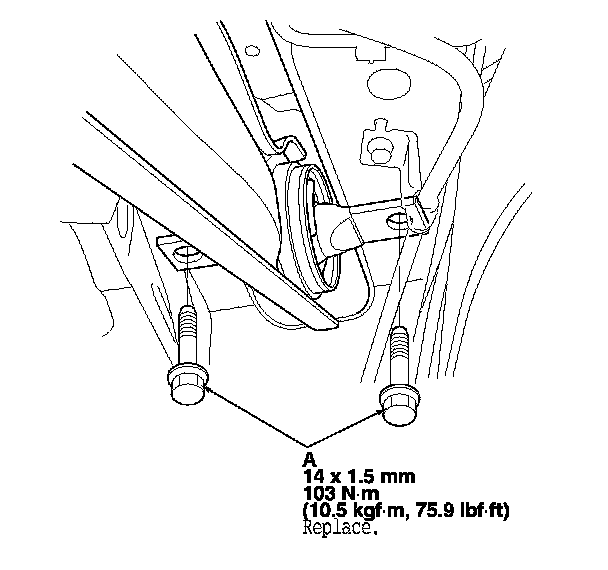
Trailing Arm: Service and Repair
Rear Trailing Arm Removal/Installation
1. Raise the rear of the vehicle, and support it with safety stands in the proper locations. Service and Repair
2. Remove the rear wheel.
3. Remove the parking brake cable (A) from the trailing arm (B).
4. Disconnect the brake line (C) from the brake hose (D), then remove the brake hose retaining clip (E).
NOTE: To prevent the brake fluid from flowing, plug and cover the hose ends and joints with a shop towel or equivalent material.
5. Disconnect the parking brake cable from the parking brake lever. Removal and Replacement
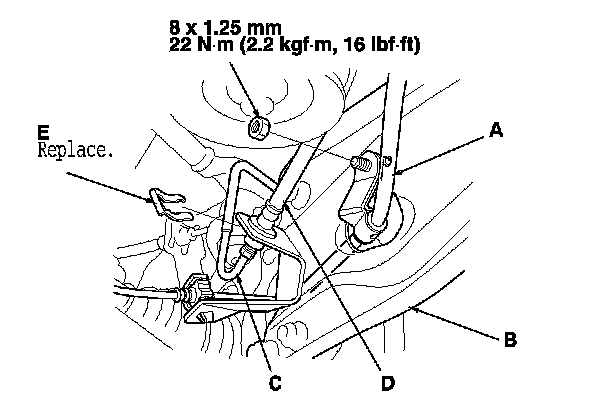
6. Remove the flange nuts (A) from the trailing arm (B).
NOTE: Use the new flange nuts during reassembly.
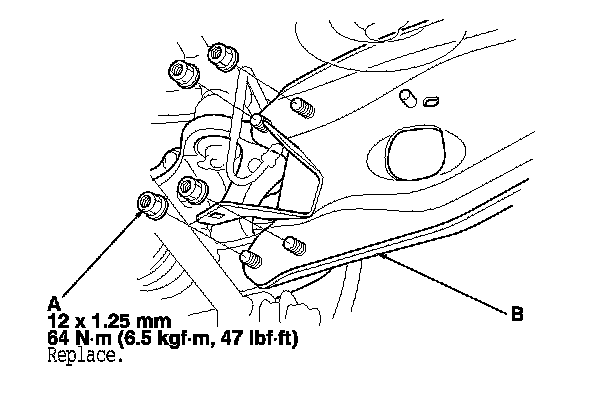
7. Remove the flange bolts (A) from the trailing arm, then remove the trailing arm.
NOTE: Use the new flange bolts during reassembly.
8. Install the trailing arm in the reverse order of removal, and note these items:
- First install all the suspension components, and lightly tighten the bolts and nuts, then raise the suspension to load it with the vehicle's weight before fully tightening to the specified torque values.
- Use the new brake hose retaining clip during reassembly.
- Before installing the wheel, clean the mating surfaces of the brake disc/drum and the inside of the wheel.
- Fill the master cylinder reservoir to the MAX (upper) level line, and bleed the brake system. Service and Repair Check for a leak at the brake hose/line joint, and retighten it if necessary.
- Check the wheel alignment, and adjust it if necessary. Service and Repair