Symptom Troubleshooting
Symptom Troubleshooting: Active damper system indicator does not go off, and no DTCs are stored
Active damper system indicator does not go off, and no DTCs are stored
NOTE: Check for gauge DTCs with the HDS. Diagnostic Aids If gauge DTCs are stored, troubleshoot those DTCs first.
1. Check for the communication between the vehicle and the HDS.
Is there communication with all vehicle systems?
YES - Check for loose terminals in the gauge control module connector A (12P). If necessary, substitute a known-good gauge control module, then recheck. If it is OK, replace the original gauge control module. Service and Repair
NO - If the HDS does not communicate with all the systems of the vehicle, troubleshoot the DLC circuit. Testing and Inspection If the HDS does not communicate with only the active damper control unit, go to step 2.
2. Turn the ignition switch to LOCK (0).
3. Check the No. 20 (7.5 A) fuse in the under-dash fuse/relay box.
Is the fuse blown?
YES - Install the No.20 (7.5 A) fuse, and recheck. If the fuse continues to blow, check for short to body ground in the wire between the No. 20 (7.5 A) fuse and the active damper control unit.
NO - Reinstall the fuse, then go to step 4.
4. Turn the ignition switch to ON (II).
5. Measure voltage between body ground and active damper control unit connector A (20P) terminal No. 8.
Is there battery voltage?
YES - Go to step 6.
NO - Repair open in the wire between the active damper control unit and the No. 20 (7.5 A) fuse in the under-dash fuse/relay box.
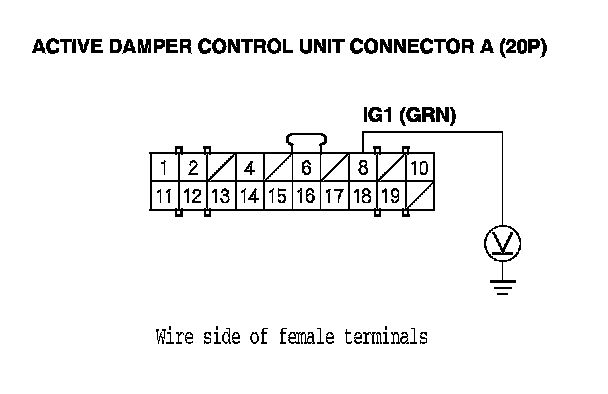
6. Measure voltage between body ground and active damper control unit connector A (20P) terminals No. 18 and No. 19 individually.
Is there less than 0.5 V?
YES - Go to step 7.
NO - Repair open in the wire between the active damper control unit and body ground (G401 or G302).
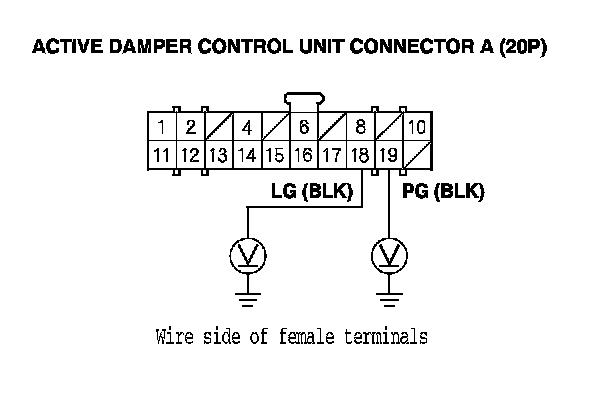
7. Turn the ignition switch to LOCK (0).
8. Disconnect gauge control module connector A (12P).
9. Disconnect active damper control unit connector B (14P).
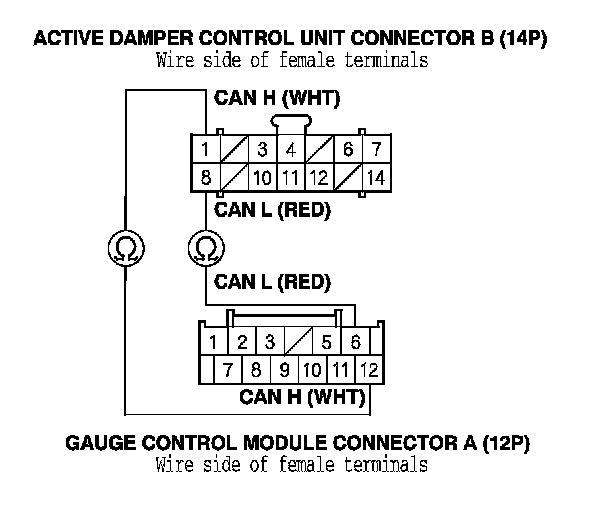
10. Check for continuity between the active damper control unit connector B (14P) terminals and the gauge control module connector A (12P) terminals individually (see table).

Is there continuity?
YES - Check for loose terminals in the active damper control unit connectors A (20P)/B (14P). If necessary, substitute a known-good active damper control unit, then recheck. If it is OK, replace the original active damper control unit. Service and Repair
NO - Repair open in the wire between the gauge control module and the active damper control unit.