Radiator and A/C Condenser Fan Low Speed Circuit Troubleshooting
Radiator and A/C Condenser Fan Low Speed Circuit Troubleshooting
NOTE:
- Do not use this troubleshooting procedure if the A/C compressor is inoperative. Refer to the symptom troubleshooting index.
- Before performing symptom troubleshooting, check for powertrain DTCs. Initial Inspection and Diagnostic Overview
1. Check the No. 15 (30 A) fuse in the relay block, and the No. 30 (10 A) fuse in the under-dash fuse/relay box.
Are the fuses OK?
YES - Go to step 2.
NO - Replace the fuse(s), and recheck. If the fuse(s) blow again, check for a short in the No. 15 (30 A) and No. 30 (10 A) fuse(s) circuit.
2. Remove the A/C condenser fan relay from the relay block, and test it. Power Relay Test
Is the relay OK?
YES - Go to step 3.
NO - Replace the A/C condenser fan relay.
3. Connect the HDS to the DLC.
4. Turn the ignition switch to ON (II).
5. Turn on the A/C.
6. Check the FAN LOW CTRL in the PGM-FI Data List with the HDS.
Is the FAN LOW CTRL on?
YES - Go to step 7.
NO - Substitute a known-good PCM, Initial Inspection and Diagnostic Overview and retest. If the symptom/indication goes away with a known-good PCM, replace the original PCM. Service and Repair
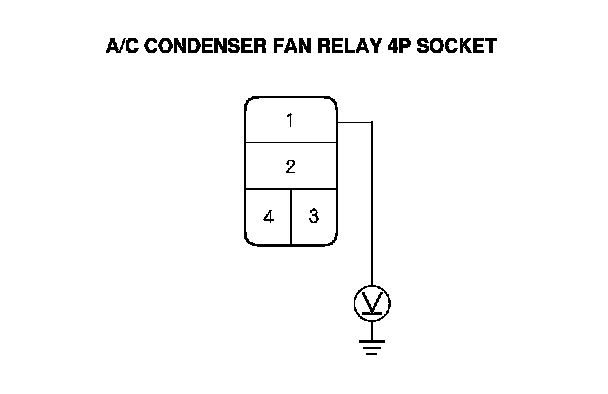
7. Measure the voltage between the A/C condenser fan relay 4P socket terminal No. 1 and body ground.
Is there battery voltage?
YES - Go to step 8.
NO - Replace the under-hood fuse/relay box. Under-Hood Fuse/Relay Box Removal and Installation
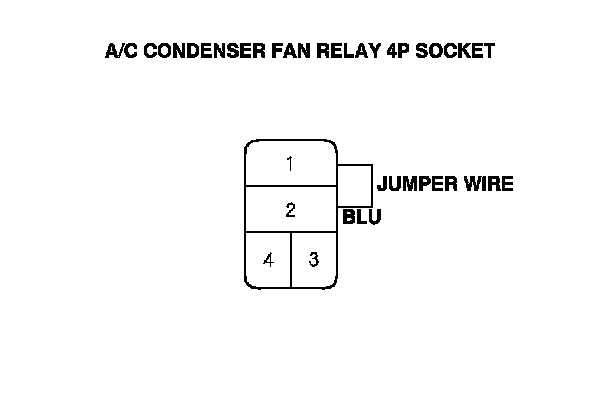
8. Connect the A/C condenser fan relay 4P socket terminals No. 1 and No. 2 with a jumper wire.
Do the A/C condenser and radiator fans run on low?
YES - Go to step 9.
NO - Go to step 18.
9. Disconnect the jumper wire.
10. Turn the ignition switch to ON (II).
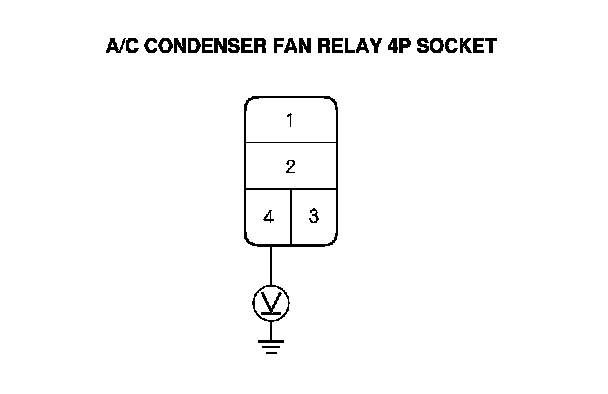
11. Measure the voltage between the A/C condenser fan relay 4P socket terminal No. 4 and body ground.
Is there battery voltage?
YES - Go to step 12.
NO - Go to step 36.
12. Turn the ignition switch to LOCK (0).
13. Reinstall the A/C condenser fan relay.
14. Jump the SCS line with the HDS.
NOTE: This step must be done to protect the powertrain control module (PCM) from damage.
15. Disconnect PCM connector A (49P).
16. Connect PCM connector A (49P) terminal No. 4 to body ground with a jumper wire.
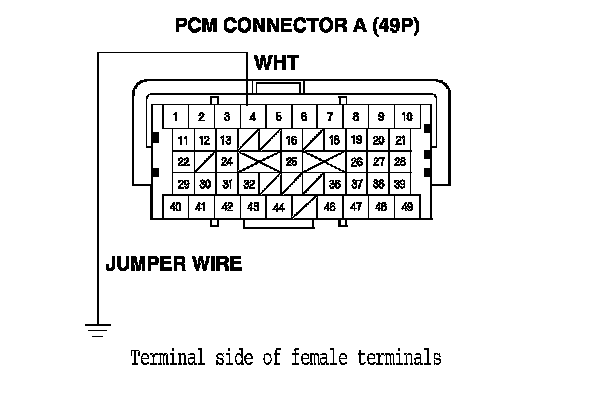
17. Turn the ignition switch to ON (II).
Do the A/C condenser and radiator fans run on low?
YES - Check for loose wires or poor connections at PCM connector A (49P) terminal No. 4. If the connections are good, substitute a known-good PCM, and recheck. If the symptom/indication goes away, replace the original PCM. Service and Repair
NO - Repair open in the wire between the A/C condenser fan relay and the PCM.
18. Disconnect the jumper wire.
19. Reinstall the A/C condenser fan relay.
20. Disconnect the A/C condenser fan 2P connector.
21. Turn the ignition switch to ON (II), then set the A/C button and fan control button ON.
22. Measure the voltage between the A/C condenser fan 2P connector terminal No. 2 and body ground.
Is there battery voltage?
YES - Go to step 23.
NO - Repair open in the wire between the A/C condenser fan relay and the A/C condenser fan.
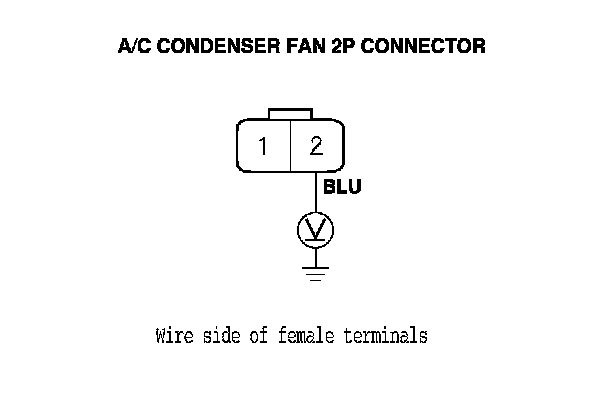
23. Set the A/C button and fan control button OFF, then turn the ignition switch to LOCK (0).
24. Reconnect the A/C condenser fan 2P connector.
25. Connect the A/C condenser fan 2P connector terminal No. 1 to body ground with a jumper wire.
26. Turn the ignition switch to ON (II), then set the A/C button and fan control button ON.
Does the A/C condenser fan run at high speed?
YES - Go to step 27.
NO - Replace the A/C condenser fan motor. Service and Repair
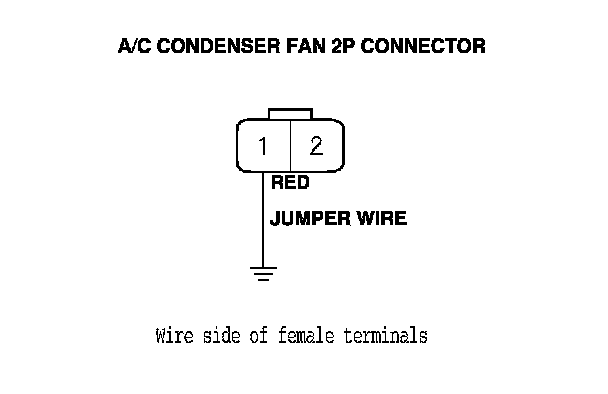
27. Set the A/C button and fan control button OFF, then turn the ignition switch to LOCK (0).
28. Disconnect the jumper wire.
29. Remove the fan control relay from the relay block, and test it. Power Relay Test
Is the relay OK?
YES - Go to step 30.
NO - Replace the fan control relay.
30. Turn the ignition switch to ON (II), then set the A/C button and fan control button ON.
31. Measure the voltage between the fan control relay 5P socket terminal No. 1 and body ground.
Is there battery voltage?
YES - Go to step 32.
NO - Repair open in the wire between the A/C condenser fan and the fan control relay.
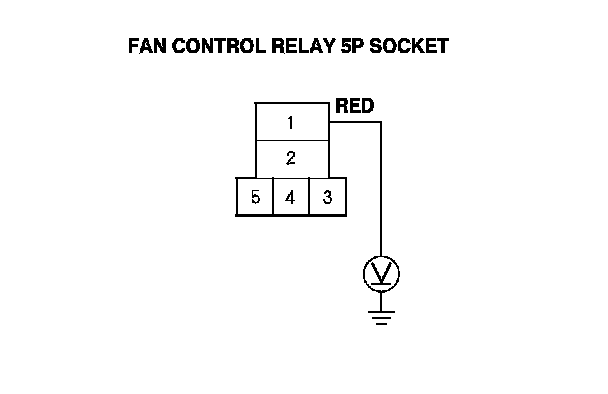
32. Set the A/C button and fan control button OFF, then turn the ignition switch to LOCK (0).
33. Disconnect the radiator fan 2P connector.
34. Check for continuity between the fan control relay 5P socket terminal No. 4 and the radiator fan 2P connector terminal No. 2.
Is there continuity?
YES - Go to step 35.
NO - Repair open in the wire between the fan control relay and the radiator fan.
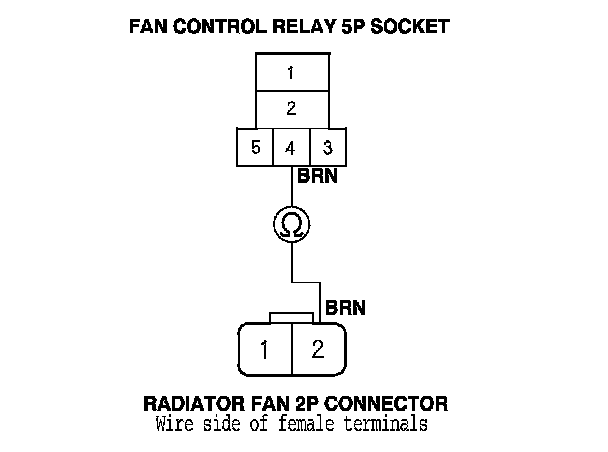
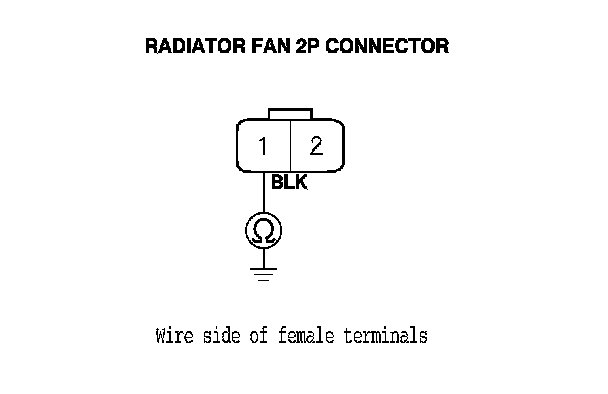
35. Check for continuity between the radiator fan 2P connector terminal No. 1 and body ground.
Is there continuity?
YES - Replace the radiator fan motor. Service and Repair
NO - Check for an open in the wire between the radiator fan and body ground. If the wire is OK, check for poor ground at G301.
36. Turn the ignition switch to LOCK (0).
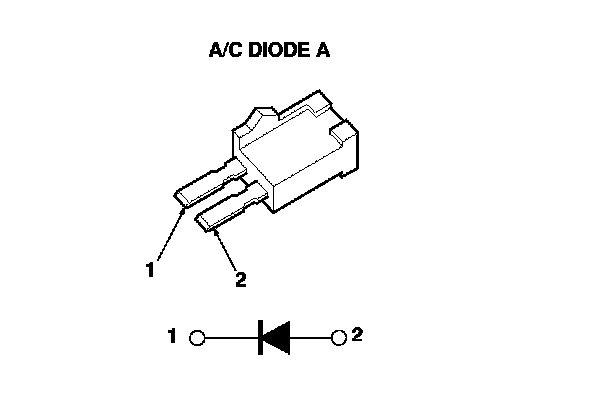
37. Remove A/C diode A from the relay block.
38. Using the diode setting on a DVOM, check for current flow in both directions between the A/C diode A terminals No. 1 and No. 2.
Is there current flow in only one direction?
YES - Go to step 39.
NO - Replace A/C diode A.
39. Turn the ignition switch to ON (II).
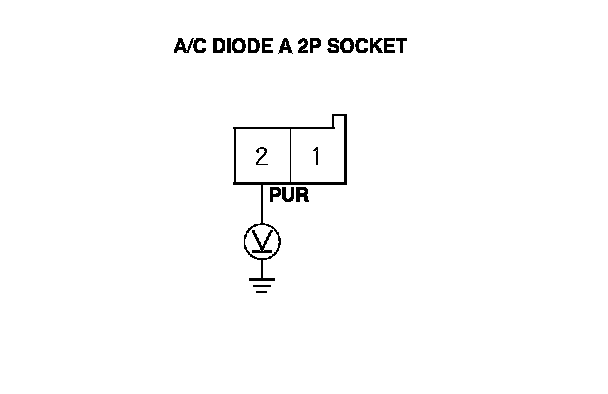
40. Measure the voltage between A/C diode A 2P socket terminal No. 2 and body ground.
Is there battery voltage?
YES - Replace the under-hood fuse/relay box. Under-Hood Fuse/Relay Box Removal and Installation
NO - Repair open in the wire between the No. 30 (10 A) fuse in the under-dash fuse/relay box and A/C diode A.