Body - Front/Rear Outside Door Handles Stick/Bind
09-043October 14, 2009
Applies To:
2007-09 MDX - ALL
Outside Door Handle Binds or Sticks
SYMPTOM
The door handle is hard to pull open, or it binds/stick
PROBABLE CAUSE
Not enough clearance between the door handle and it base.
CORRECTIVE ACTION
Replace the door handle on the affected door(s).
PARTS INFORMATION
Right Front or Right Rear Door Handle Assembly:
P/N 72140-STX-A02
Left Front Door Handle Assembly:
P/N 72180-STX-A02
Left Rear Door Handle Assembly:
P/N 72680-STX-A02
TOOL INFORMATION
KTC Trim Tool Set: T/N SOJATP2014
Trim Pad Remover: Snap-on A177A or equivalent, commercially available.
WARRANTY CLAIM INFORMATION
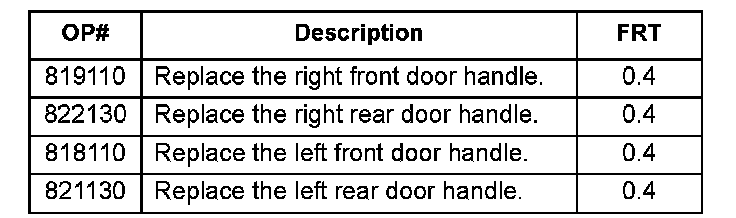
In warranty:
The normal warranty applies.
Failed Part: P/N 72140-STX-A02
Defect Code: 03001
Symptom Code: 07902
Skill Level: Repair Technician
Out of warranty:
Any repair performed after warranty expiration may be eligible for goodwill consideration by the District Parts and Service Manager or your Zone Office. You must request consideration, and get a decision, before starting work.
REPAIR PROCEDURE - FRONT DOOR HANDLE REPLACEMENT
NOTE:
This procedure is in an outline form that you can also use as a checklist for the repair. If you need more details, bookmark the following procedure in the 07-09 MDX Service Manual, or view them online: Front Door Panel Removal/Installation
1. Raise the glass fully.
2. Remove the door panel.
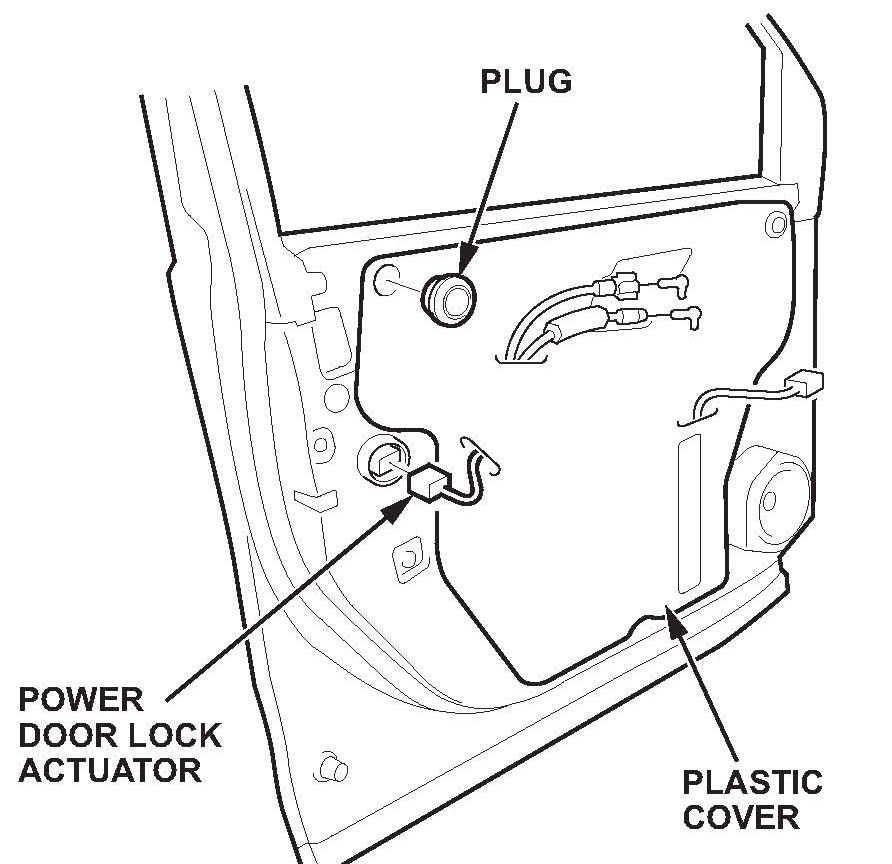
3. Disconnect the power door lock actuator connector. Remove the cap, then detach enough of the plastic cover to expose the door handle area.
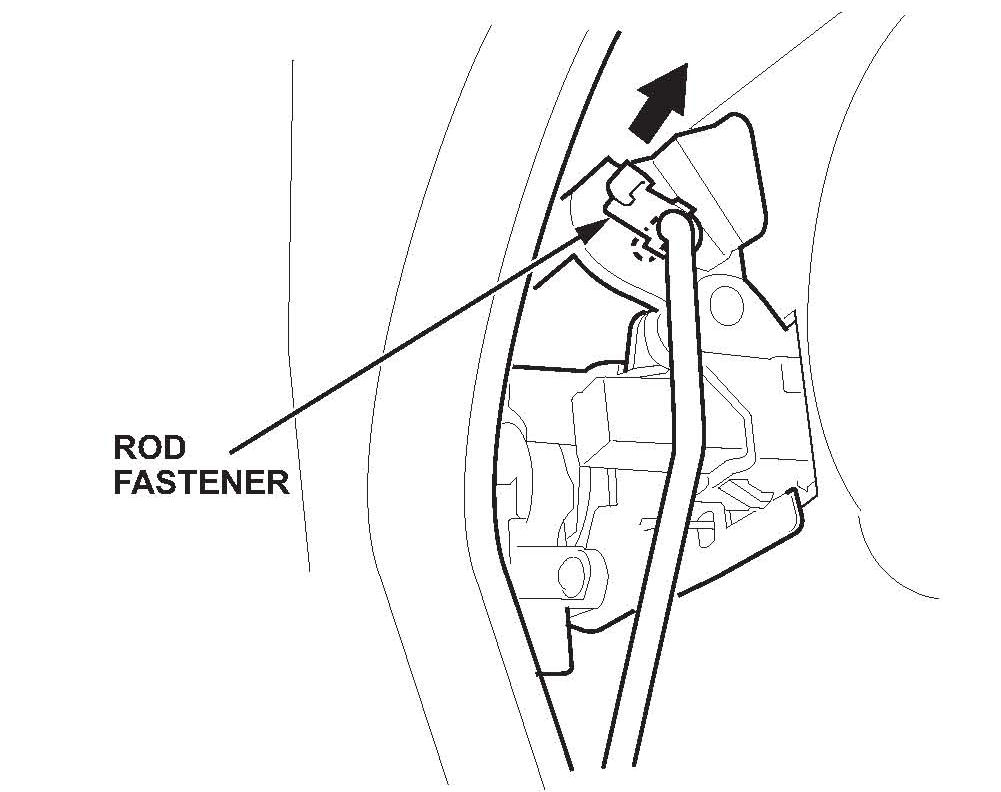
4. Detach the rod fastener from the outer handle.
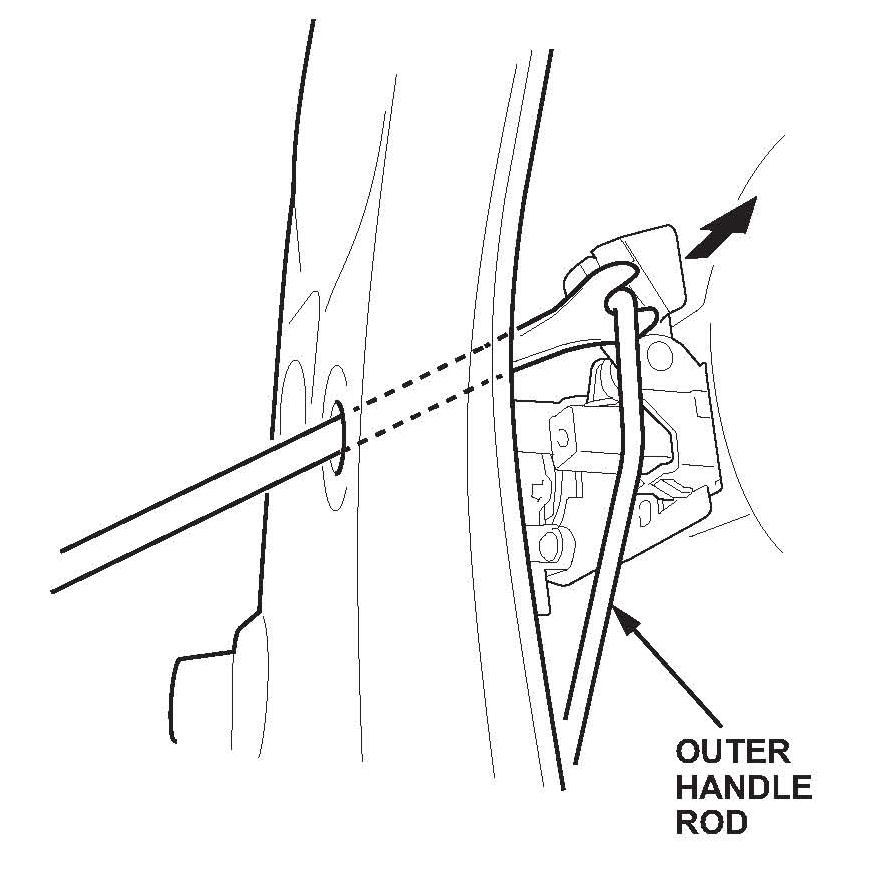
5. Disconnect the outer handle rod with a clip
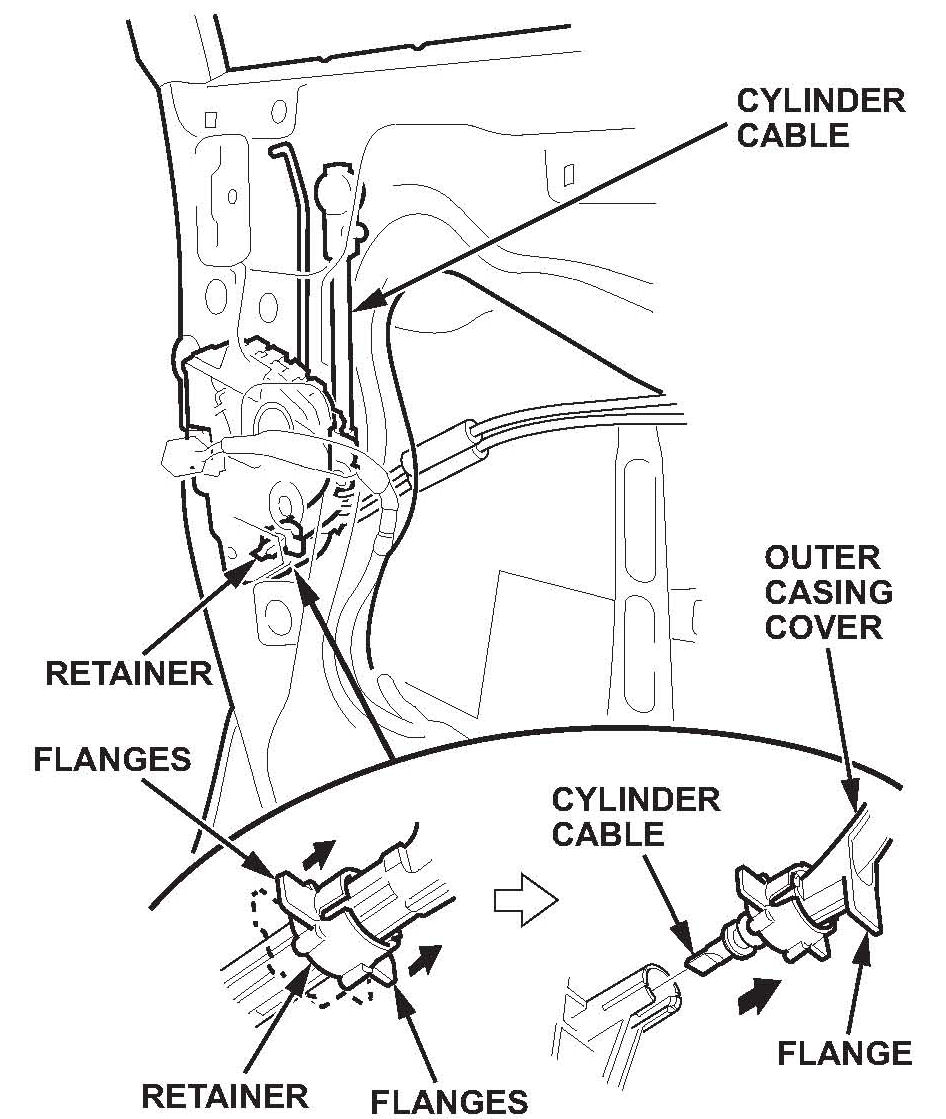
6. Driver's side: Pull both side flanges of the retainer outward, pull out the middle flange portion of the outer casing cover, then disconnect the cylinder cable from the latch.
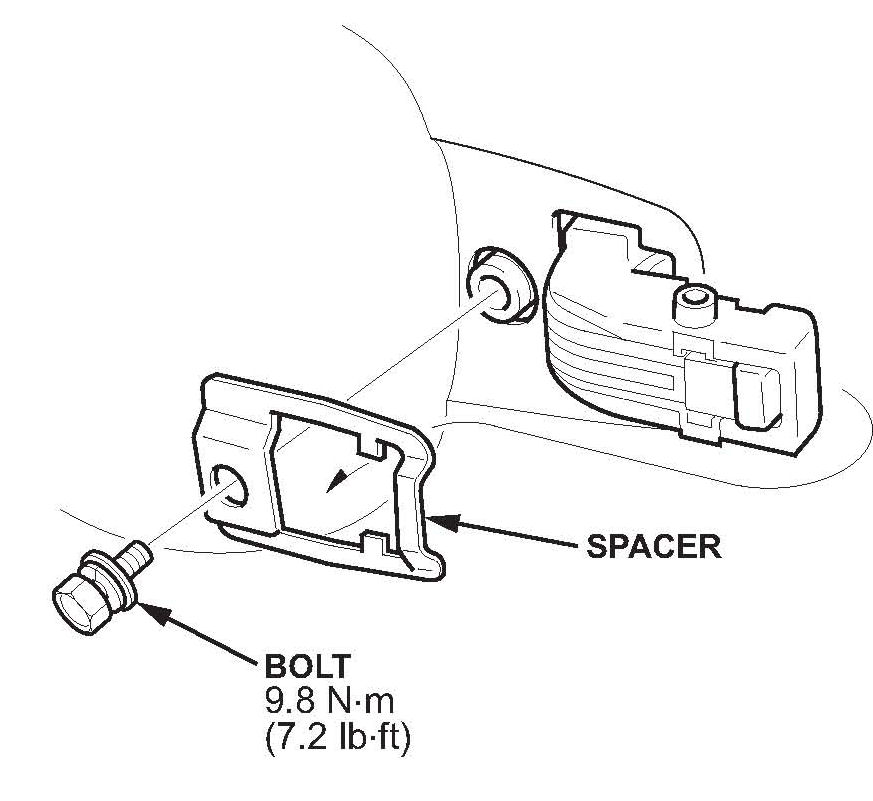
7. Remove the bolt, then remove the spacer.
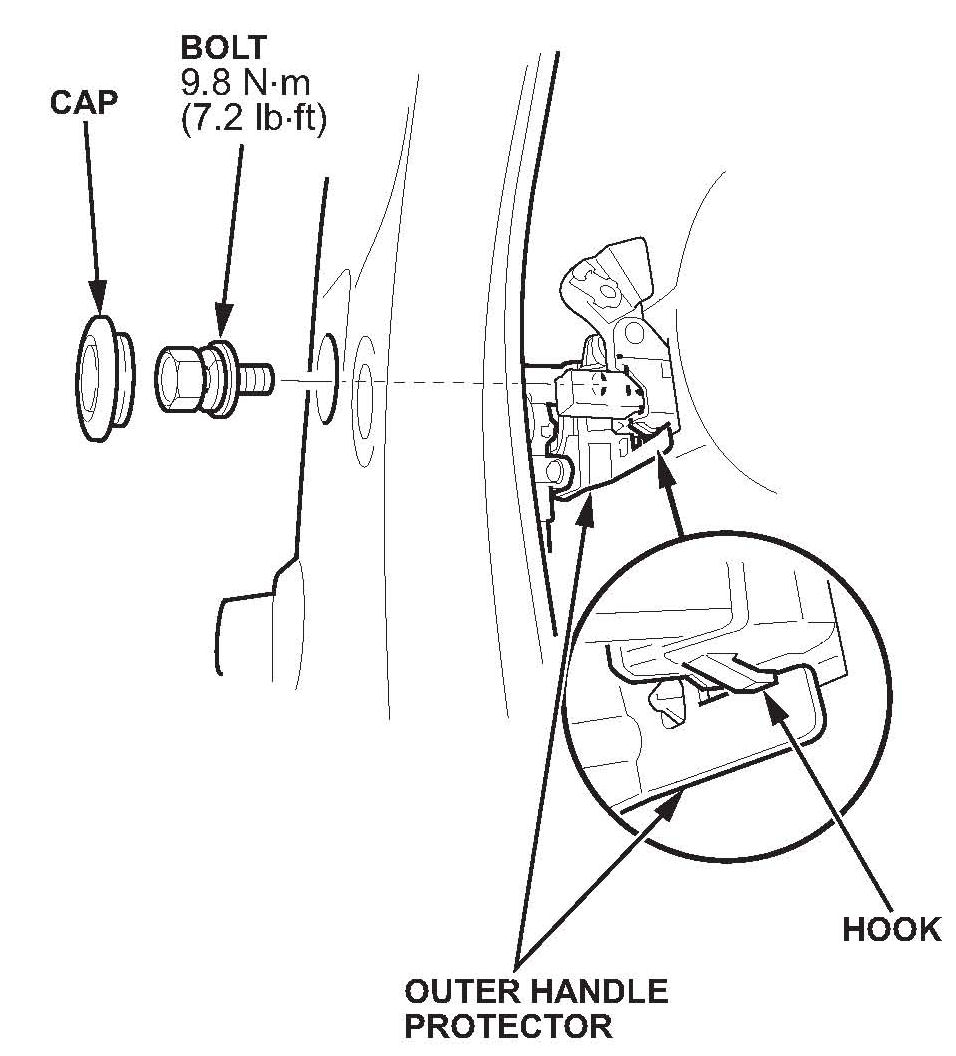
8. Remove the cap with the clip remover, then remove the bolt securing the outer handle protector, and remove the outer handle protector by releasing the hook.
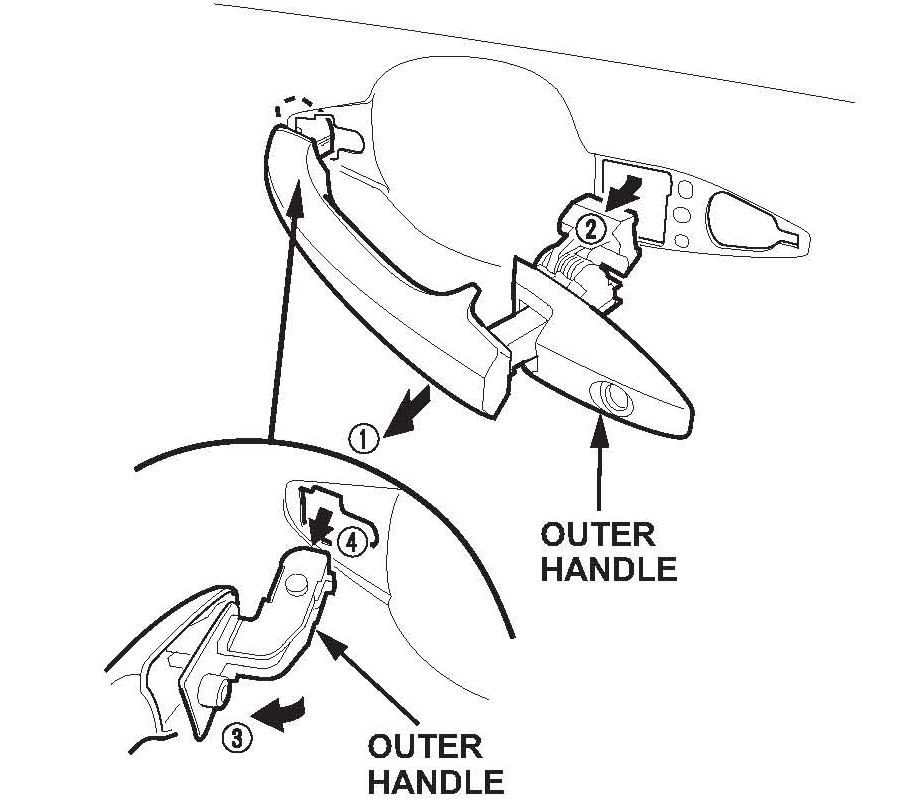
9. While pulling the outer handle, remove it from the holes in the door panel. Take care not to scratch the door.
10. Install the new door handle and the door handle bolt, then torque the bolt to 9.8 N.m (7.2 lb-ft).
11. Reinstall the spacer, and torque the bolt to 9.8 N.m (7.2 lb-ft).
12. Reconnect the cylinder cable to the latch.
13. Reinstall the cap, and reinstall the outer handle rod to the rod fastener.
14. Reconnect the power door lock actuator.
15. Reinstall the plug, the plastic cover, and the door panel.
REPAIR PROCEDURE - REAR DOOR HANDLE REPLACEMENT
NOTE:
This procedure is in an outline form that you can also use as a checklist for the repair. If you need more details, bookmark the following procedure in the 07-09 MDX Service Manual, or view them online: Rear Door Panel Removal/Installation
1. Raise the glass fully.
2. Remove the door panel.
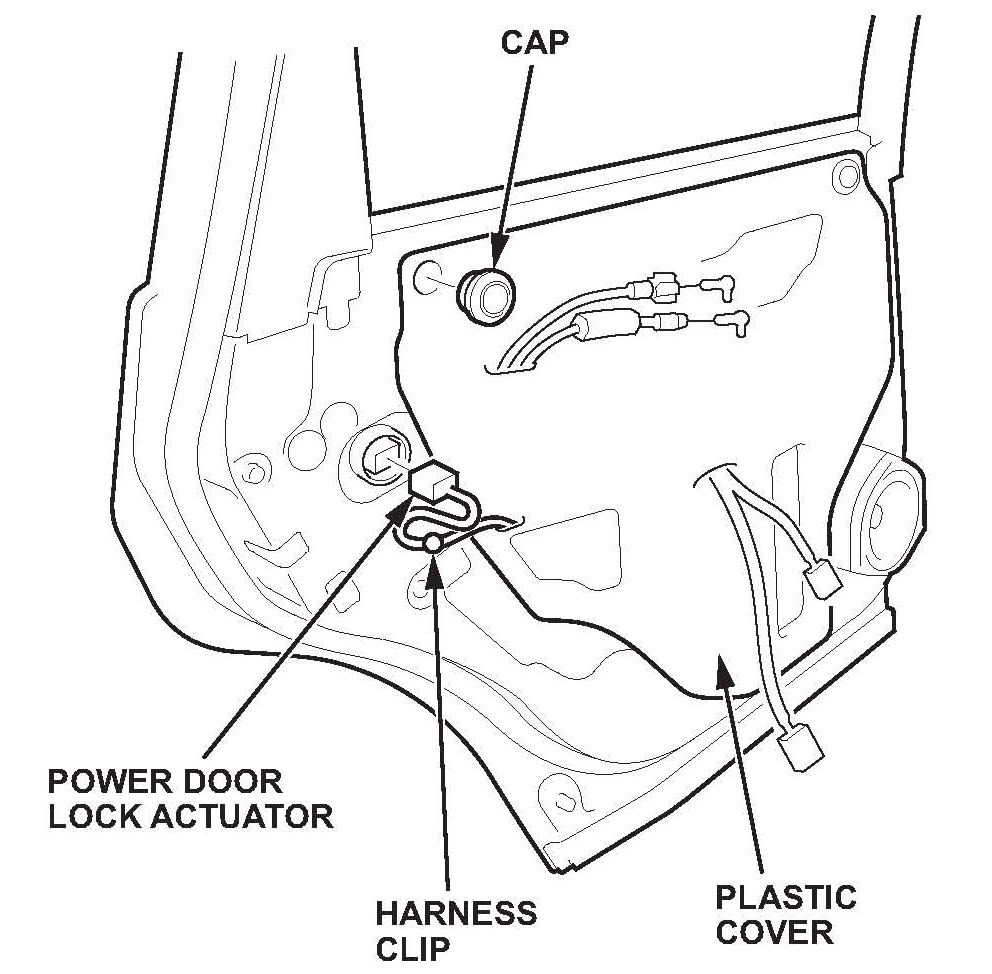
3. Detach the harness clip, and disconnect the power door lock actuator connector. Remove the cap, then detach enough of the plastic cover to expose the door handle area.
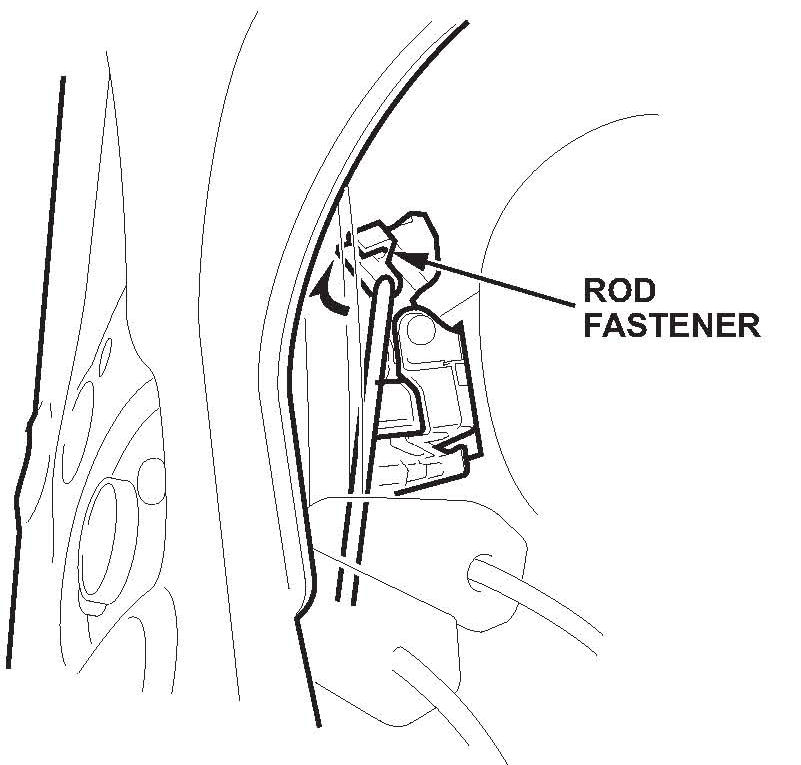
4. Detach the rod fastener from the outer handle.
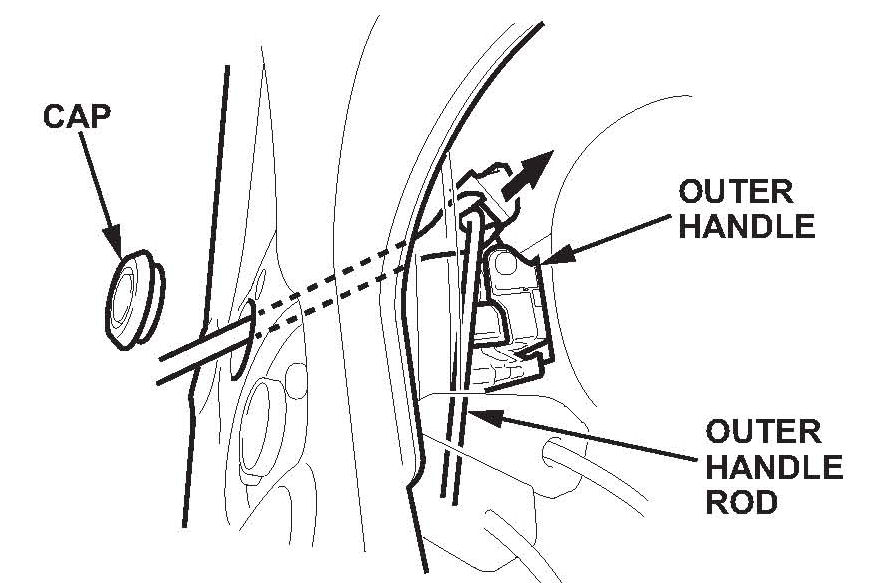
5. Remove the cap with a clip remover, then disconnect the outer handle rod from the outer handle.
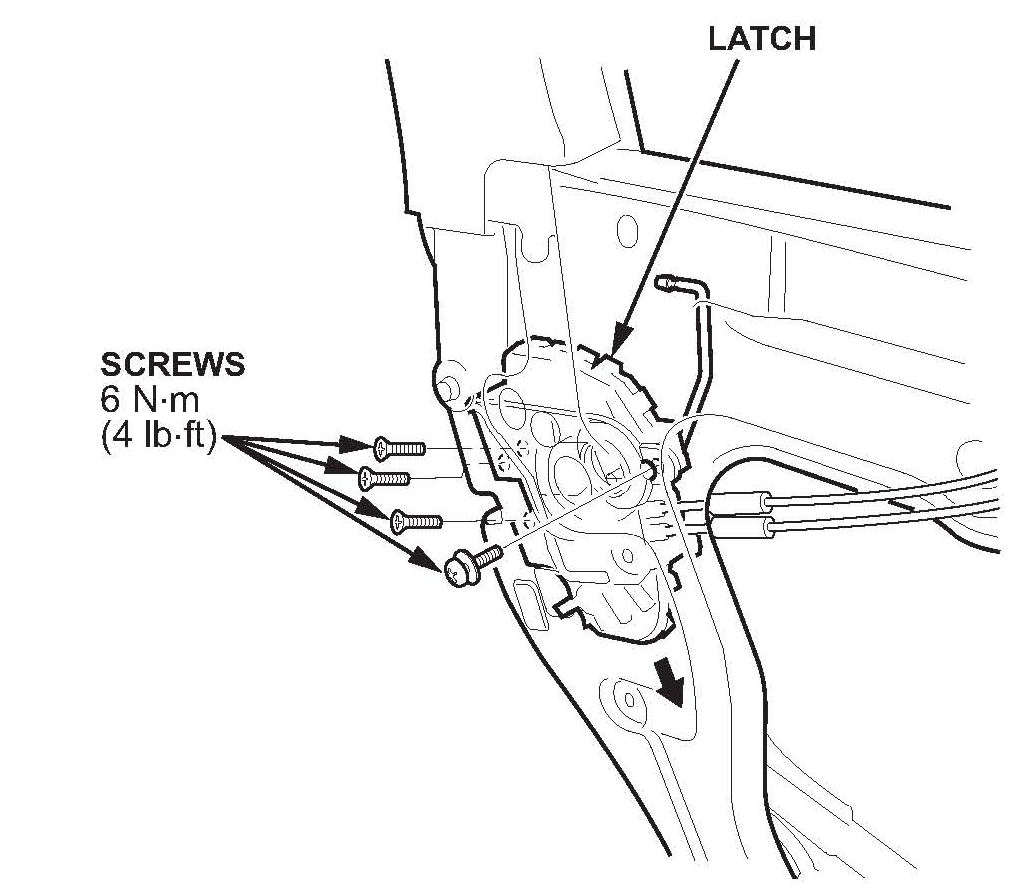
6. Remove the screws securing the latch, then lower the latch.
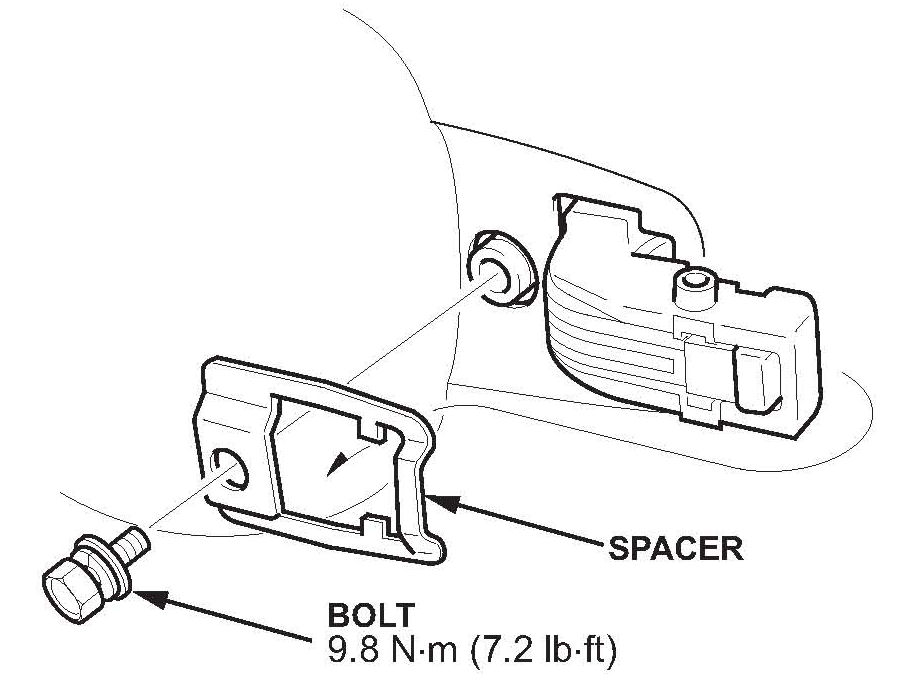
7. Remove the bolt, then remove the spacer.
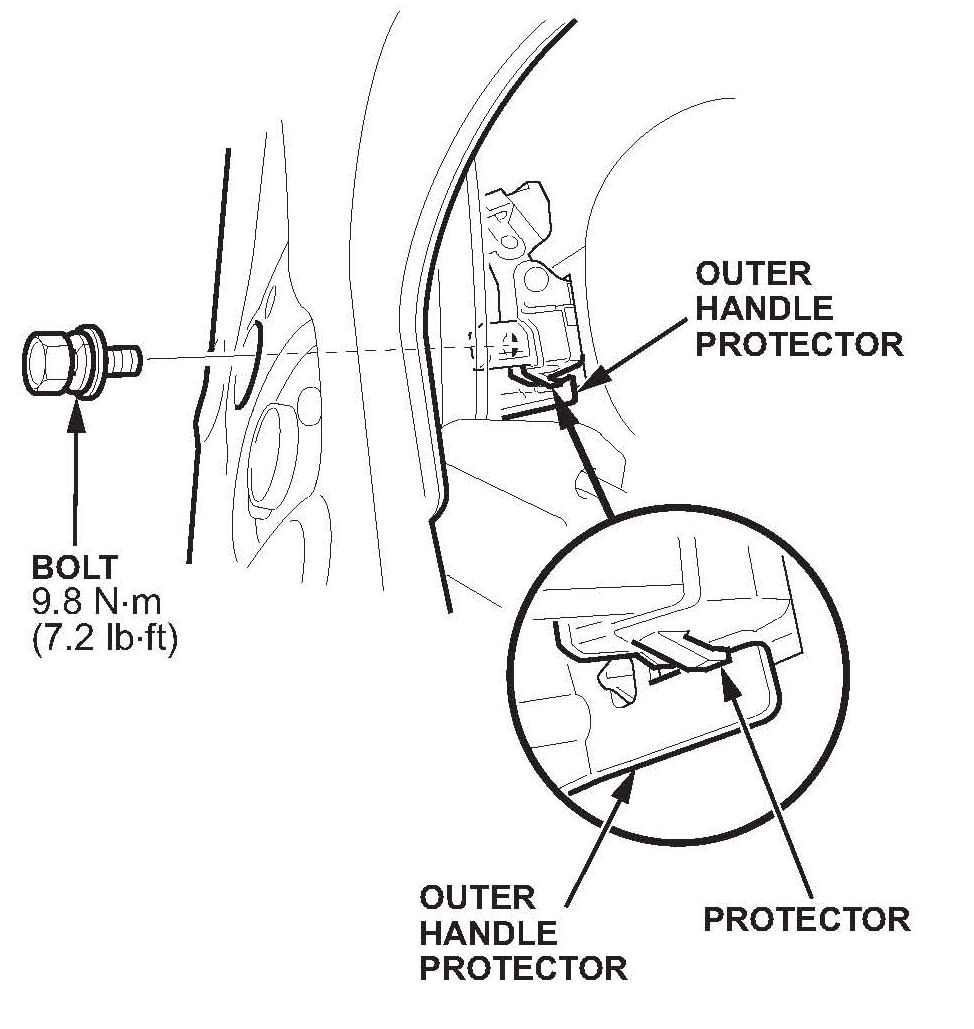
8. Remove the bolt securing the outer handle protector, then remove the protector by releasing the hook.
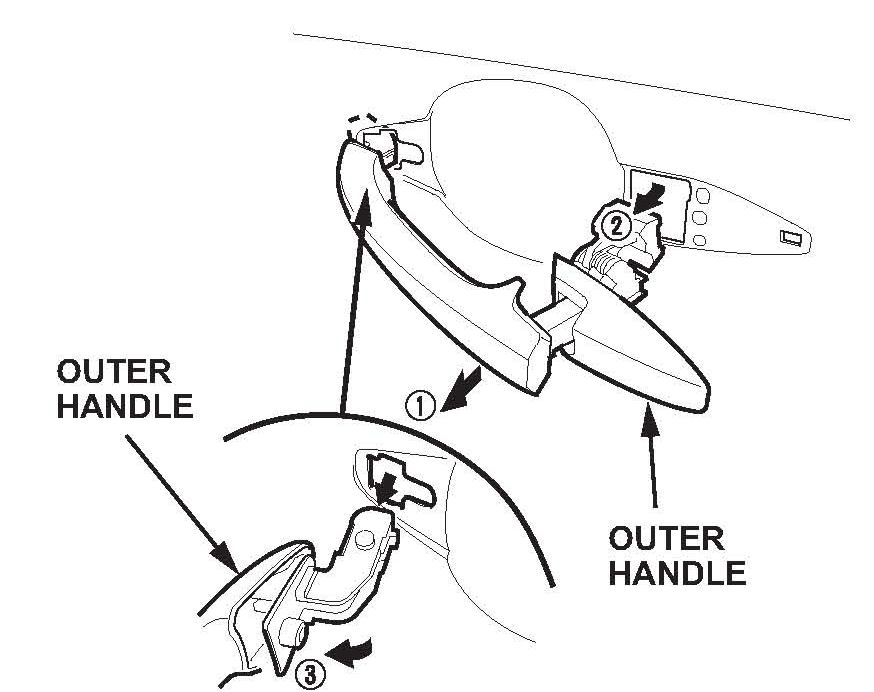
9. While pulling the outer handle, remove it from the holes in the door panel. Take care not to scratch the door.
10. Install the rod fastener and the door handle, then torque the outer handle protector bolt to 9.8 N.m (7.2 lb-ft).
11. Reinstall the spacer, and torque the bolt to 9.8 N.m (7.2 lb-ft).
12. Reinstall the latch, and torque the screws to 6 N.m (4 lb-ft).
13. Reinstall the cap, and reattach the outer handle rod to the rod fastener.
14. Reconnect the power door lock actuator.
15. Reinstall the cap, the plastic cover, and the door panel.

Disclaimer