Interior Trim Removal/Installation - A-Pillar Trim
Interior Trim Removal/Installation - A-Pillar Trim
Special Tools Required
- KTC trim tool set SOJATP2014*
*Available through the Acura Tool and Equipment Program.
A-Pillar Trim
SRS components are located in this area. Review the SRS component locations Locations and the precautions and procedures Service and Repair before doing repairs or service.
NOTE:
- Follow the A-pillar trim installation procedure carefully; improper installation could cause the side curtain airbags to deploy improperly and possibly cause injury.
- Put on gloves to protect your hands.
- Use the appropriate tool from the KTC trim tool set to avoid damage when removing components.
- Take care not to scratch the trim and panels.
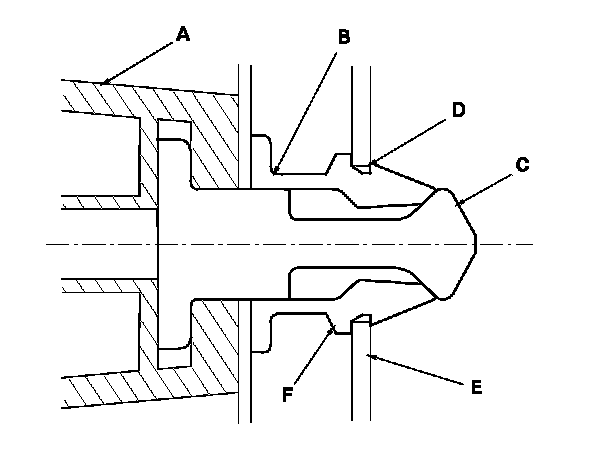
- The upper clip in the A-pillar trim (A) consists of a resin grommet (B) and a metal pin (C). The groove (D) in the grommet secures it to the body panel (E). The shoulder (F) on the grommet is broken during removal, so the clip must be replaced with a new one when the trim is reinstalled.
1. Pull the front door opening seal away from the A-pillar as needed. Interior Trim Removal/Installation - Front Door Sill Area
2. Hit the surface of the A-pillar trim (A) with a rubber mallet. The clip is located under the top of the A-pillar trim near the "SIDE CURTAIN AIRBAG" mark (B). Hitting the trim surface breaks the shoulder (C) on the grommet (D) and pushes the pin (E) and grommet against the body (F).
NOTE: The clip must be replaced with a new one when the A-pillar trim is reinstalled.
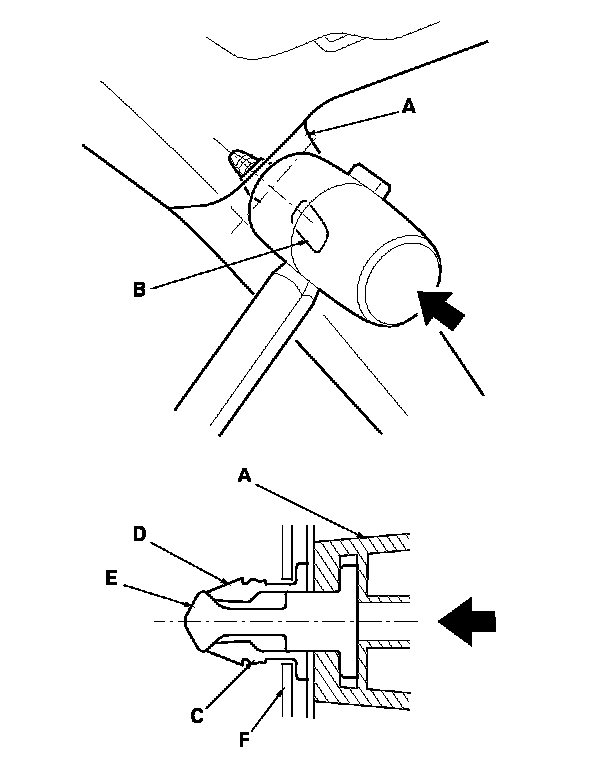
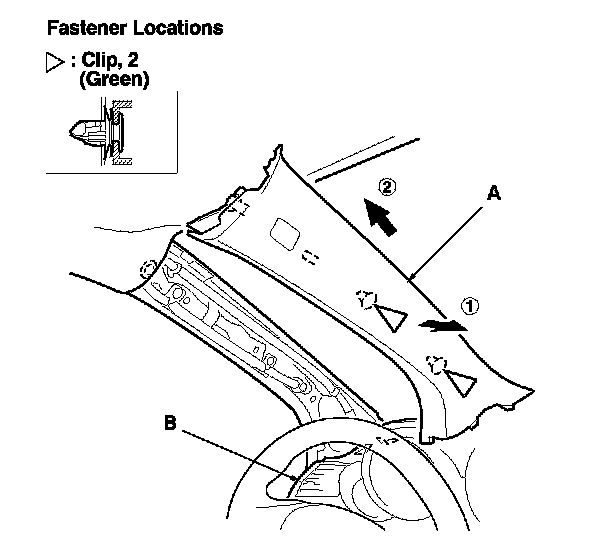
3. Pull the top of the A-pillar trim (A) back by hand to remove the pin (B) from the grommet (C) remaining in the body (D).
NOTE: The edge of the headliner (E) lies between the A-pillar trim and the guide bracket (F) of the trim. The A-pillar trim shouldn't be pulled out too far at a time, or the guide bracket might catch the headliner and bend it.
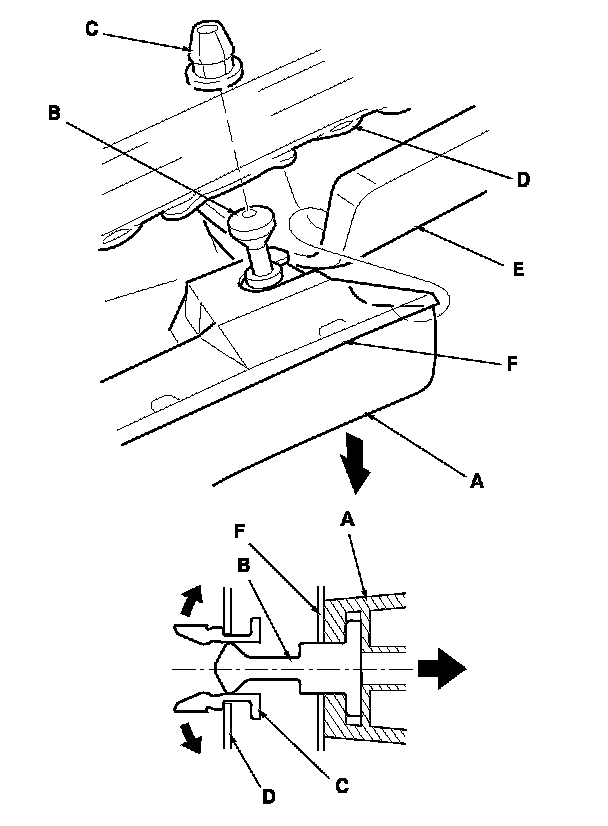
4. Remove the A-pillar trim (A) by hand to detach the remaining clips, then pull the trim up from the dashboard (B).
5. Remove the grommet from the body.
NOTE: The upper grommet must be replaced with a new one because the grommet is damaged during removal.
6. If the side curtain airbag has been deployed, replace the A-pillar trim with a new one. Service and Repair
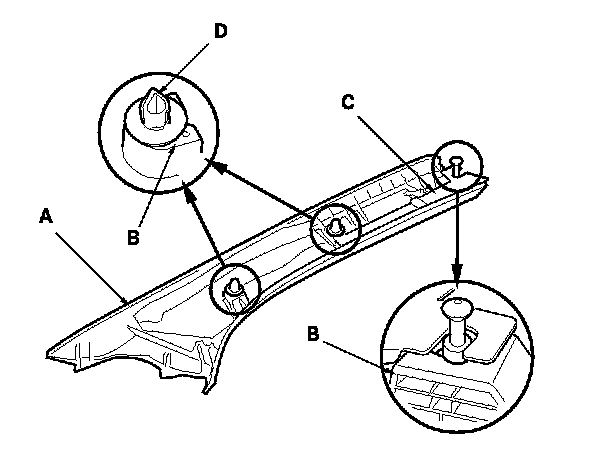
7. If the side curtain airbag has not been deployed, check the A-pillar trim (A) and note the following:
- To prevent the side curtain airbags from deploying improperly and possibly causing injury, inspect the A-pillar trim and replace it if it has any of these types of damage:
- Any cracks, deformations, or stress-whitened areas in the A-pillar trim
- Any cracks or stress-whitening in the clip and pin seating surfaces (B)
- Damaged guide bracket (C)
- Replace the upper grommet with a new one because it will be damaged during removal.
- If the clips (D) are damaged or stress-whitened, replace them with new ones.
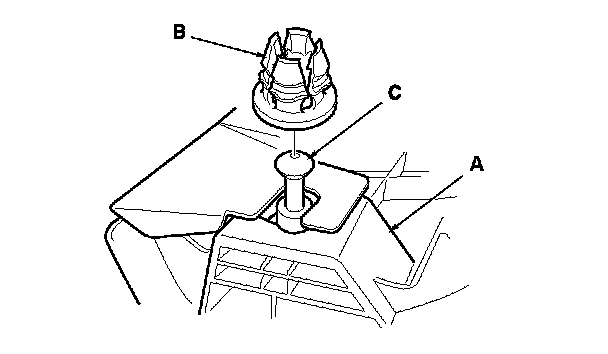
8. Before installing the A-pillar trim (A), carefully remove the grommet (B) from the pin (C) on the upper clip.
9. Check the overlap between the headliner and A-pillar trim, and if necessary, adjust it. Service and Repair
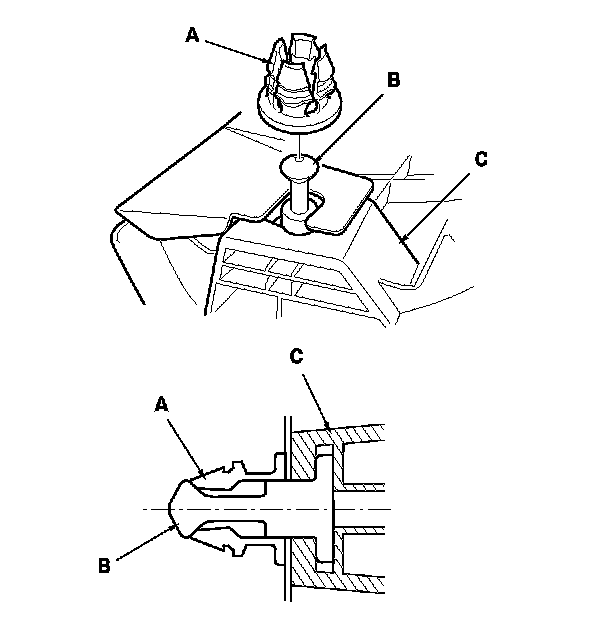
10. Carefully reinstall the grommet (A) on the pin (B) and seat them on the A-pillar trim (C) as shown.
11. Reinstall the A-pillar trim (A).
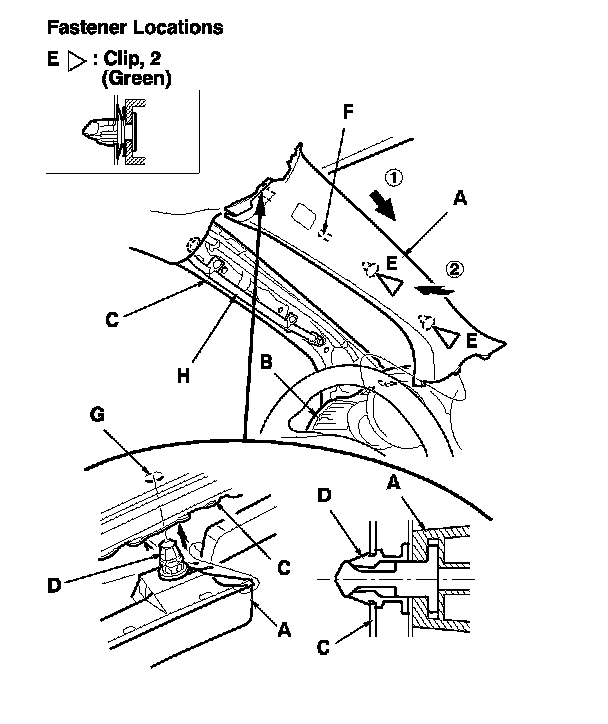
-1 Insert the bottom of the trim into the dashboard (B).
-2 Place the trim over the A-pillar (C), and fit its upper clip (D), the other clips (E) and the pin (F) into holes (G) in the A-pillar, then lightly push the trim into place.
-2 NOTE:
- Make sure that the side curtain airbag tether (H) is below the clip.
- Make sure the side curtain airbag isn't tucked down under the clips and ribs.
- Apply pressure to the areas of the trim on the upper clip until these clip fittings are felt. If you push too hard, the clip will be damaged, and it will not hold the trim properly.
- Make sure the upper clip portions of the trim don't come off the body by tugging on the trim.
12. Reinstall the front door opening seal.