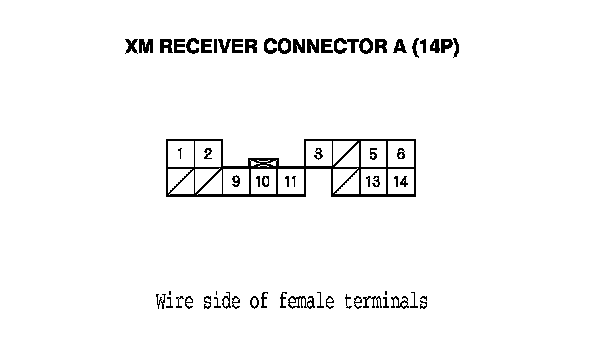
XM Radio Display Is Blank and No Station Information Is Displayed (Without AcuraLink (Except USA With Navigation))
Symptom Troubleshooting: XM radio display is blank and no station information is displayed
XM radio display is blank and no station information is displayed (Without AcuraLink)
NOTE:
- Check the vehicle battery condition first.
- Check the connectors for poor connections or loose terminals.
1. Turn the ignition switch to LOCK (0).
2. Disconnect XM receiver connector A (14P).
3. Measure the voltage between XM receiver connector A (14P) terminal No. 1 and body ground.
Is there battery voltage?
YES - Go to step 4.
NO - Repair open in the wire between the No. 5 (10 A) fuse in the under-dash fuse/relay box and XM receiver connector A (14P) terminal No. 1.
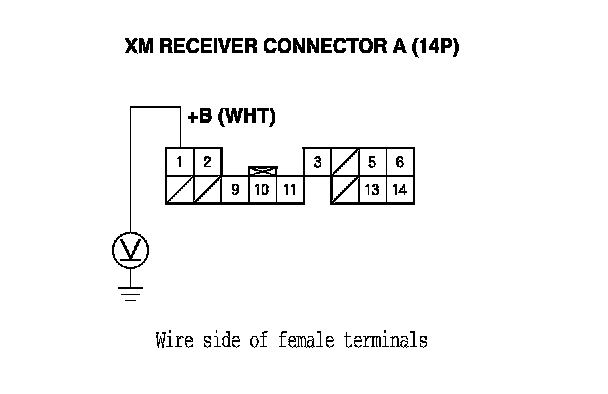
4. Turn the ignition switch to ON (II).
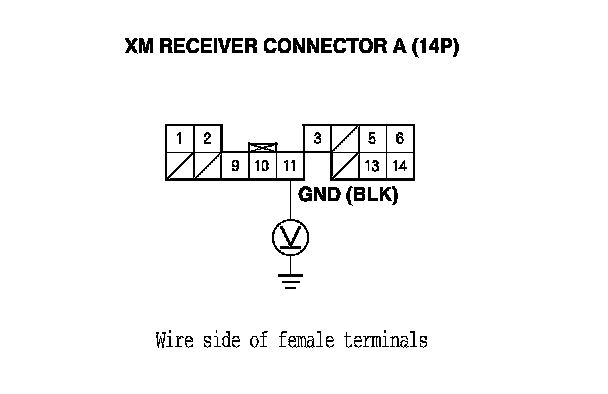
5. Measure the voltage between XM receiver connector A (14P) terminal No. 11 and body ground.
Is there less than 0.1V?
YES - Go to step 6.
NO - Repair open in the wire between XM receiver connector A (14P) terminal No 11 and body ground (G606).
6. Turn the ignition switch to LOCK (0).
7. Reconnect XM receiver connector A (14P).
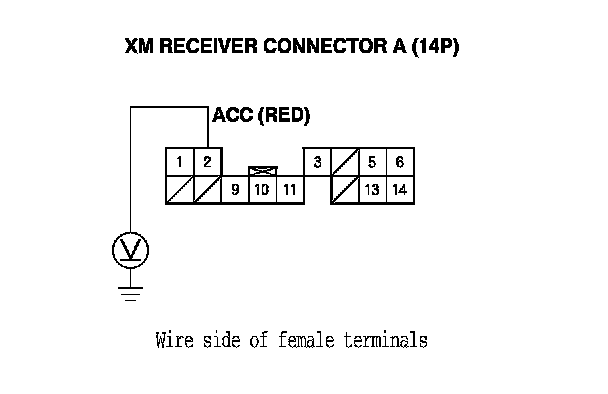
8. Measure the voltage between XM receiver connector A (14P) terminal No. 2 and body ground.
Is there 10 volts or more present?
YES - Go to step 9.
NO - Substitute a known- good XM receiver and recheck. If 10 volts or more are present, replace the original XM receiver. XM Receiver Removal/Installation (Without AcuraLink (Except USA With Navigation))
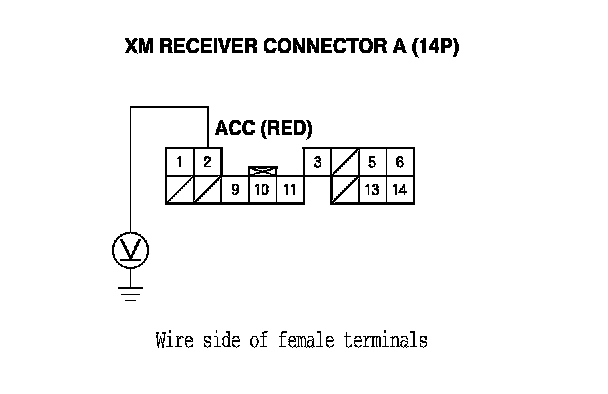
9. Turn the ignition switch to ON (II).
10. Measure the voltage between XM receiver connector A (14P) terminal No. 2 and body ground.
Is there less than 0.5V?
YES - Go to step 11.
NO - Substitute a known- good audio unit, and recheck. If 0.5 volts or less are present, replace the original audio unit. Audio Unit Removal/Installation
11. Turn the ignition switch to LOCK (0).
12. Disconnect audio unit connector D (14P), XM receiver connector A (14P), navigation unit connector A (20P), and navigation display unit 20P connector.
13. Check for continuity between the following terminals of the audio unit connector D (14P) and XM receiver A (14P).
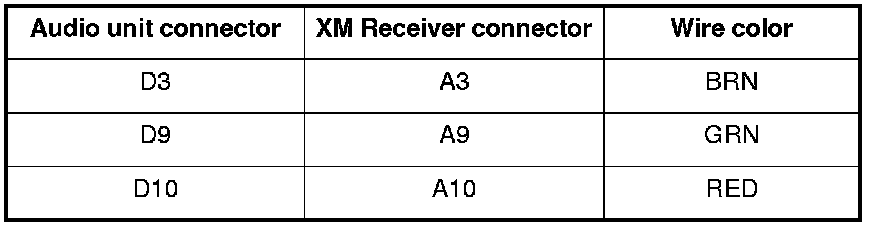
Is there continuity?
YES - Go to step 14.
NO - Repair open in the wire(s) between audio unit and XM receiver.
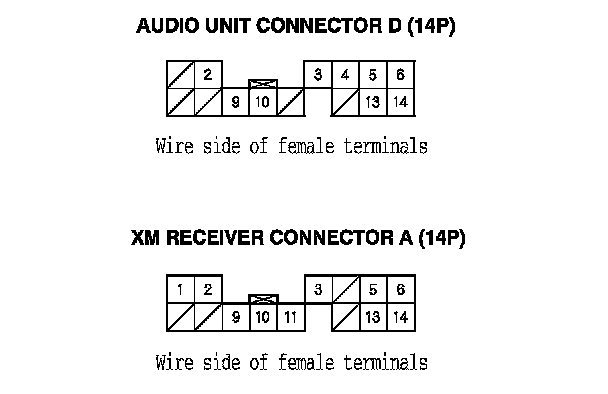
14. Check for continuity between body ground and XM receiver connector A (14P) terminals No. 9 and No. 10 individually.
Is there continuity?
YES - Repair short to body ground in the wire(s) between the audio unit and the XM receiver or a short between the shield wires (replace the applicable shielded harness).
NO - Go to step 15.
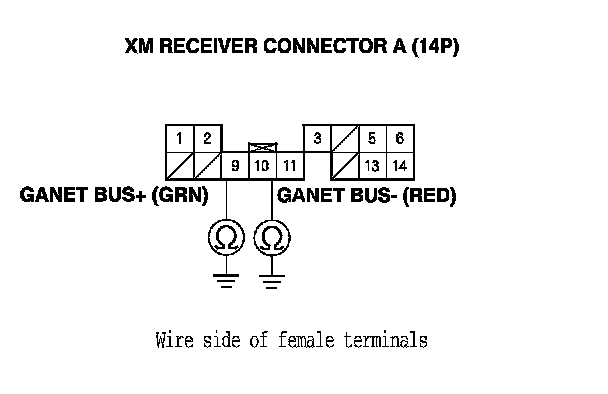
15. Check for continuity between the terminals of XM receiver connector A (14P) according to the cable.
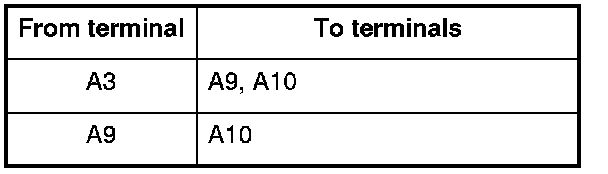
Is there continuity between any of the terminals?
YES - Repair short in the wire(s) between the audio unit and the XM receiver (replace the appropriate shield harness).
NO - Substitute a known-good audio unit, and recheck. If the symptom/indicated goes away, replace the original audio unit. Audio Unit Removal/Installation If the symptom is still present, substitute a known-good XM receiver, and recheck. If the symptom/indicated goes away, replace the original XM receiver. AcuraLink Control Unit (XM Receiver) Removal/Installation (With AcuraLink (USA With Navigation))