Audio Unit Removal/Installation
Audio Unit Removal/Installation
SRS components are located in this area. Review the SRS component locations, Locations and the precautions and procedures Service and Repair before doing repairs or service.
NOTE:
- Put on gloves to protect your hands.
- Take care not to scratch the dashboard and related parts.
- Lay a workshop towel under the parts when working on them to protect the face panel from scratches or other damage.
- Eject all the disc before remove the audio unit to prevent damaging the CD/DVD player's load mechanism.
- If you are replacing the audio unit, write down the audio presets (if possible), and enter them into the new audio unit.
1. Make sure you have the anti-theft codes for the audio system and the navigation system (if equipped).
2. Remove the driver's inner dashboard trim, Driver's Inner Dashboard Trim Removal/Installation and front passenger's dashboard trim. Dashboard Center Pocket Removal/Installation
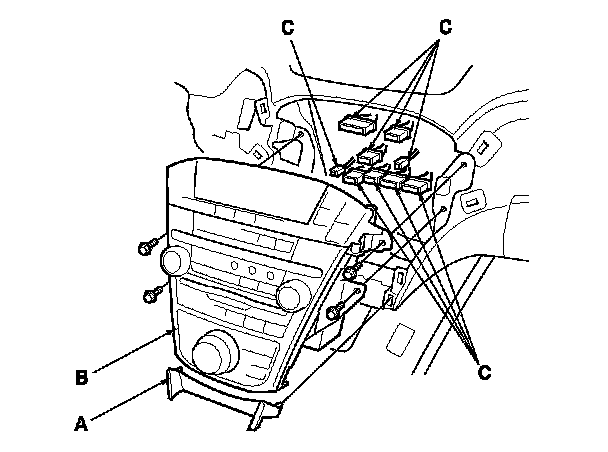
3. Remove the console lower trim panel (A) and the self tapping screws, then pull out the audio unit (B).
4. Disconnect the connectors (C), then remove the audio unit.
5. Remove the climate control unit. Climate Control Unit Removal/Installation
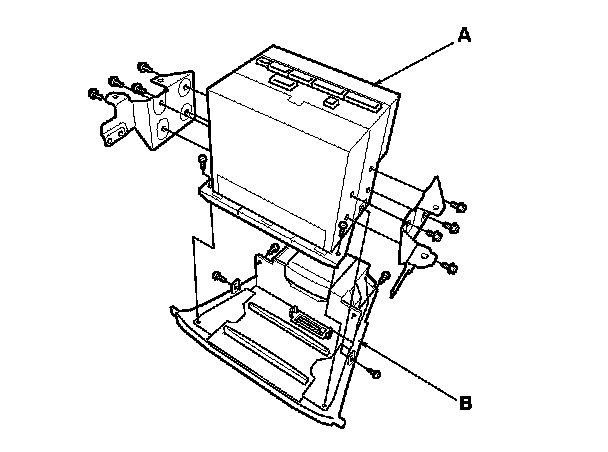
6. Remove the screws and the audio unit (A) from the audio panel (B).
7. Install the audio unit in the reverse order of removal, and note these items:
8. Give the new anti-theft codes to the client.
- Make sure all the connectors and the antenna lead are secure.
- Enter anti-theft codes for the audio system and the navigation system (if equipped).
- Set the clock (on vehicles without navigation).
- If necessary, enter the navigation system code.