34-9x
SRS DTC Troubleshooting: 34-9x (x can be 0 thru 9 or A thru F)
DTC 34-9x ("x" can be 0 thru 9 or A thru F):Short to Ground in Right Side Curtain Airbag Inflator
Special Tools Required
- SRS inflator simulator 07SAZ-TB4011A
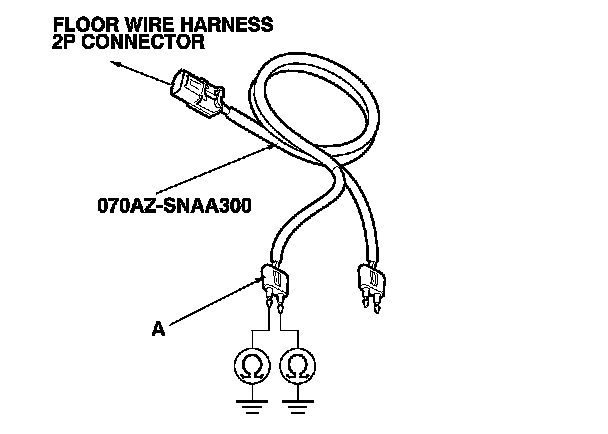
- SRS simulator lead L 070AZ-SNAA300
NOTE: Before doing this troubleshooting procedure, review SRS Precautions and Procedures, Service and Repair General Troubleshooting Information, Initial Inspection and Diagnostic Overview and Battery Terminal Disconnection and Reconnection. Procedures
1. Clear the DTC memory. Initial Inspection and Diagnostic Overview
2. Turn the ignition switch to ON (II), and check that the SRS indicator comes on for about 6 seconds and then goes off.
Does the SRS indicator stay on, and is DTC 34-9x indicated?
YES - Go to step 3.
NO - Intermittent failure, the system is OK at this time. Go to Troubleshooting Intermittent Failures. Initial Inspection and Diagnostic Overview If another DTC is indicated, troubleshoot the DTC.
3. Turn the ignition switch to LOCK (0). Disconnect the negative cable from the battery, then wait for 3 minutes.
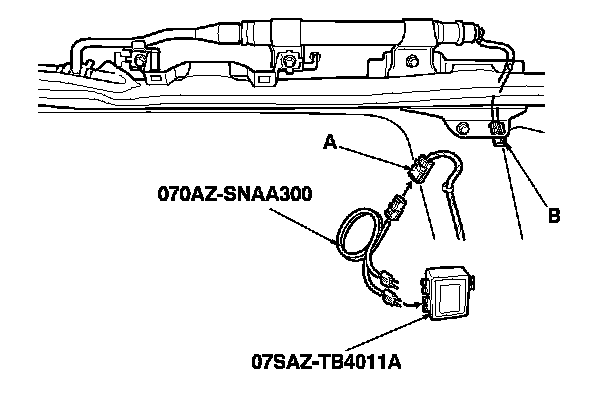
4. Remove the right side quarter pillar trim, Interior Trim Removal/Installation - Quarter Pillar Trim then disconnect the floor wire harness 2P connector (A) from the right side curtain airbag connector (B).
5. Connect the SRS inflator simulator (2 Ohms connectors) and simulator lead L to the floor wire harness.
6. Reconnect the negative cable to the battery.
7. Clear the DTC memory.
8. Read the DTC. Initial Inspection and Diagnostic Overview
Is DTC 34-9x indicated?
YES - Go to step 9.
NO - Short to ground in the right side curtain airbag inflator; replace the right side curtain airbag. Side Curtain Airbag Replacement
9. Turn the ignition switch to LOCK (0). Disconnect the negative cable from the battery, then wait for 3 minutes.
10. Disconnect both seat belt tensioner 4P connectors. Service and Repair
11. Disconnect SRS unit connector B (28P) from the SRS unit. Service and Repair
12. Disconnect the SRS inflator simulator from the SRS simulator lead. Do not disconnect the simulator lead from the floor wire harness 2P connector.
13. Measure the resistance between each terminal of the black SRS simulator lead (A) and body ground. There should be an open circuit or at least 1 MOhms.
Is the resistance as specified?
YES - Faulty SRS unit or poor connection at SRS unit connector B (28P) and the SRS unit. Check the connection; if the connection is OK, replace the SRS unit. SRS Unit Replacement
NO - Short to ground in the floor wire harness; replace the floor wire harness.