B1826
DTC Troubleshooting: B1826
DTC B1826: Power Seat Front Up-down Motor Pulse Error
NOTE: If you are troubleshooting multiple DTCs, be sure to follow the instructions in B-CAN System Diagnosis Test Mode A. Troubleshooting - B-CAN System Diagnosis Test Mode A
DTC B1826 is stored when the front up-down switch is operated more than 1 second after the seat moves to the most up or most down position, even when the system is OK.
1. Turn the ignition switch to LOCK (0) and then back ON (II).
2. Clear the DTCs with the HDS.
3. Operate the power seat adjustment switch in all directions for more than 1 second each.
4. Check for the DTCs with the HDS.
Is DTC B1826 indicated?
YES - Go to step 5.
NO - Intermittent failure, the front up-down motor/position sensor is OK at this time. Check for loose or poor connections at the power seat control unit connectors.
5. Check for DTCs with the HDS.
Is DTC B1836 also indicated?
YES - Troubleshoot DTC B1836 first.
NO - Go to step 6.
6. Check for DTCs with the HDS.
Are DTCs B1825, B1827 and/or B1828 also indicated?
YES - Go to step 17.
NO - Go to step 7.
7. Turn the ignition switch to LOCK (0) and then back ON (II).
8. Operate the front up-down switch for 2 seconds, and check the front up-down motor operation.
Does the front up-down motor run smoothly?
YES - Go to step 9.
NO - Go to step 26.
9. Turn the ignition switch to LOCK (0).
10. Disconnect power seat control unit connector A (40P).
11. Disconnect the front up-down position sensor 4P connector.
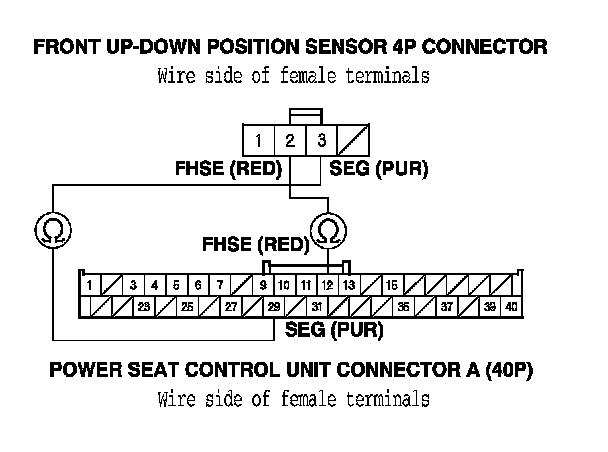
12. Check for continuity between the power seat control unit connector A (40P) terminals No. 12 and No. 29 and the front up-down position sensor 4P connector terminals No. 2 and No. 3 respectively.
Is there continuity?
YES - Go to step 13.
NO - Repair open in the wire.
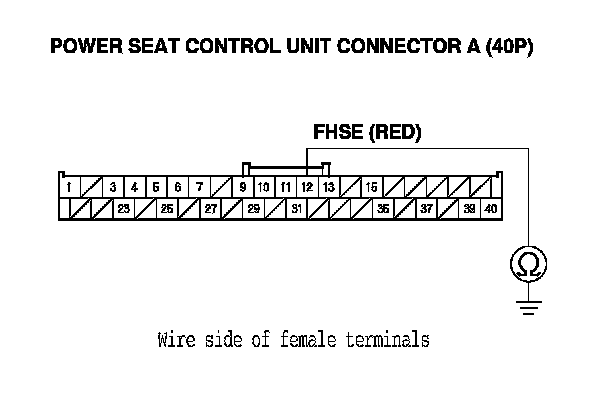
13. Check for continuity between the power seat control unit connector A (40P) terminal No. 12 and body ground.
Is there continuity?
YES - Repair short to ground in the wire.
NO - Go to step 14.
14. Reconnect power seat control unit connector A (40P).
15. Turn the ignition switch to ON (II).
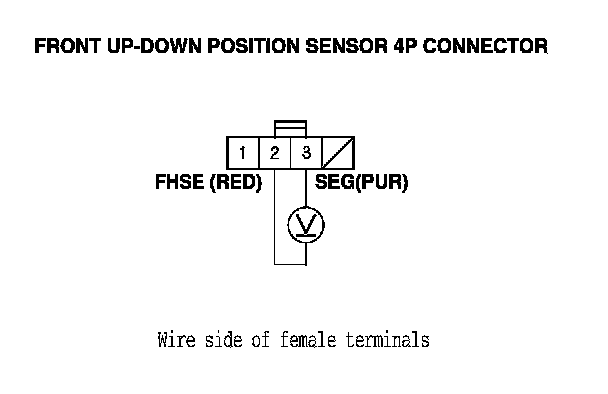
16. Measure the voltage between the front up-down position sensor 4P connector terminals No. 2 (+) and No. 3 (-).
Is there about 5 V?
YES - Faulty front up-down position sensor, replace the front up-down motor.
NO - If there is no voltage, replace the power seat control unit. If there is battery voltage, repair a short in the wire (sensor line).
17. Turn the ignition switch to LOCK (0).
18. Disconnect power seat control unit connector A (40P).
19. Disconnect the front up-down position sensor 4P connector.
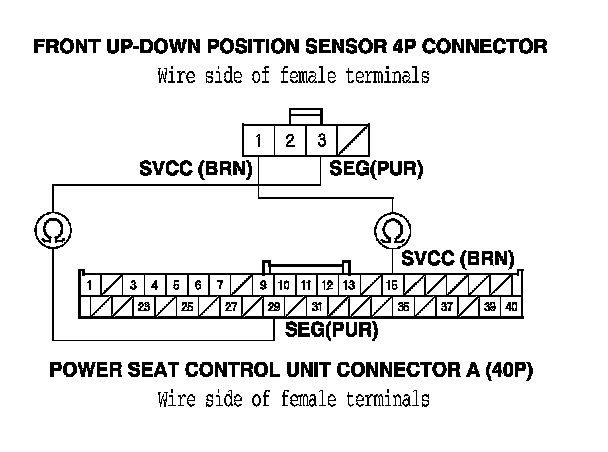
20. Check for continuity between the power seat control unit connector A (40P) terminals No. 15 and No. 29 and the front up-down position sensor 4P connector terminals No. 1 and No. 3 respectively.
Is there continuity?
YES - Go to step 21.
NO - Repair open in the wire.
21. Disconnect the 4P connector from the slide position sensor and the rear up-down position sensor, then disconnect the recline motor/lumbar support motor 8P connector.
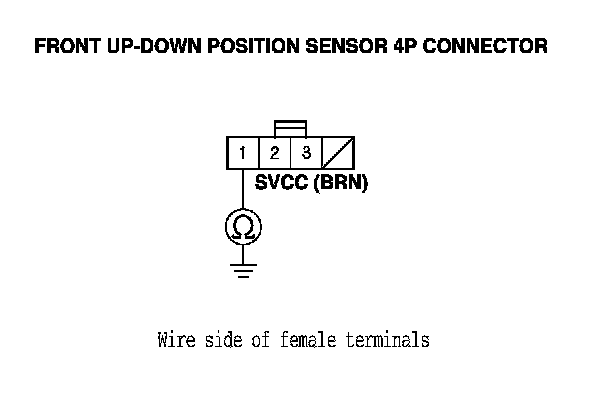
22. Check for continuity between body ground and the front up-down position sensor 4P connector terminal No. 1.
Is there continuity?
YES - Repair short to ground in the wire.
NO - Go to step 23.
23. Reconnect power seat control unit connector A (40P).
24. Turn the ignition switch to ON (II).
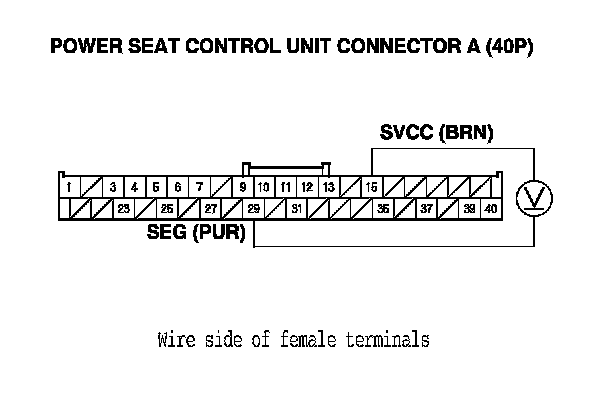
25. Measure the voltage between the power seat control unit connector A (40P) terminals No. 15 and No. 29.
Is there battery voltage when the front up-down switch is operated?
YES - Replace the front up-down motor/position sensor.
NO - Replace the power seat control unit.
26. Turn the ignition switch to LOCK (0).
27. Disconnect power seat control unit connector B (18P).
28. Disconnect the front up-down motor 2P connector.
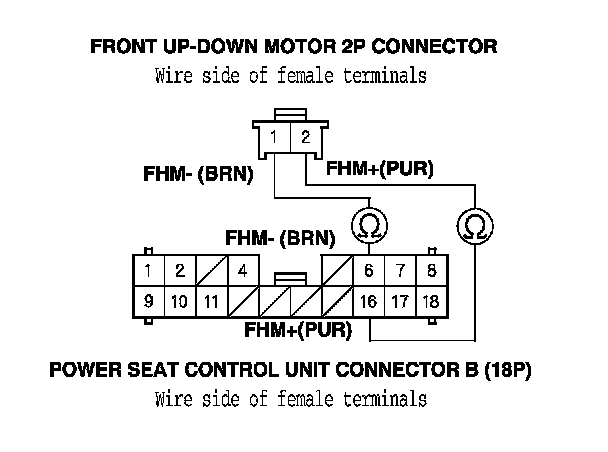
29. Check for continuity between the power seat control unit connector B (18P) terminals No. 6 and No. 16 and the front up-down motor 2P connector terminals No. 1 and No. 2 respectively.
Is there continuity?
YES - Go to step 30.
NO - Repair open in the wire.
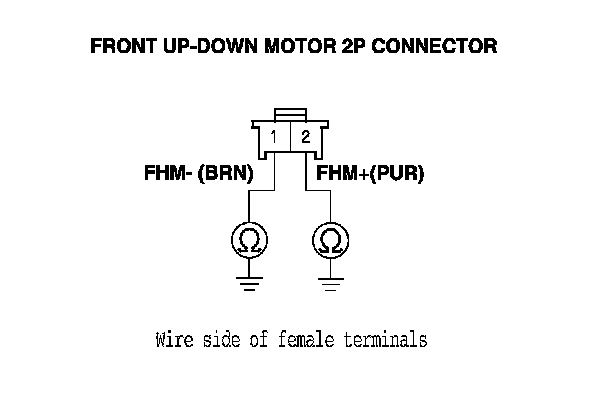
30. Check for continuity between body ground and the front up-down motor 2P connector terminals No. 1 and No. 2 individually.
Is there continuity?
YES - Repair short to ground in the wire.
NO - Go to step 31.
31. Test the front up-down motor. Driver's Power Seat Motor Test
Is the motor OK?
YES - Replace the power seat control unit.
NO - Replace the front up-down motor/position sensor.