Radiator and Fan Replacement
- Make sure you have the anti-theft code for the audio system or the navigation system, then write down the audio presets.
- Disconnect the negative cable from the battery first, then disconnect the positive cable.
- Remove the battery.
- Drain the engine coolant (see COOLANT CHECK
).
- Remove the bulkhead cover (see
FRONT BUMPER REMOVAL/INSTALLATION
).
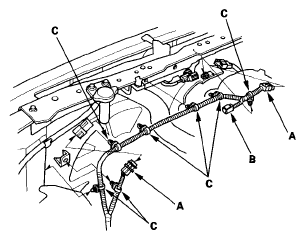
- Disconnect the fan motor connectors (A) and hood switch connector (B), then remove the harness clamps (C).
 Courtesy of AMERICAN HONDA MOTOR CO., INC.
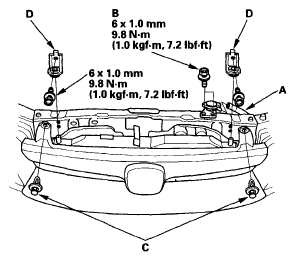
- Remove the reservoir hose (A), radiator cap base mounting bolts (B), clips (C), and radiator upper brackets (D).
 Courtesy of AMERICAN HONDA MOTOR CO., INC.
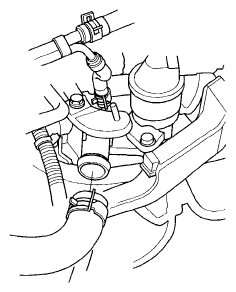
- Remove the upper radiator.
 Courtesy of AMERICAN HONDA MOTOR CO., INC.
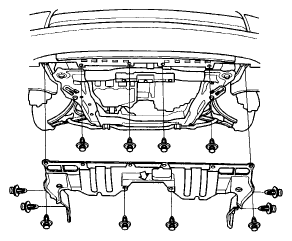
- Remove the splash shield.
 Courtesy of AMERICAN HONDA MOTOR CO., INC.
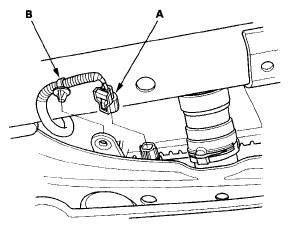
- Disconnect the engine coolant temperature (ECT) sensor 2 connector (A), and remove the harness clamp (B).
 Courtesy of AMERICAN HONDA MOTOR CO., INC.
- Remove the lower radiator hose from the radiator (see LOWER RADIATOR HOSE REMOVAL AND INSTALLATION
).
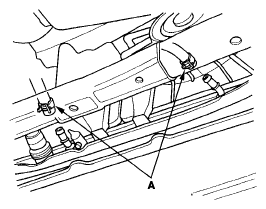
- A/T model: Remove the automatic transmission fluid (ATF) cooler hoses (A), then plug the hoses.
 Courtesy of AMERICAN HONDA MOTOR CO., INC.
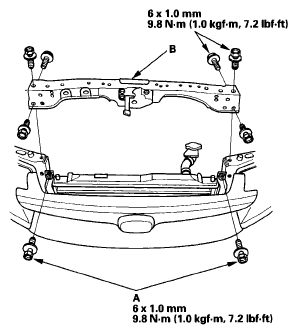
- Remove the condenser bracket mounting bolts (A), then remove the bulkhead (B).
 Courtesy of AMERICAN HONDA MOTOR CO., INC.
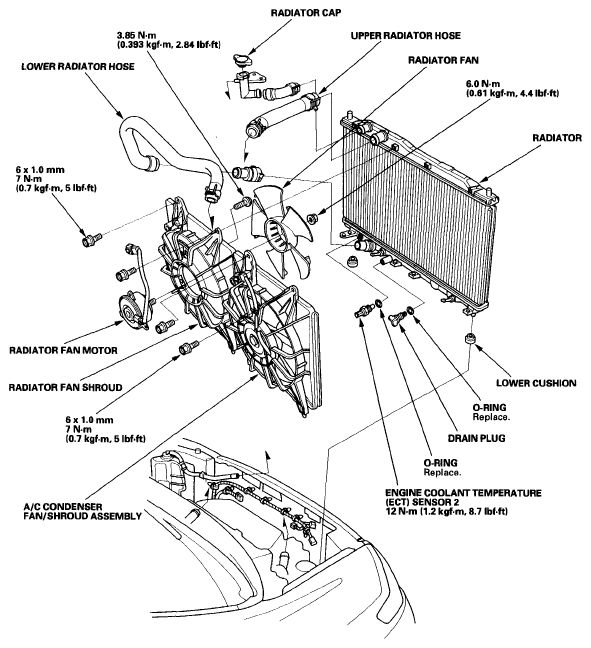
- Pull up the radiator, then remove the fan shroud assemblies and other parts from the radiator.
 Courtesy of AMERICAN HONDA MOTOR CO., INC.
- Install the radiator in the reverse order of removal. Make sure the upper and lower cushions are set securely.
- Install the lower radiator hose to the radiator (see LOWER RADIATOR HOSE REMOVAL AND INSTALLATION
).
- Install the bulkhead in the reverse order of removal. Apply body paint to the bulkhead mounting bolts.
- Fill the radiator with engine coolant and bleed the air (see step 6 on
).