Wiper Motor Replacement
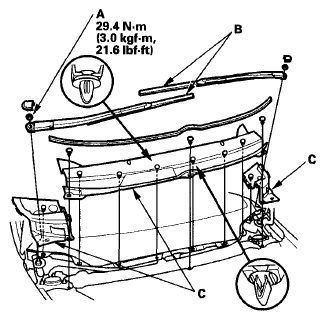
- Open the hood. Remove the caps, nuts (A), and the windshield wiper arms (B).
 Courtesy of AMERICAN HONDA MOTOR CO., INC.
- Remove the cowl covers (C).
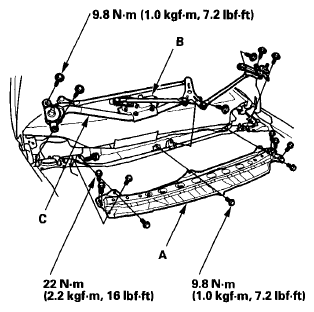
- Remove the bolts and the under-cowl panel (A).
 Courtesy of AMERICAN HONDA MOTOR CO., INC.
- Disconnect the 5P connector from the wiper motor (B), then remove the six bolts and wiper linkage assembly (C).
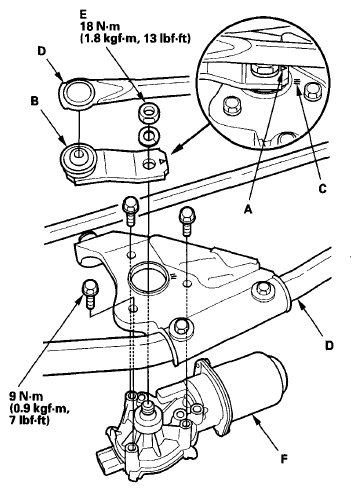
- Make sure the mark (A) on the link (B) is aligned with the mark (C) on the windshield wiper linkage (D).
 Courtesy of AMERICAN HONDA MOTOR CO., INC.
- Remove the nut (E), and separate the link and windshield wiper linkage.
- Remove the three bolts, and separate the windshield wiper linkage from the wiper motor (F).
- Install in the reverse order of removal, and note these items:
- Align the marks of the link and the linkage to install the linkage with the original adjustment.
- Apply multipurpose grease to the moving parts.
- Before installing the wiper arms, turn the wiper switch ON, then OFF to return the wiper shafts to the park position.
- If necessary, replace any damaged clips.
- After installation, adjust the wiper arms (see
WIPER ARM/NOZZLE ADJUSTMENT ).