Reading and Clearing Diagnostic Trouble Codes
General Troubleshooting InformationHow to Check for DTCs with the HDS
1. Make sure the ignition switch is in LOCK (0).
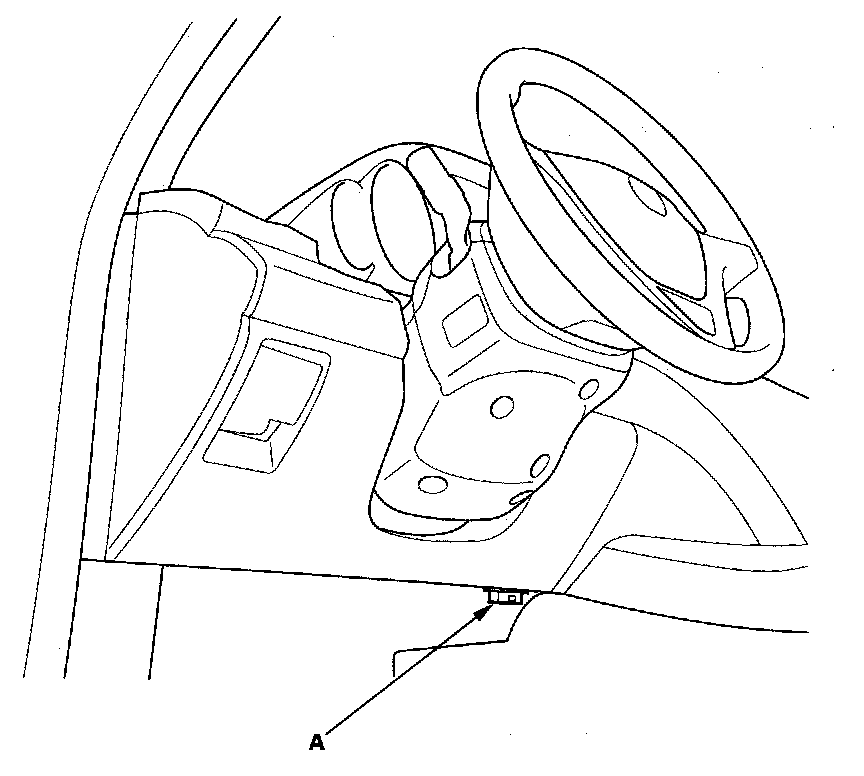
2. Connect the HDS to the data link connector (DLC) (A) located under the driver's side of the dashboard.
3. Turn the ignition switch to ON (II).
4. Make sure the HDS communicates with the vehicle and the AcuraLink control unit (XM receiver). If it doesn't, troubleshoot the DLC circuit.
5. Select XM/HIP in the BODY ELECTRICAL menu.
6. Select DTCs in the XM/HIP menu.
7. Check for DTCs. If any DTCs are indicated, write down the DTCs, then go to the indicated DTC troubleshooting. If no DTCs are indicated, refer to symptom troubleshooting. AcuraLink
NOTE: After troubleshooting, clear the DTCs with the HDS.
Deleting the AcuraLink Messages (with the HDS)
To delete all messages including Recall and Diagnostic Info:
1. Connect the HDS to the data link connector (DLC).
2. Using the HDS, go to the BODY ELECTRICAL menu, select XM/HIP, then select HIP RESET menu, select DTC Log Data Clear and follow the HDS on screen instructions.
Deleting the AcuraLink Messages (without HDS) (To delete a single message)
NOTE: Diagnostic info and recall/campaign messages can only be deleted with HDS.
1. Press the INFO button to bring up the Information screen.
2. Scroll to the Message option, then select it by pressing ENTER on the interface selector.
3. Select the message category that contains the message you want to delete.
4. Use the interface knob to scroll up or down to the message title you want to delete, and select it by pressing ENTER on the interface selector.
5. Scroll to Delete with the interface knob, and select it by pressing ENTER on the interface selector.
Deleting the AcuraLink Messages (without HDS) (To delete all message)
NOTE: The Delete All Messages command does not apply to Diagnostic Info and Recall messages. They can only be deleted with HDS.
1. Press the SETUP button to view the setup screen.
2. Select MORE by pushing the interface selector to the right.
3. Use the interface knob to scroll to the AcuraLink/Messages button, and select it by pressing ENTER on the interface selector.
4. Scroll to the Delete Messages option, and select it by pressing ENTER on the interface selector.
5. Scroll to the category with the messages you want to delete, and select the category by pressing ENTER on the interface selector.
Updating the AcuraLink control unit
Special Tools Required
- GNA600 kit and an iN workstation with AcuraLink update software
- 256MB PCMCIA Memory Card
- AcuraLink Reprogramming Cable
- AcuraLink Reprogramming Cable Adapter
NOTE:
- Whenever you install a new AcuraLink control unit, you must update the control unit with the latest software.
- The GNA 600 is the only tool currently available to update the AcuraLink control unit.
- If you are updating a control unit in a new vehicle, make sure all the fuses are installed.
- Make sure the iN workstation has the latest HDS software installed. (The AcuraLink update software is contained in the HDS update CD.)
- The update may take up to 60 minutes.
- You cannot update an AcuraLink control unit with its current or previous software versions. It will only accept a new software version.
- Before you update the AcuraLink control unit, test the vehicle battery, and only proceed if the results are good. Make sure the battery is connected to a battery booster (not a battery charger) while updating the control unit. If the battery is not in good condition, or it dies during the updating procedure, you may damage the AcuraLink control unit.
- If you encounter errors in the software, follow the on-screen instructions, or if necessary, reboot the iN workstation, and try again.
- There are five process involved in updating the AcuraLink control unit:
- Setting up the GNA600
- Capturing the current program ID from the AcuraLink control unit
- Download the new software to the GNA600
- Update the software in the vehicle's AcuraLink control unit
- Confirm the AcuraLink self-diagnosis
- Do the update with the ignition switch turned to LOCK (0).
- To prevent damage to the AcuraLink control unit, do not operate anything electrical (brakes, head lights, etc.) during the update.
- Check any official Honda service website for more service information about updating the AcuraLink control unit.
- To update the AcuraLink control unit, you must connect the GNA600 to the AcuraLink connector (A), not the DLC.
- Before you update an AcuraLink control unit, read the procedure. The order of connecting and disconnecting connectors is critical, and some steps must be done within a specified period of time. If the steps are not followed exactly, you may have to repeat the procedure from the start, and in same cases, you may damage the GNA600 or the AcuraLink control unit.
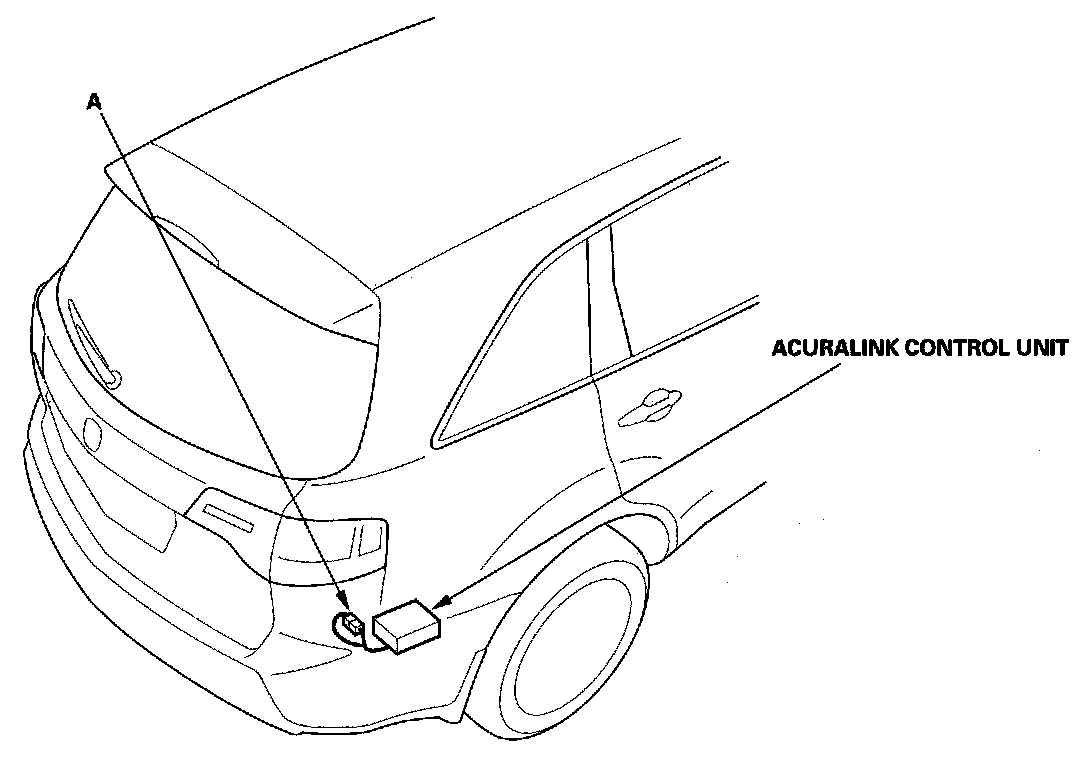
1. Make sure the ignition switch is turned to LOCK (0).
2. Remove the right rear side trim panel.
3. Launch the AcuraLink Update program and follow the on-screen instructions to complete the update.
NOTE:
- If the software in the AcuraLink control unit is the latest, disconnect the update tool from the AcuraLink connector.
- If the update is part of a troubleshooting or a repair procedure, return to that procedure and continue troubleshoot or repairing the vehicle.