Rear Door Panel: Service and Repair
Rear Door Panel Removal/InstallationSpecial Tools Required
KTC trim tool set SOJATP2014 *
Trim pad remover. Snap-on A 177A or equivalent, commercially available
* Available through the American Honda Tool and Equipment Program
NOTE: Use the appropriate tool from the KTC trim tool set to avoid damage when removing components.
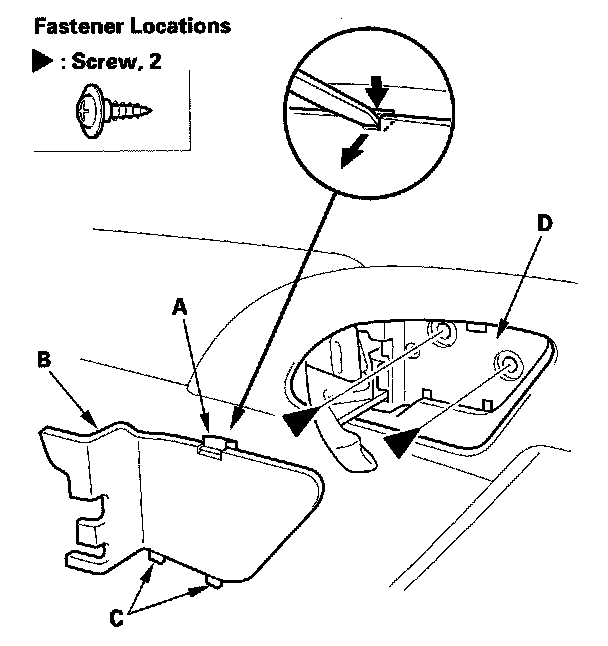
1. Using a trim tool, push on the upper hook (A) and pivot the inner handle cap (B) on the bottom hooks (C), then remove the cap and the screws securing the inner handle (D).
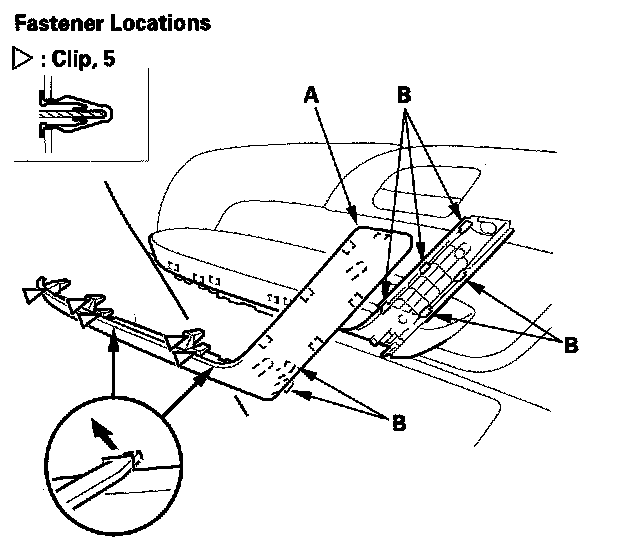
2. Pry out the bottom edge of the grip cover (A) at the notches with the trim tool to detach the clips and to release the hooks (B). Then remove the cover.
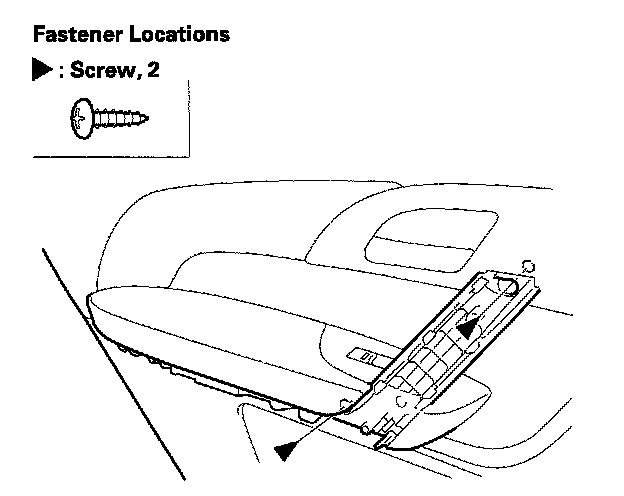
3. Remove the screws.
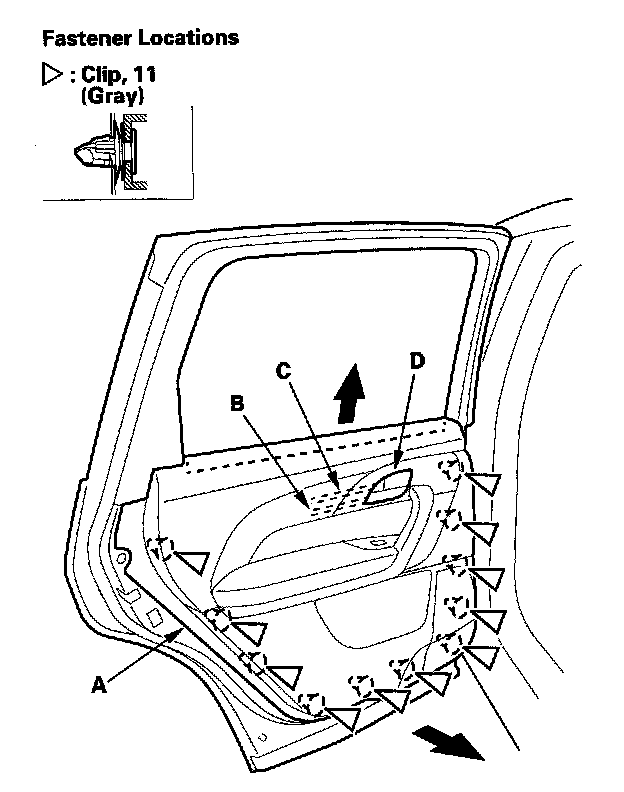
4. Remove the door panel (A) with as little bending as possible to avoid creasing or breaking it.
1. Start at the bottom edge of the door panel, release the clips with a commercially available trim pad remover.
2. Detach the upper clips.
3. Stating at the rear, pull the door panel upward.
NOTE: The inner handle cable (B) and latch cable (C) are connected to the inner handle (D). Do not pull the door panel up too far, or the cables will be damaged.
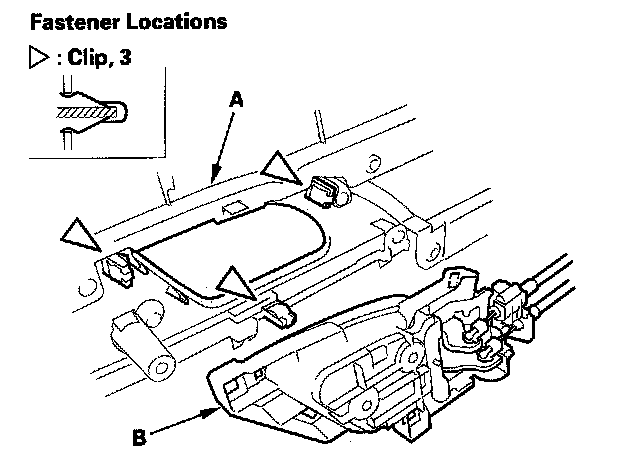
5. While holding the door panel (A) away from the door, remove the inner handle (B) from the door panel by detaching the clips.
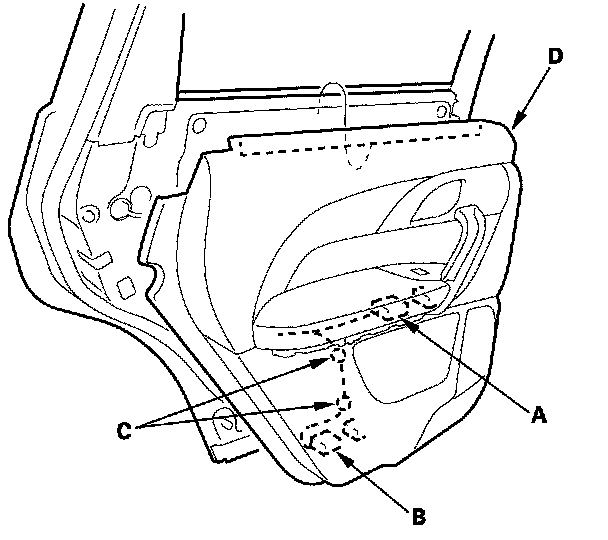
6. Disconnect the power window switch connector (A) and courtesy light connector (B), detach the harness clips (C), then remove the door panel (D).
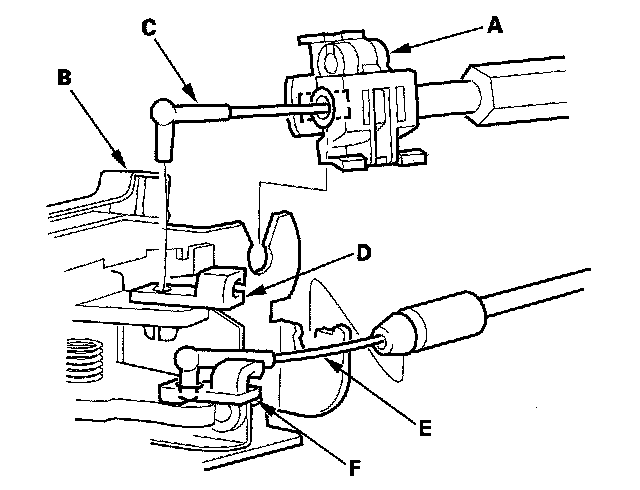
7. Remove the latch cable fastener (A) from the inner handle (B), and then disconnect the latch cable (C) from the cable fastener (D). Disconnect the inner handle cable (E) from the cable fastener (F), then remove the inner handle.
NOTE: Check if the cable fasteners are damaged or stress-whitened.
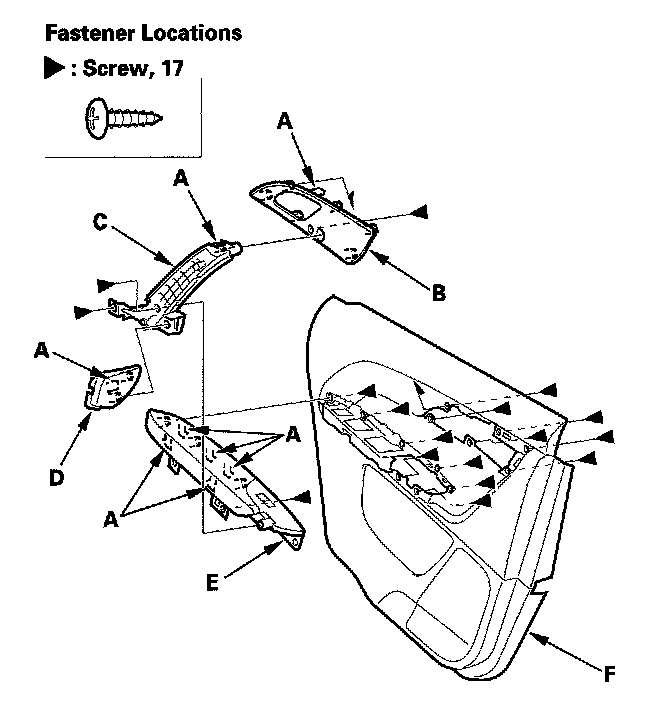
8. Remove the screws and release the hooks (A), then remove the wood trim (B), the door grip (C), armrest cover (D) and the armrest assembly (E) from the door panel (F).
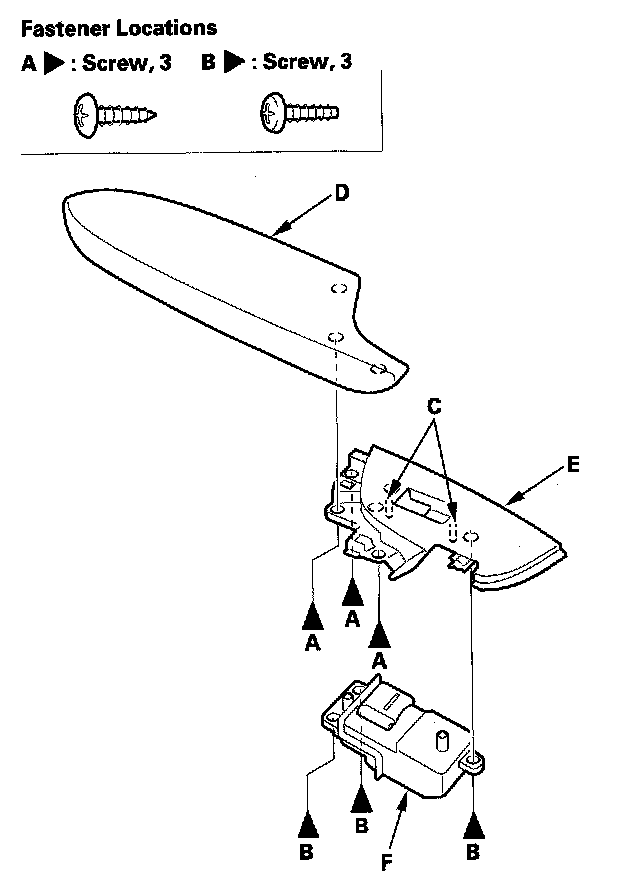
9. Remove the screws (A, B) and release the pins (C), then separate the armrest (D), the power window switch panel (E), and the power window switch (F).
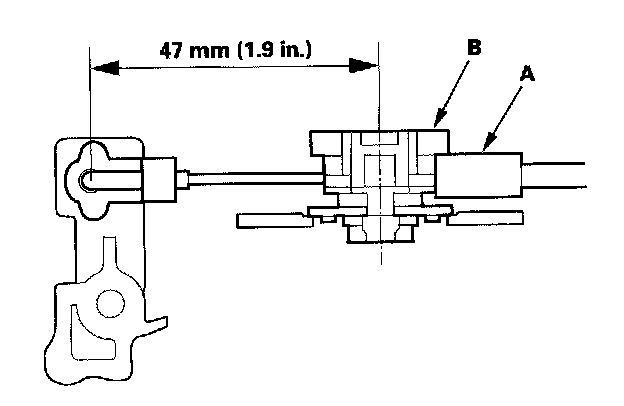
10. Install the door panel in the reverse order of removal, and note these items:
- If the clips are damaged or stress-whitened, replace them with new ones.
- Replace any damaged cable fasteners with new ones.
- The latch cable (A) should be fixed to the cable fastener (B) with the latch in the unlocked position as shown.
- Make sure the connectors are plugged in properly, and the cables are connected securely.
- Make sure the window and power door lock operate properly.