Molding Replacement
- Remove the cowl cover (see COWL COVER REPLACEMENT
).
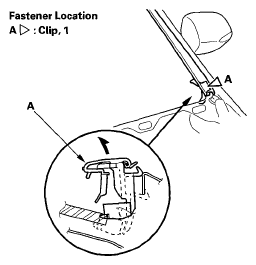
- Detach the bottom clip (A) at the lower corner of the windshield.
 Courtesy of AMERICAN HONDA MOTOR CO., INC.
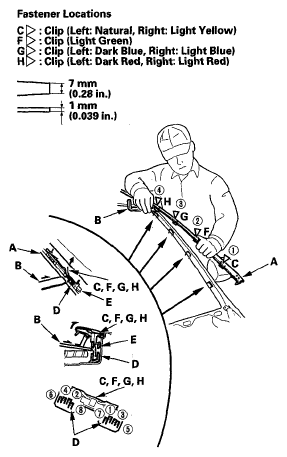
- Remove the windshield portion of the roof molding (A).
- Carefully insert a trim tool (B) under the molding next to the lower clip (C).
- While pulling the clip portion of the molding up by hand, push each of the eight small hooks (D) in the numbered sequence shown to release the clip from the retainer (E). Do not try to pry up the clip if it is hard to release from the retainer.
- Gradually work your way up to release each of the upper clips (F, G, H).
 Courtesy of AMERICAN HONDA MOTOR CO., INC.
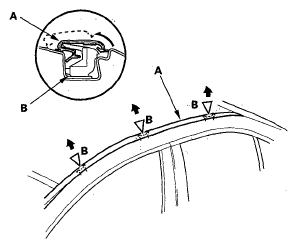
- Pull up the middle portion of the roof molding (A) to release it from the retainers (B).
 Courtesy of AMERICAN HONDA MOTOR CO., INC.
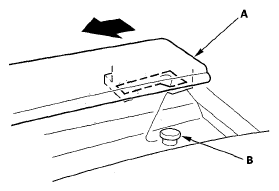
- Pull up and release the rear end of the roof molding (A) from the pin (B), then remove the roof molding.
 Courtesy of AMERICAN HONDA MOTOR CO., INC.
- Install the molding in the reverse order of removal, and note these items:
- Check if the clips are damaged or stress-whitened, and if necessary, replace them with new ones.
- Make sure the roof molding is installed securely.