Test E: Brake Light Failure Sensor
- First make sure the brake lights come on when the brake pedal is pressed.
- If all the brake lights come on, go to next step.
- If one of the brake lights does not come on, check whether the bulb is blown. If the bulb is OK, go to next step.
- If none of the brake lights come on, check the brake light circuit.
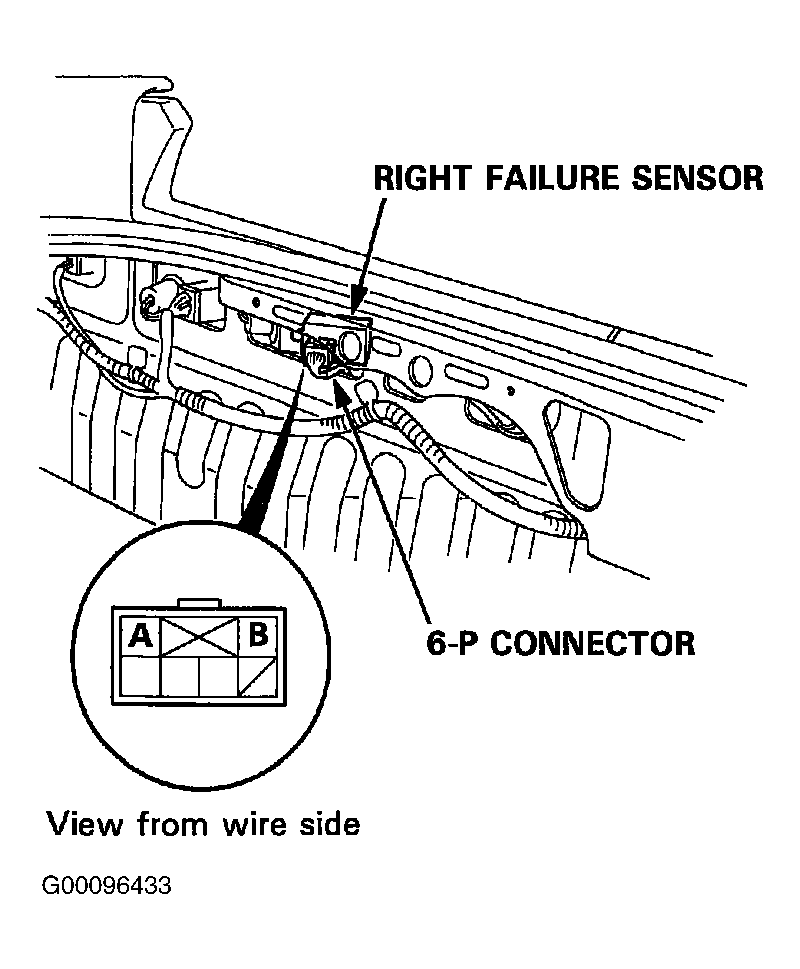
- Open the trunk lid, and remove the trim panel that covers the right taillight. Watch the BRAKE LAMP light in the safety indicator when the A (WHT/GRN) wire of the 6-P connector is grounded and the ignition switch is turned from OFF to ON. See Fig 1.
- If the BRAKE LAMP light comes on and stays on, check for an open in the A (WHT/GRN) wire between the safety indicator and the right failure sensor.
- If the BRAKE LAMP light does not stay on, go to next step.
- Watch the BRAKE LAMP light as you turn the ignition switch from OFF to ON, with the B (GRN) wire of the 6-P connector grounded and the brake pedal pressed.
- If the BRAKE LAMP light comes on and stays on, replace the right failure sensor.
- If the BRAKE LAMP light does not stay on, go to next step.
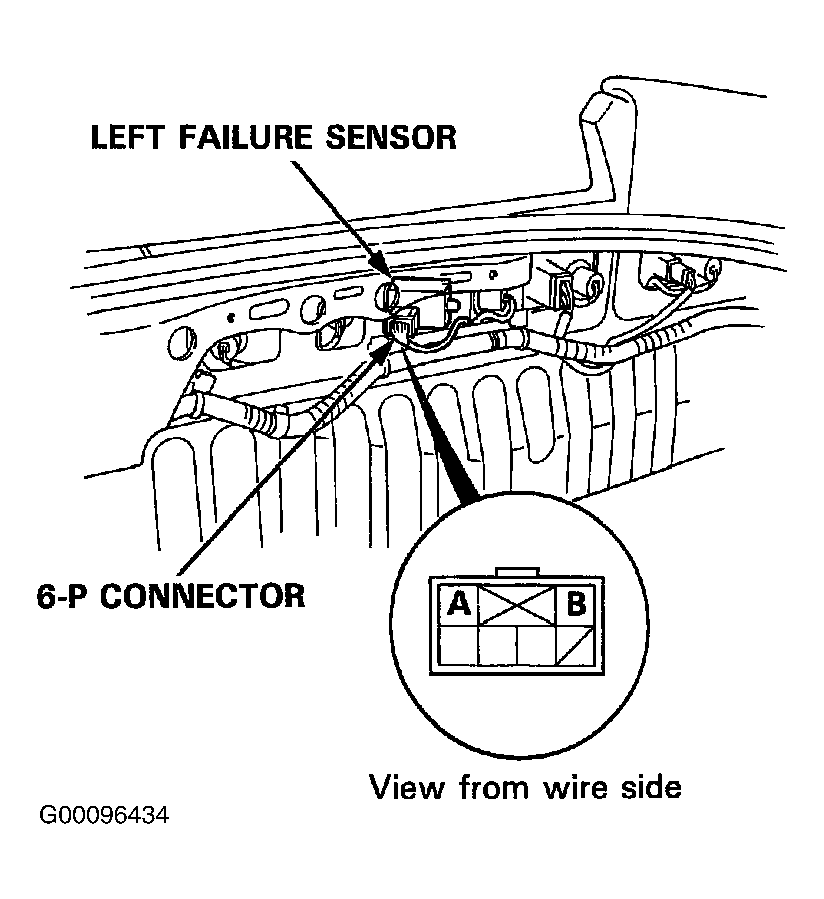
- Remove the rear trim panel that covers the left tail- light. Watch the BRAKE LAMP light as you turn the ignition switch from OFF to ON, with the A (GRN) wire of the 6-P connector grounded and the brake pedal pressed. See Fig 2.
- If the BRAKE LAMP light comes on and stays on, there is an open in the A (GRN) wire between the left failure sensor and the right failure sensor.
- If the BRAKE LAMP light does not stay on, go to next step.
- Watch the BRAKE LAMP light as you turn the ignition switch from OFF to ON, with the B (BLK) wire of the 6-P connector grounded and the brake pedal pressed.
- If the BRAKE LAMP light comes on and stays on, replace the left failure sensor.
- If the BRAKE LAMP light does not stay on, check for an open in the B (BLK) wire between the left failure sensor and ground, and check for a poor ground at G551.
 Courtesy of AMERICAN HONDA MOTOR CO., INC.
 Courtesy of AMERICAN HONDA MOTOR CO., INC.