Gauge Assembly: Removal
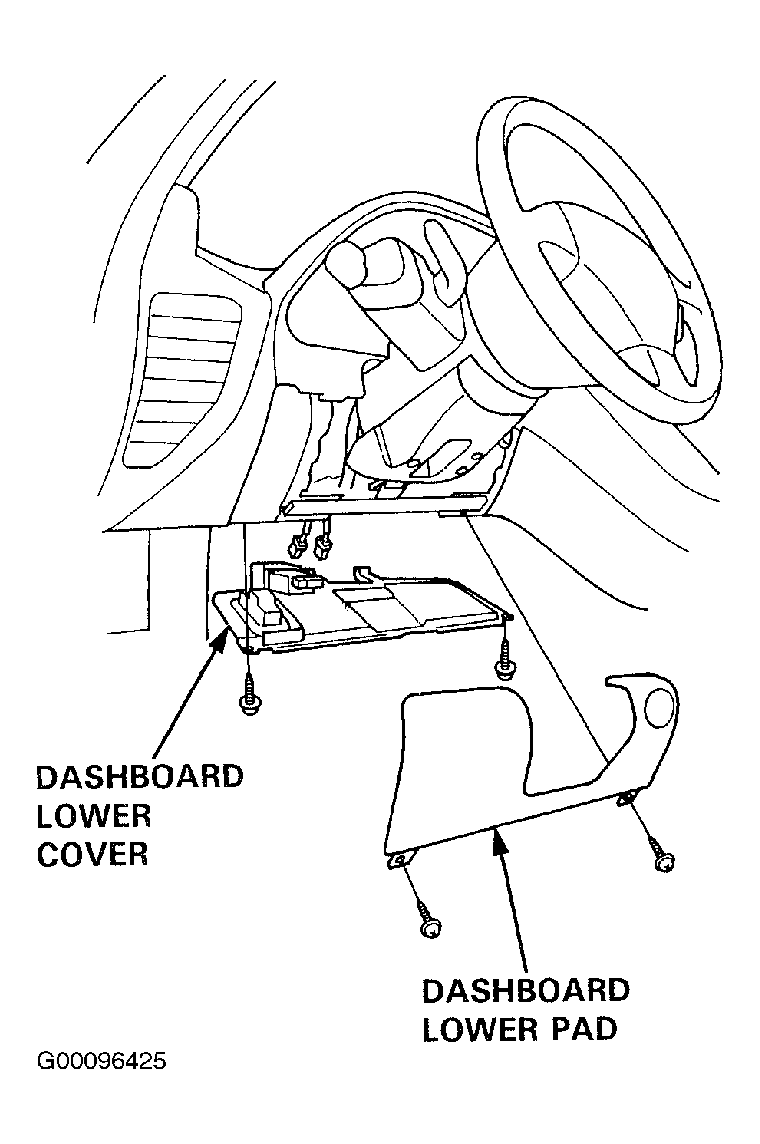
- Remove the dashboard lower cover and disconnect the floor wire harness connectors.
- Remove the two screws, then remove the knee bolster pad from the dashboard. See Fig 1.
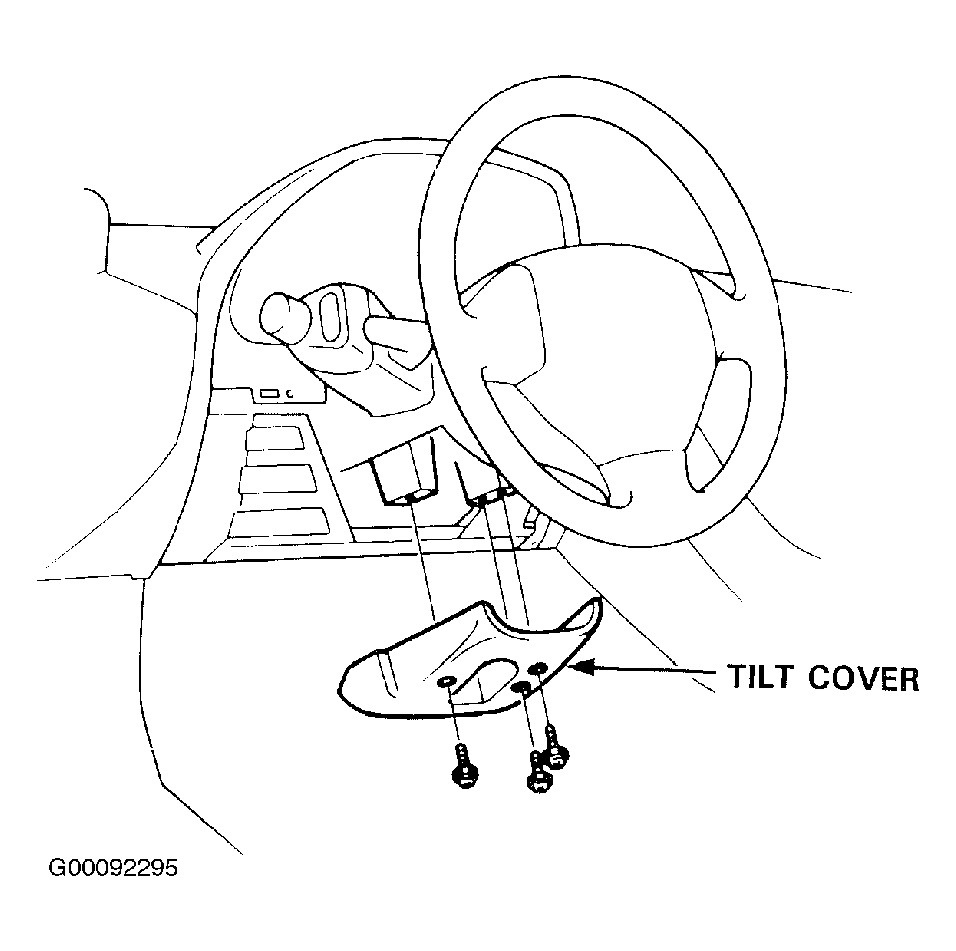
- Remove the three screws, then remove the tilt cover from the steering column. See Fig 2.
- Disconnect the connectors from the instrument panel switches.
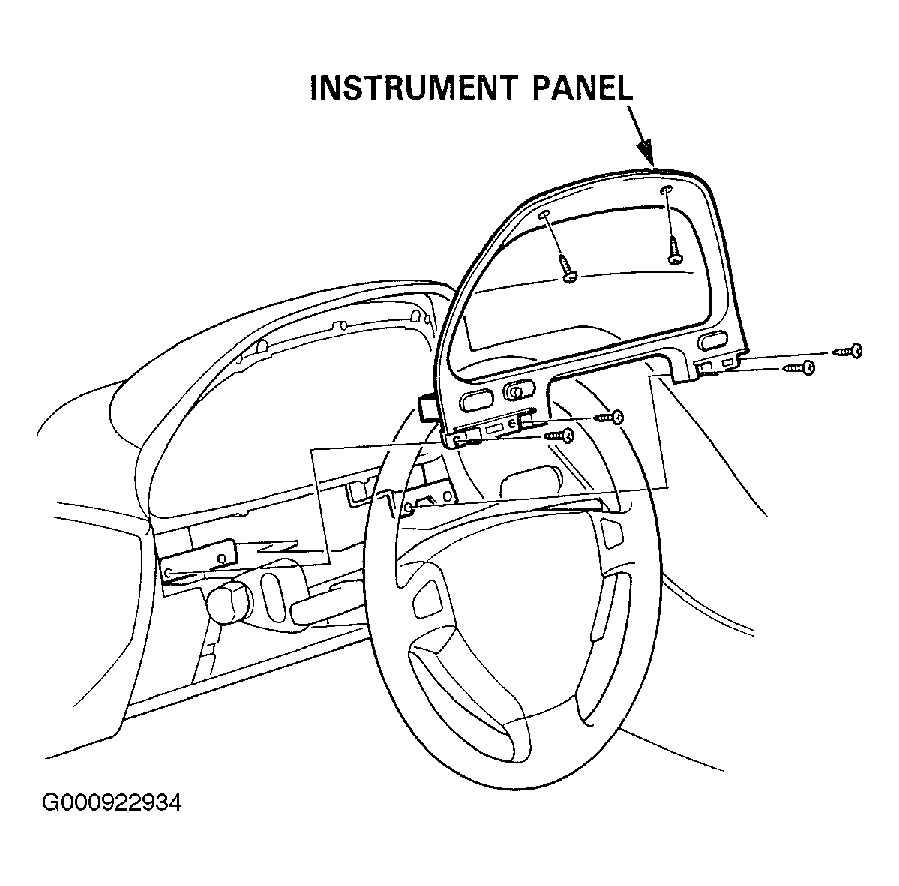
- Remove the six screws, then remove the instrument panel trim from the dashboard. See Fig 3.
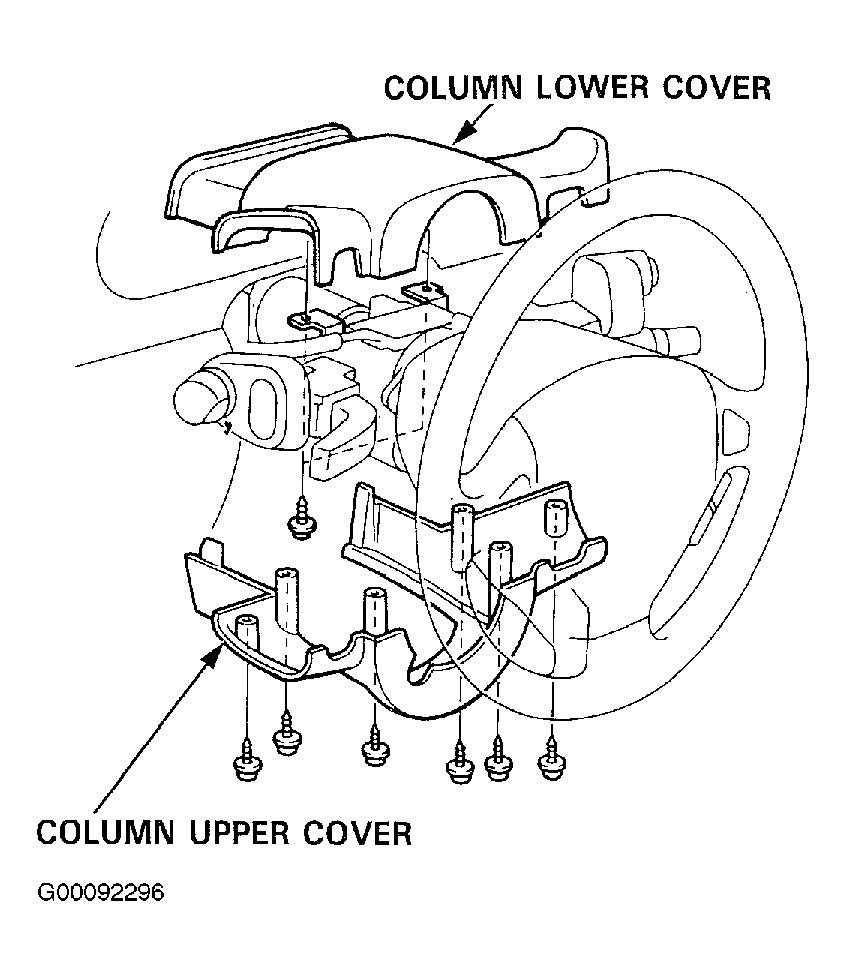
- Remove the eight screws, then remove the steering column covers. See Fig 4.
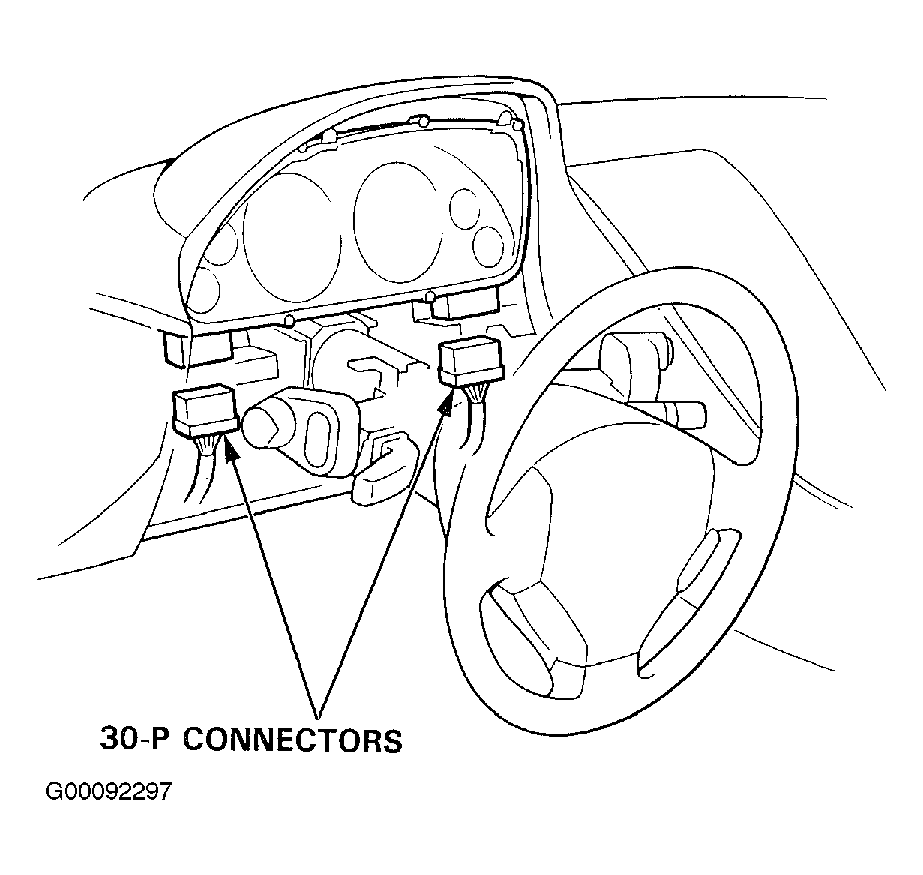
- Disconnect the 30-P connectors from both sides of the gauge assembly. See Fig 5.
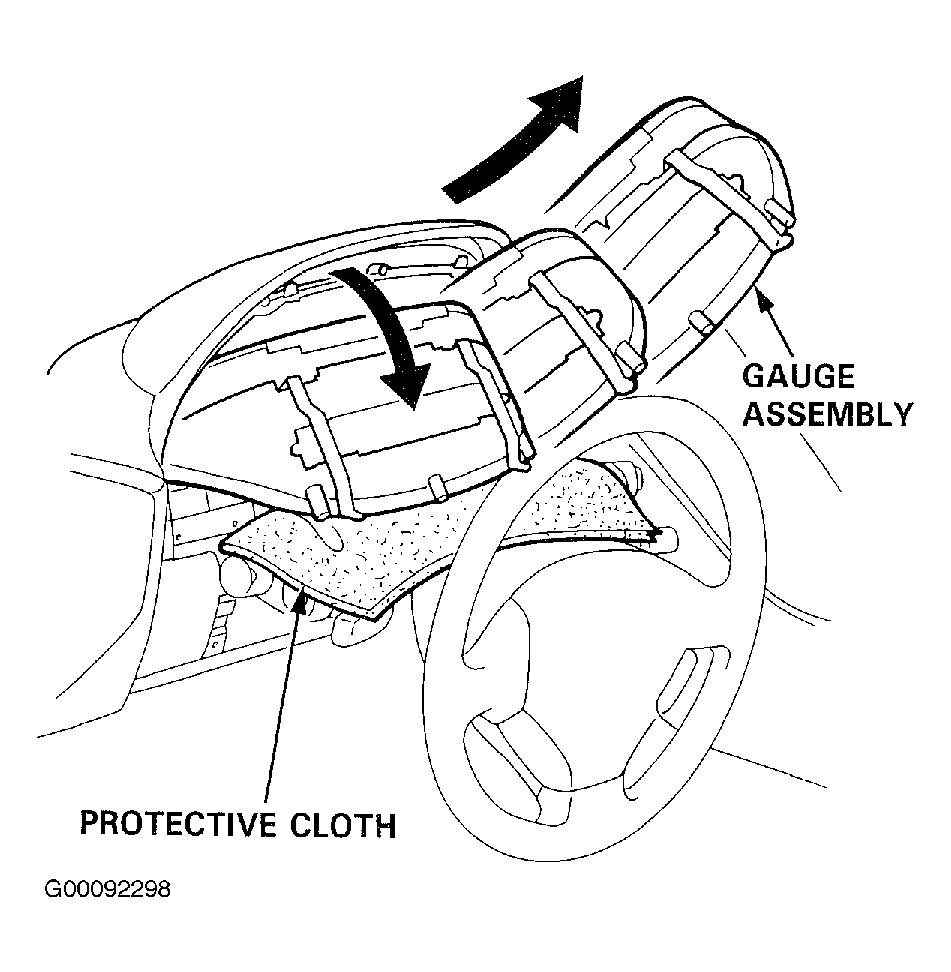
- Lay a protective cloth on the combination switches to prevent scratching the gauge assembly. Remove the four screws, then take out the gauge assembly as shown. See Fig 6.
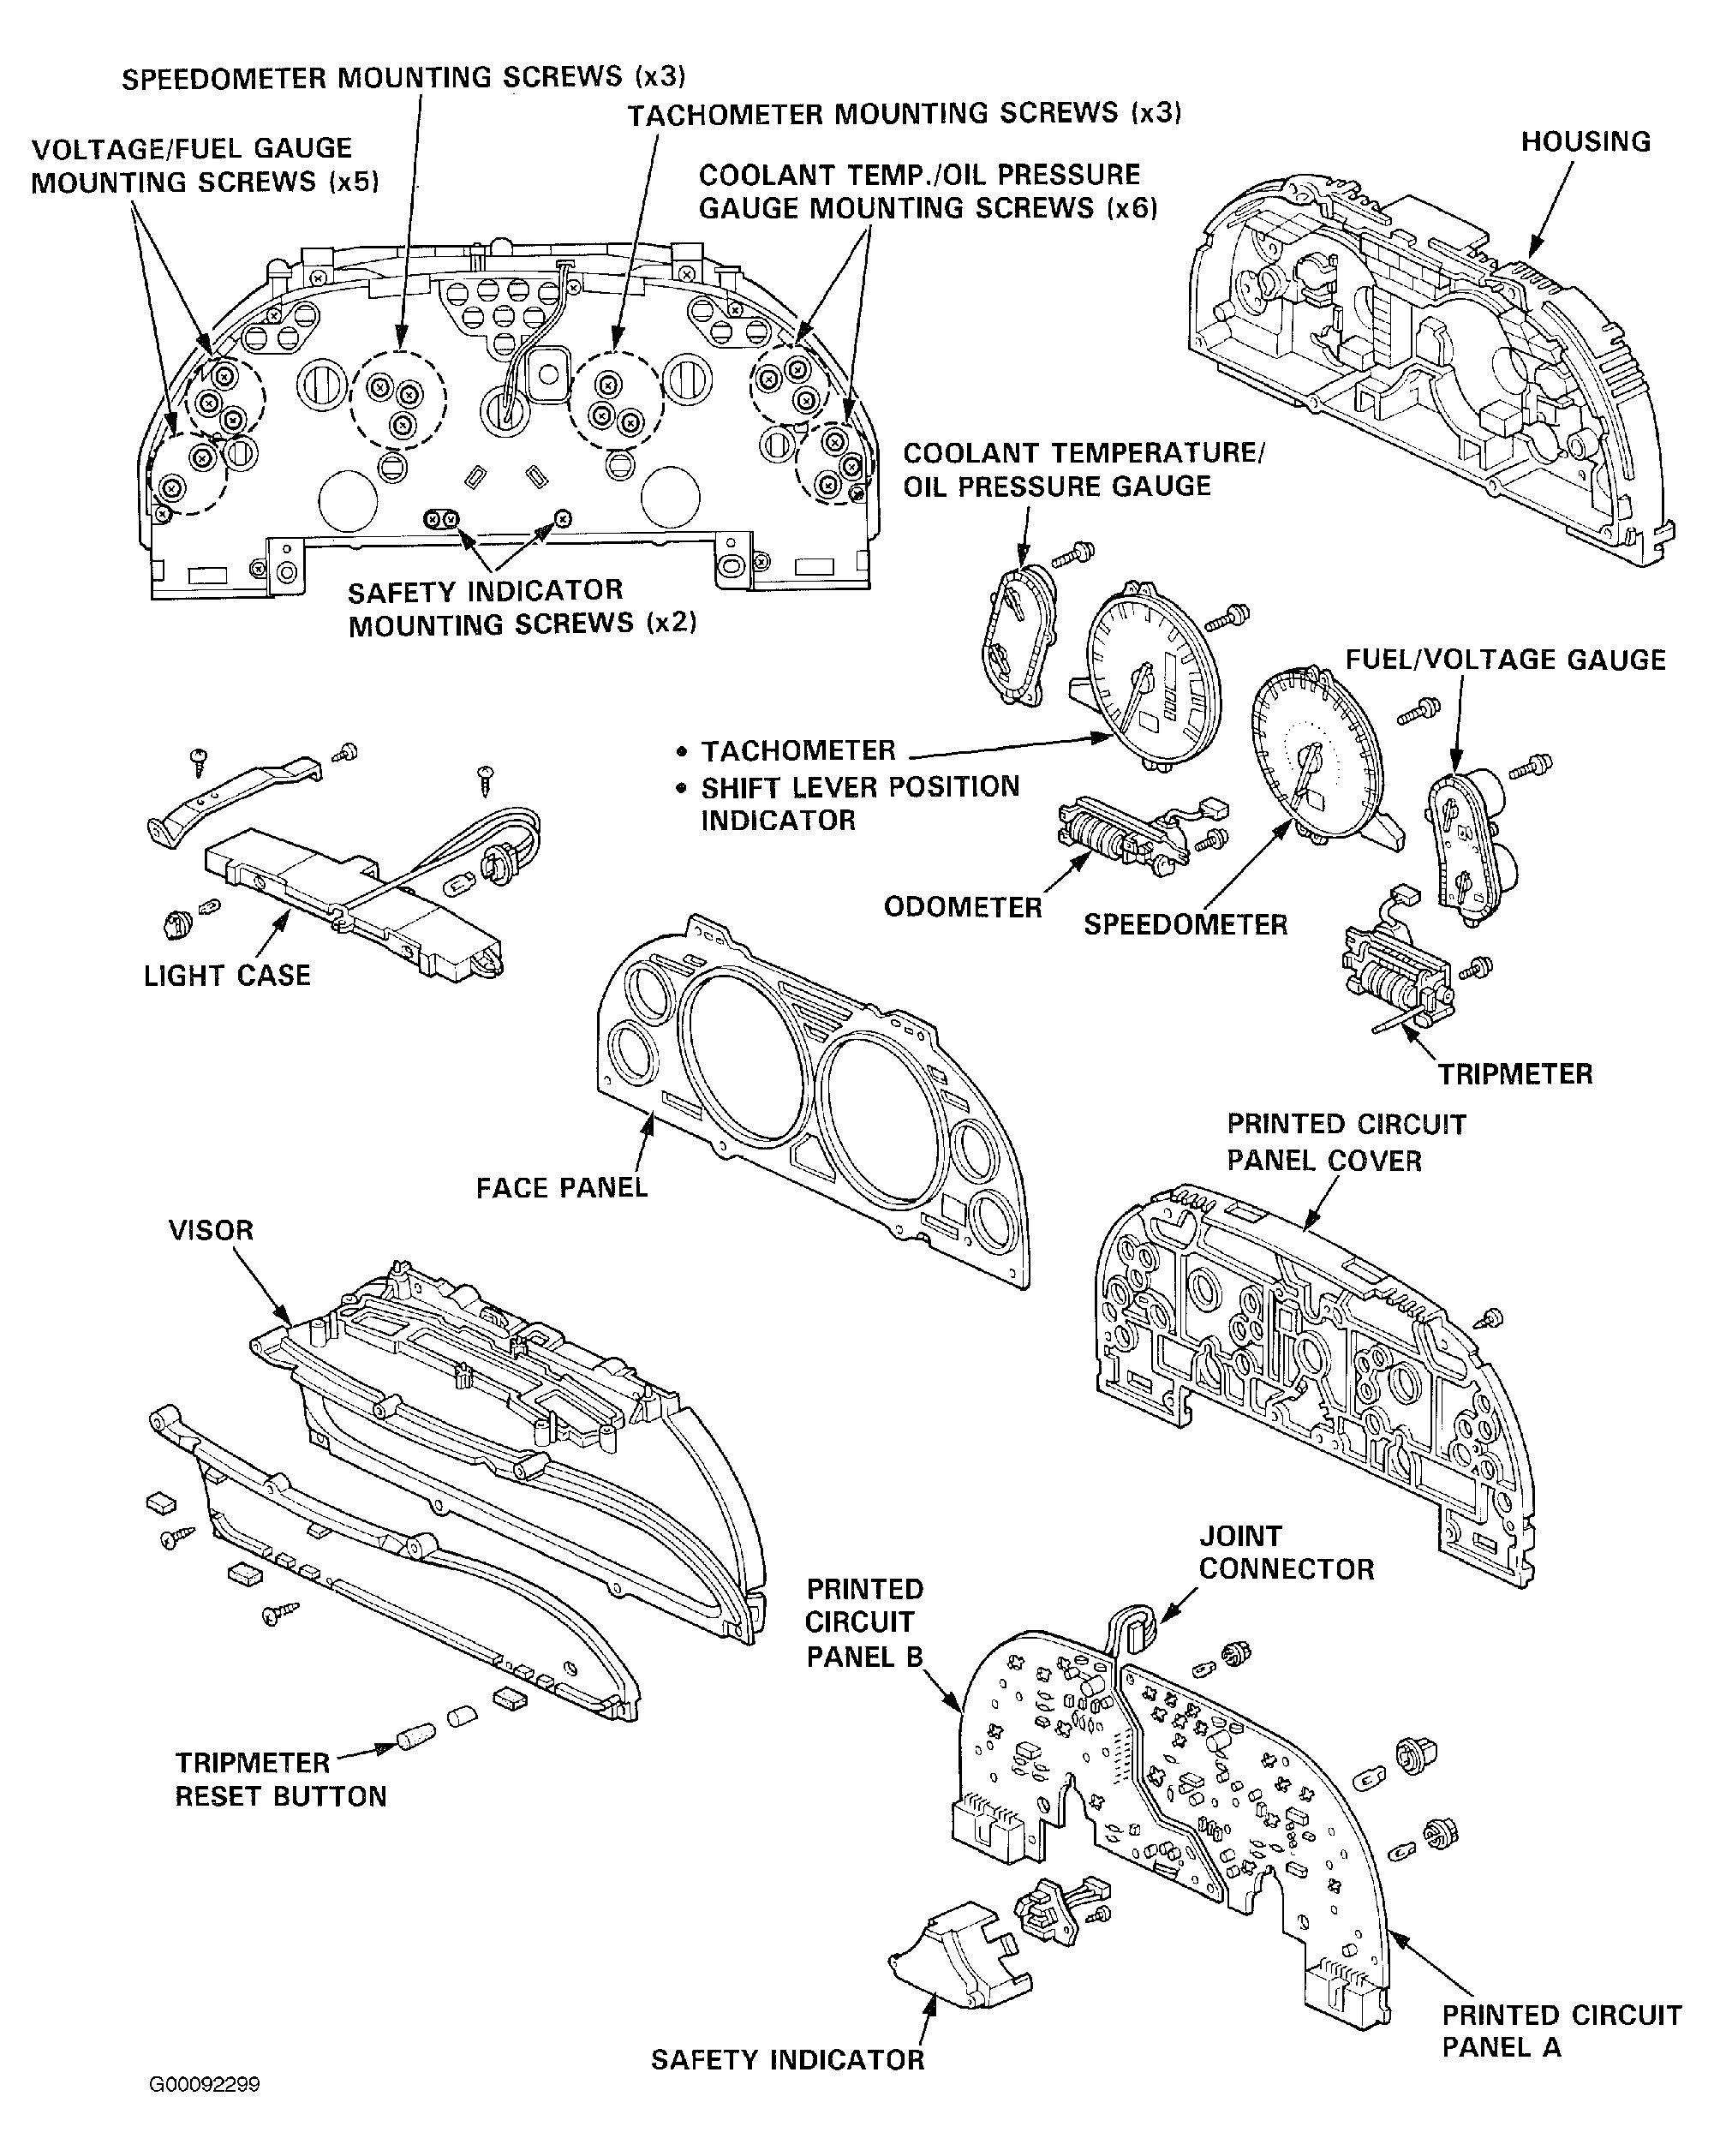
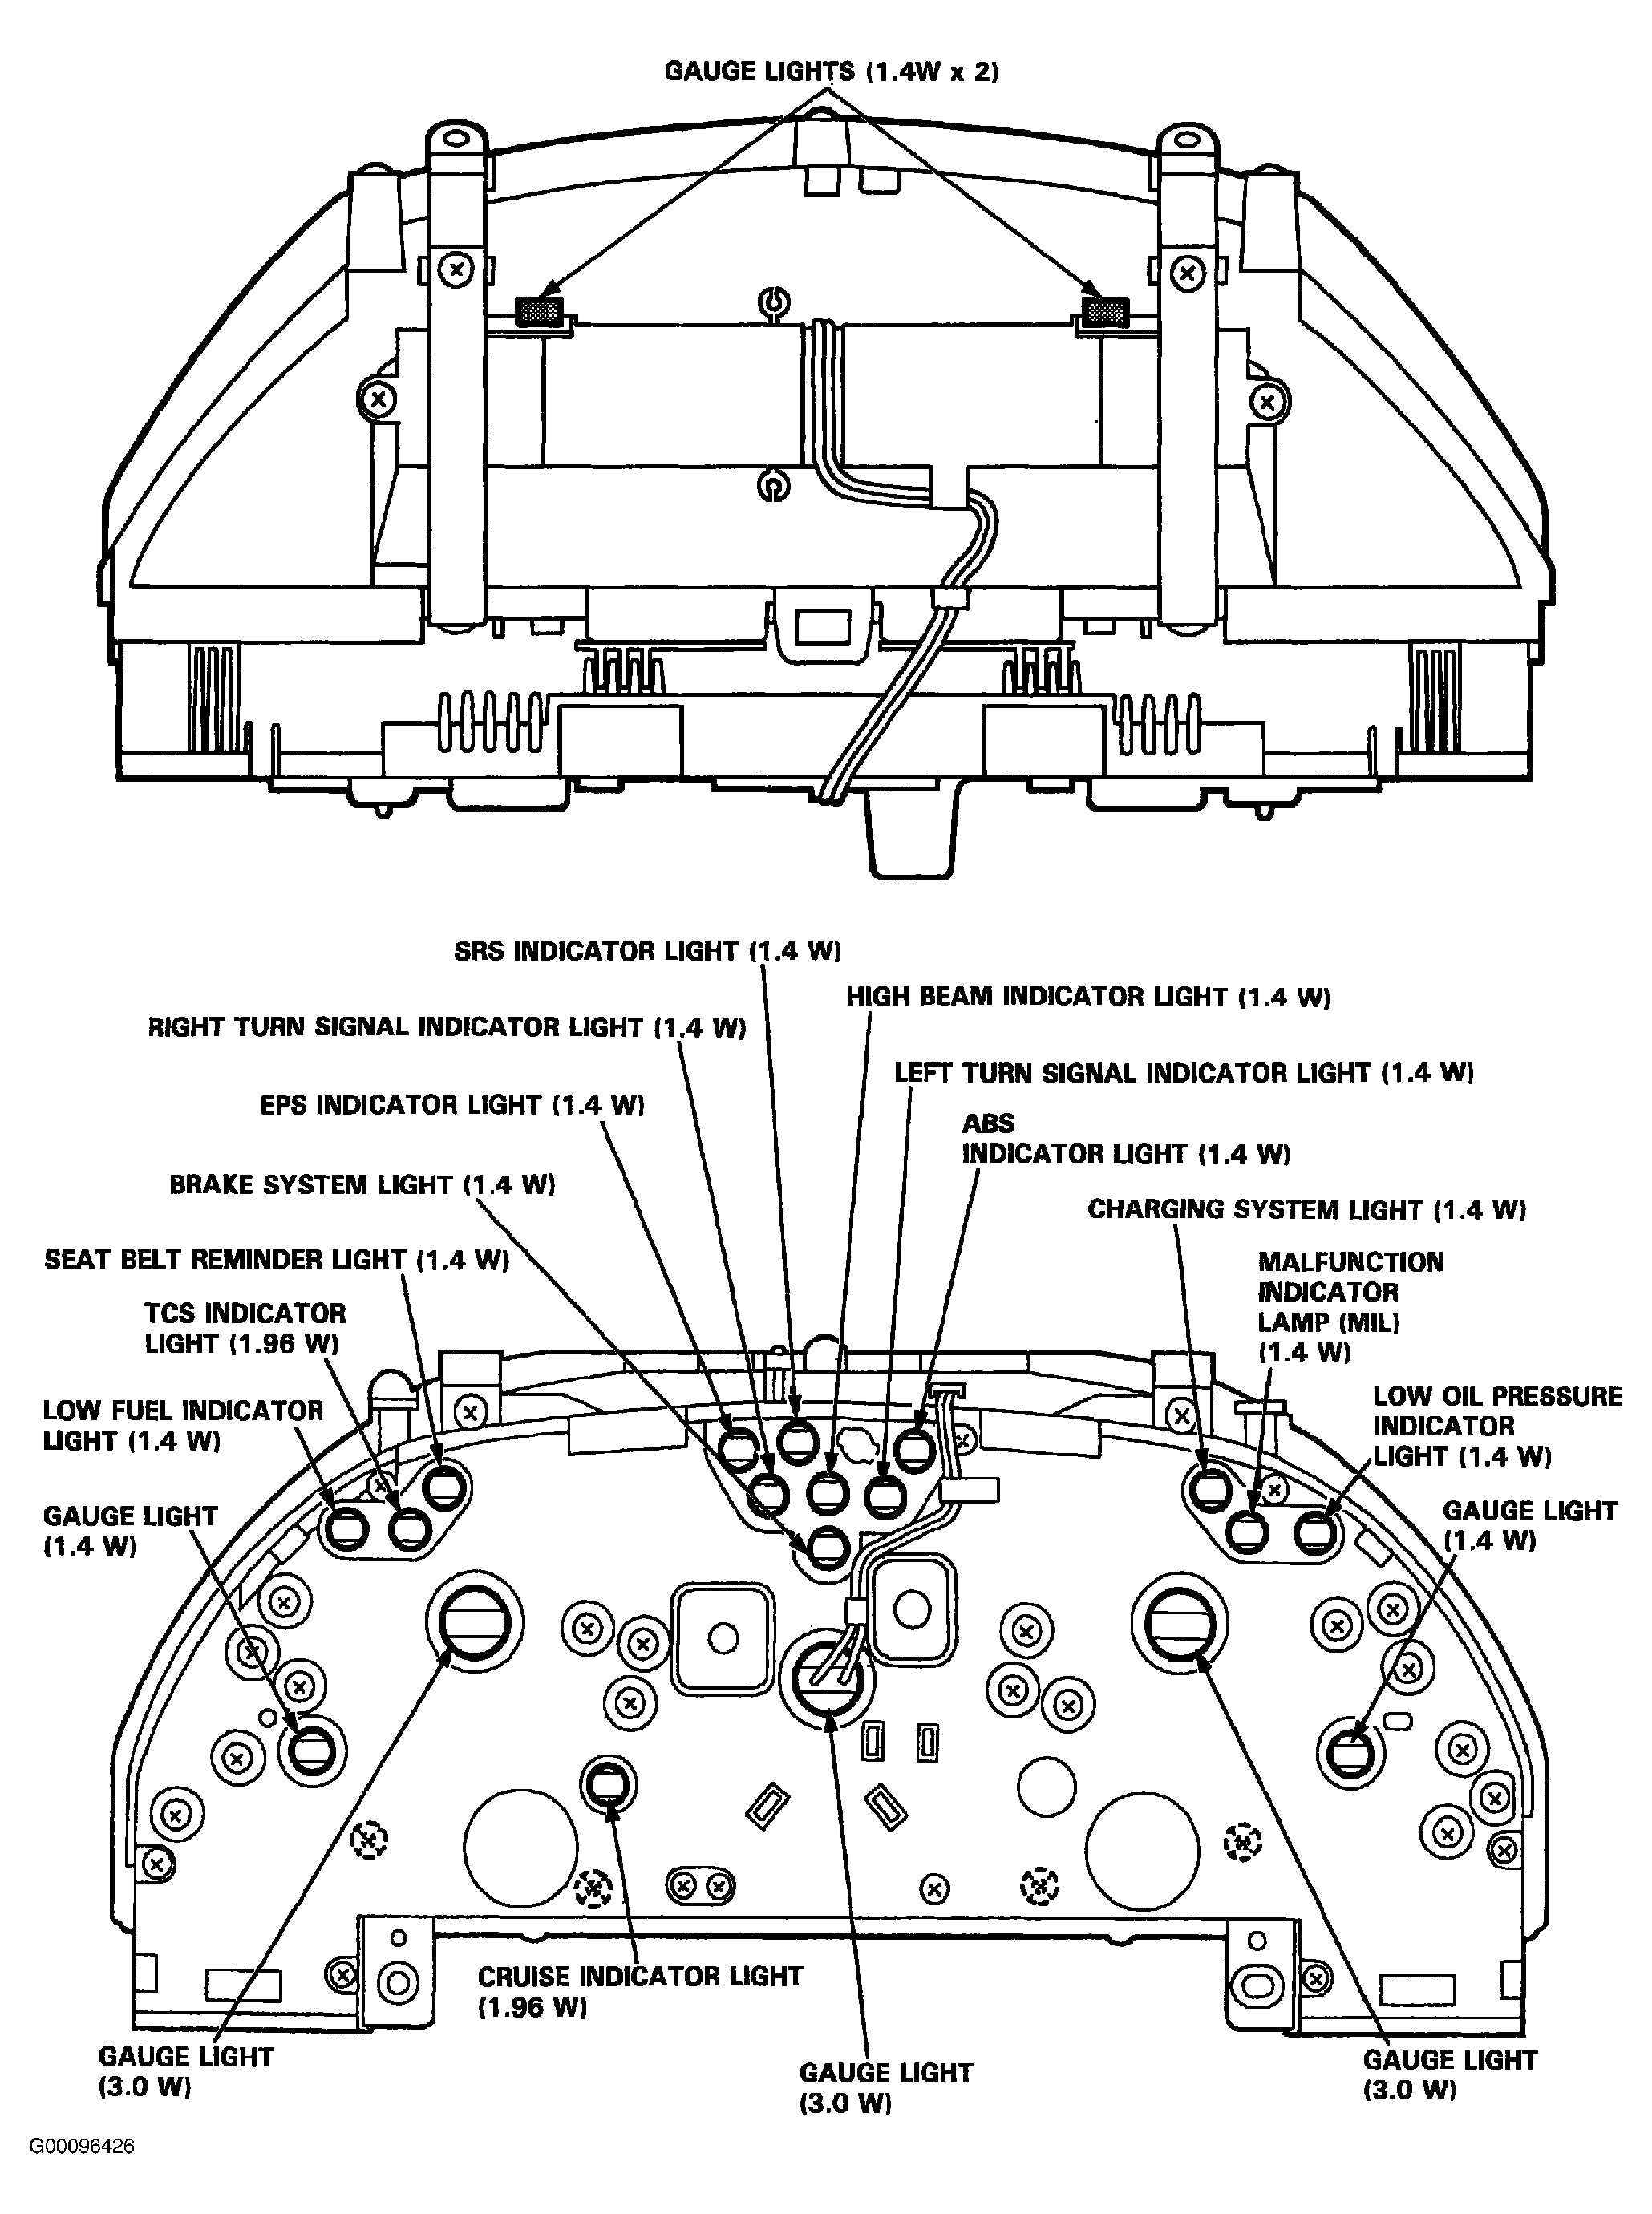
- After removal, disassemble gauge assembly. Replace bulbs as necessary. See Fig 7 and Fig 8
. To install gauge assembly, reverse removal procedure.
 Courtesy of AMERICAN HONDA MOTOR CO., INC.
 Courtesy of AMERICAN HONDA MOTOR CO., INC.
 Courtesy of AMERICAN HONDA MOTOR CO., INC.
 Courtesy of AMERICAN HONDA MOTOR CO., INC.
 Courtesy of AMERICAN HONDA MOTOR CO., INC.
 Courtesy of AMERICAN HONDA MOTOR CO., INC.
 Courtesy of AMERICAN HONDA MOTOR CO., INC.
 Courtesy of AMERICAN HONDA MOTOR CO., INC.