Antenna Feeder No. 2 Removal/Installation
ANTENNA FEEDER NO.2 REMOVAL/INSTALLATION
1. Disconnect the negative battery cable.
2. Remove the following parts:
a. A-pillar trim A-Pillar Trim Removal/Installation
b. Sunvisor Service and Repair
c. Assist handle Service and Repair
d. Front scuff plate Front Scuff Plate Removal/Installation
e. Rear scuff plate Rear Scuff Plate Removal/Installation
f. B-pillar lower trim B-Pillar Lower Trim Removal/Installation
g. Front seat belt adjuster anchor cover Front Seat Belt Removal/Installation
h. Front seat belt upper anchor installation bolt Front Seat Belt Removal/Installation
i. B-pillar upper trim B-Pillar Upper Trim Removal/Installation
j. Rain sensor cover (Vehicles with auto light / wiper system) Service and Repair
3. Disconnect the rain sensor connector. (vehicles with auto light/wiper system) Service and Repair
4. Partially peel back the seaming welt.
5. Partially peel back the headliner.
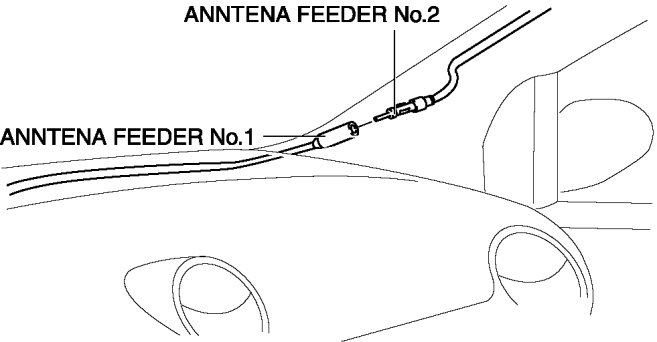
6. Disconnect antenna feeder No.1.
7. Remove in the order indicated in the table.
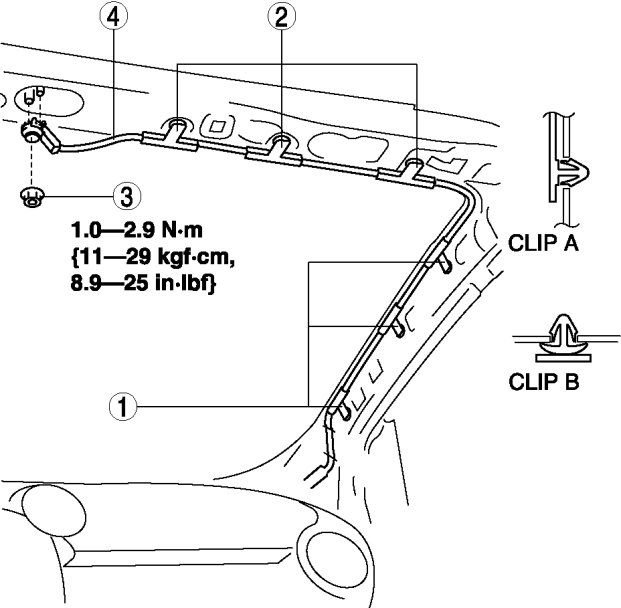
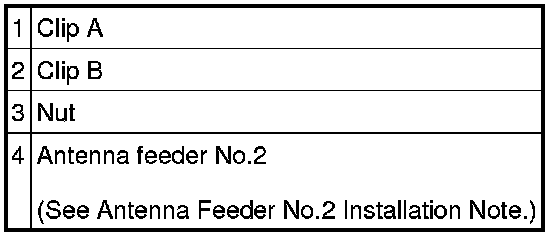
8. Install in the reverse order of removal.
Antenna Feeder No.2 Installation Note
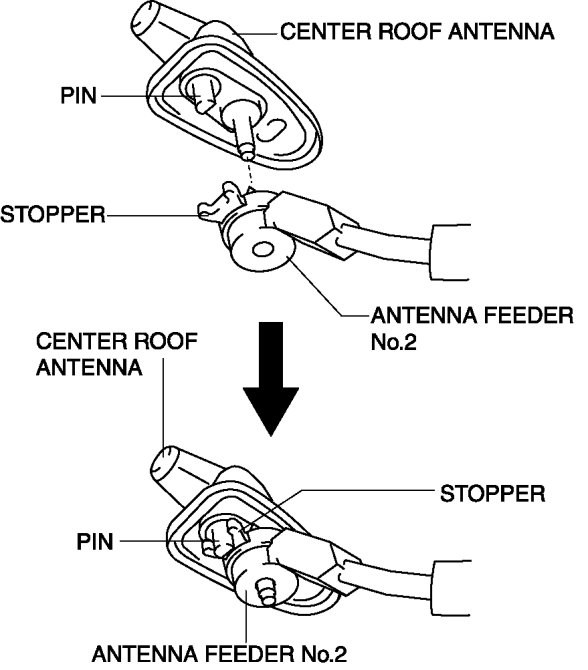
1. Install the antenna feeder No.2 stopper to the pin of the center roof antenna.