Lower Panel Removal/Installation
LOWER PANEL REMOVAL/INSTALLATION
1. Disconnect the negative battery cable.
2. Remove the following parts:
a. Driver-side front scuff plate Front Scuff Plate Removal/Installation
b. Driver-side front side trim Front Side Trim Removal/Installation
c. Upper panel Upper Panel Removal/Installation
d. Driver-side decoration panel Decoration Panel Removal/Installation
e. Hood release lever Service and Repair
f. Meter hood Meter Hood Removal/Installation
3. Remove the screw A, pull the lower panel in the direction of the arrow in the order of (1) (2), (3) and remove the lower panel while detaching the hooks B, C, clips D and guide pin E.
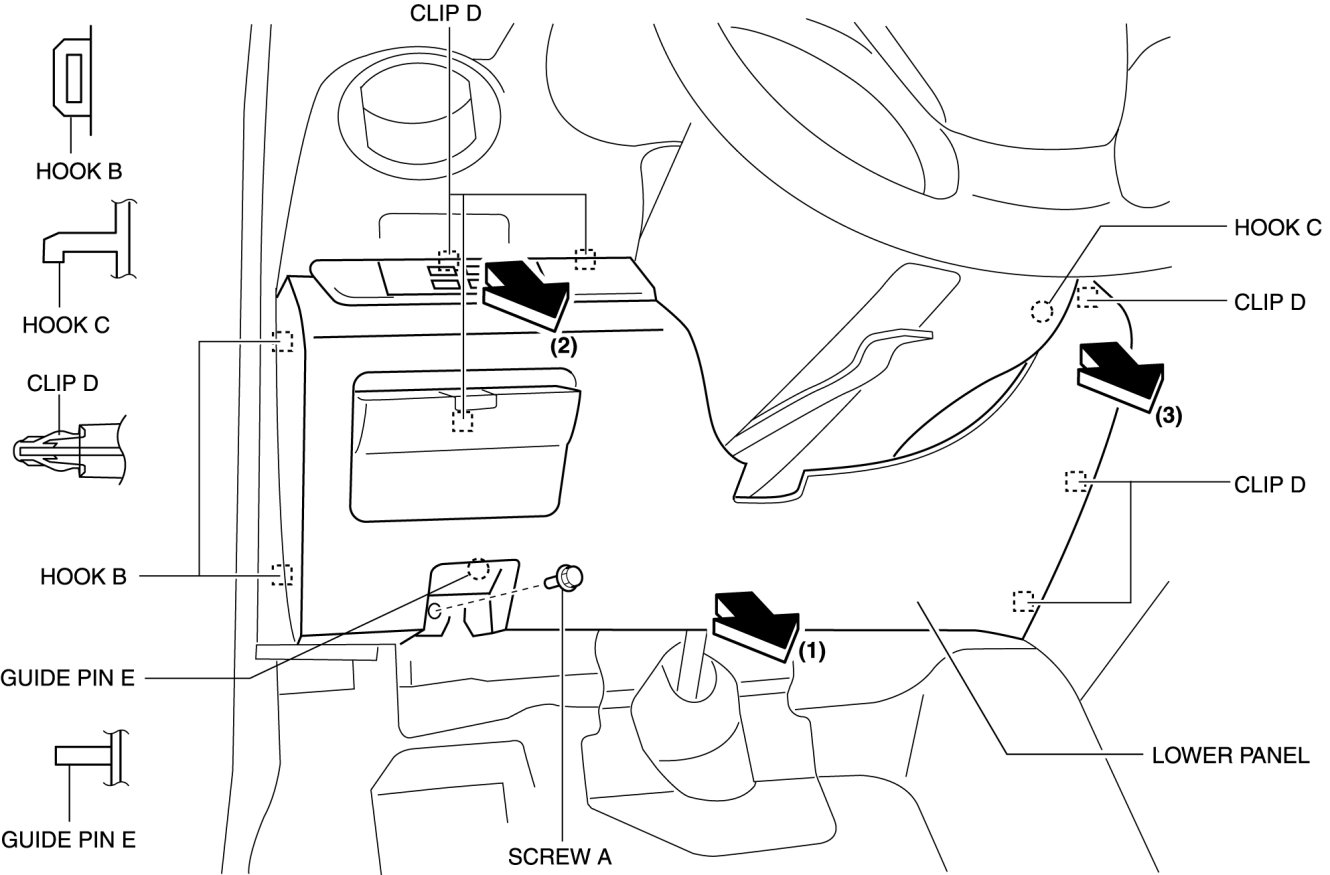
4. Disconnect the switch connector.
5. Install in the reverse order of removal.