A-Pillar Trim Removal/Installation
A-PILLAR TRIM REMOVAL/INSTALLATION
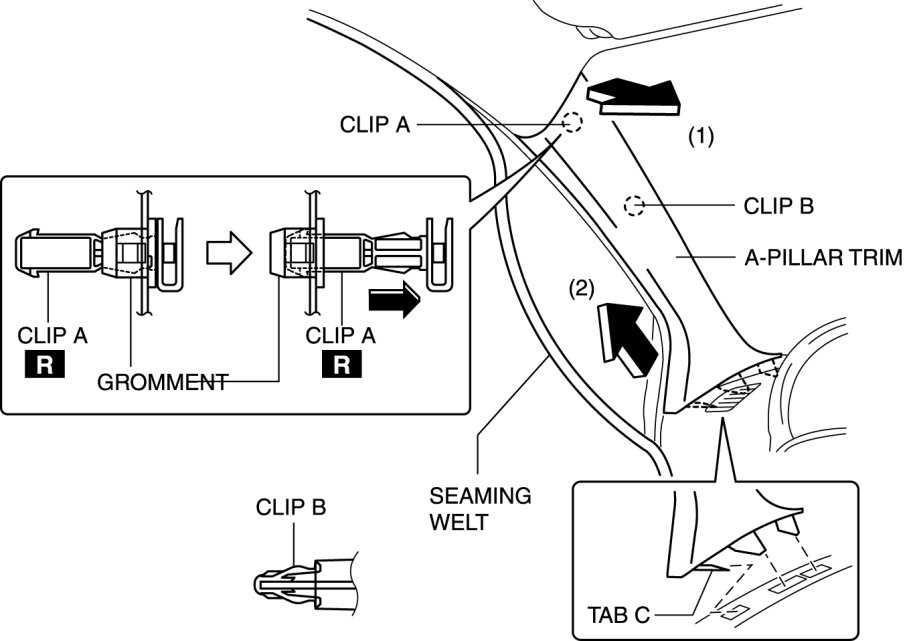
1. Partially peel back the seaming welt.
2. Pull the upper end of the A-pillar trim in the direction of the arrow shown in the figure and remove clips A, B and C.
CAUTION:
- When pulling out the A-pillar trim, be careful not to damage the tabs.
3. When installing the A-pillar, Install the new clip A to the A-pillar trim in advance.
4. Install in the reverse order of removal.