Installation
AUDIO / VIDEO: RADIO RECEIVER: INSTALLATION
1. INSTALL NO. 2 RADIO BRACKET
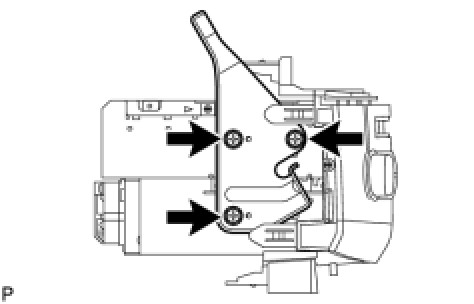
(a) Install the bracket with the 3 bolts.
Torque: 3.0 Nm (30 kgf-cm, 26 in-lbf)
2. INSTALL NO. 1 RADIO BRACKET
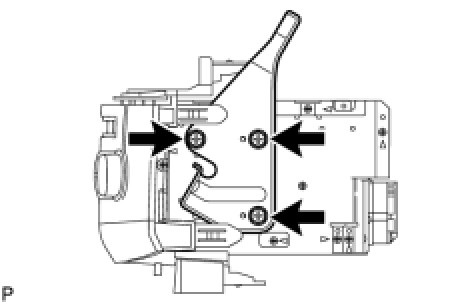
(a) Install the bracket with the 3 bolts.
Torque: 3.0 Nm (30 kgf-cm, 26 in-lbf)
3. INSTALL RADIO RECEIVER ASSEMBLY WITH BRACKET
(a) Connect the connectors.
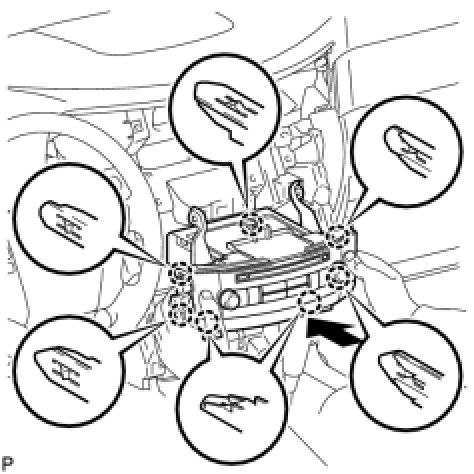
(b) Insert the radio receiver to attach the 7 claws on its backside.
NOTICE:
When inserting the radio receiver, do not press the knobs on it.
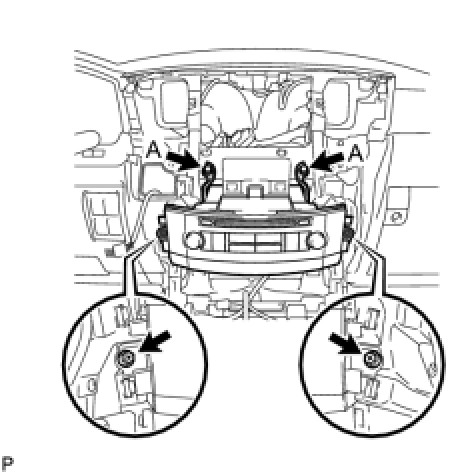
(c) Install the radio receiver with the 2 screws and 2 bolts.
for bolts labeled A - Torque: 12 Nm (122 kgf-cm, 8 ft-lbf)
4. INSTALL MULTI-DISPLAY ASSEMBLY WITH BRACKET (w/o Navigation System) Installation
5. INSTALL DISPLAY AND NAVIGATION MODULE DISPLAY WITH BRACKET (w/ Navigation System) Installation
6. INSTALL NO. 4 INSTRUMENT PANEL REGISTER ASSEMBLY Installation
7. INSTALL NO. 3 INSTRUMENT PANEL REGISTER ASSEMBLY Installation
8. INSTALL LOWER CENTER INSTRUMENT CLUSTER FINISH PANEL SUB-ASSEMBLY Installation
9. INSTALL LOWER INSTRUMENT PANEL PAD SUB-ASSEMBLY RH Installation
10. INSTALL LOWER INSTRUMENT PANEL PAD SUB-ASSEMBLY LH Installation
11. CONNECT CABLE TO NEGATIVE BATTERY TERMINAL
NOTICE:
When disconnecting the cable, some systems need to be initialized after the cable is reconnected Repair Instruction - Initialization.
12. INSTALL ENGINE ROOM SIDE COVER LH Installation