Removal
REMOVAL
NOTE: Before proceeding, Technician Safety Information .
1. Raise and support the vehicle. Maintenance
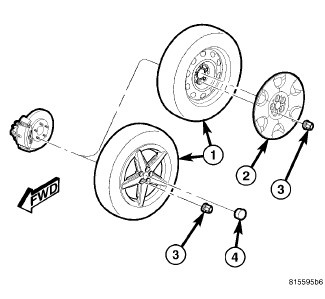
2. Remove the wheel mounting nuts (3), then the tire and wheel assembly (1).
NOTE: If both strut assemblies are to be removed, mark the strut assemblies right or left and keep the parts separated to avoid mix-up. Not all parts of the strut assembly are interchangeable side-to-side.
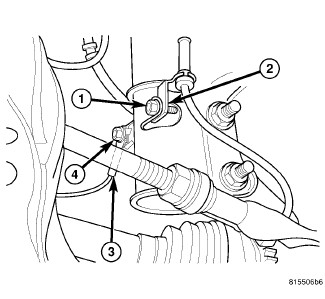
NOTE: The ground strap attached to the rear of the strut mounts to the ear extending toward the front of the vehicle.
3. Remove the screw (4) securing the ground strap (3) to the rear of the strut.
4. If the vehicle is equipped with Antilock brakes (ABS), remove the screw (1) securing the wheel speed sensor routing bracket (2) to the rear of the strut.
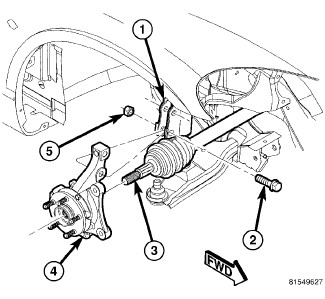
CAUTION: The strut assembly-to-knuckle attaching bolts (2) are serrated and must not be turned during removal. Hold the bolts stationary in the knuckle while removing the nuts, then tap the bolts out using a pin punch.
5. While holding the bolt heads stationary, remove the two nuts (5) from the bolts (2) attaching the strut (1) to the knuckle (4).
6. Remove the two bolts (2) attaching the strut (1) to the knuckle (4) using a pin punch.
7. Lower the vehicle just enough to open the hood, but without letting the tires touch the floor.
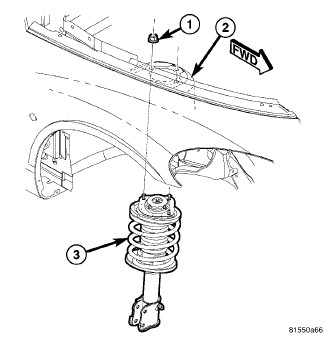
8. Remove the three nuts (1) attaching the strut assembly upper mount to the strut tower (2).
9. Remove the strut assembly (3) from the vehicle.
10. For disassembly, Front Suspension Strut Assembly - Disassembly.