Differential Drive Pinion Gear Bearing Replacement (250 mm Axle)
Differential Drive Pinion Gear Bearing Replacement (250 mm Axle)
Special Tools
* DT 47561 - Bearing Remover
* J-8592 - Driver Handle 3/4 in-12
* J-8608 - Rear Pinion Bearing Race Installer
* J-22912-B - Split Plate Bearing Puller
* J-44412 - Inner Pinion Bearing Installer
* J-44417 - Outer Pinion Race Installer
* J-45012 - Holding Fixture
For equivalent regional tools, refer to Special Tools Tools and Equipment.
Disassemble Procedure
1. Raise the vehicle. Refer to Lifting and Jacking the Vehicle Service and Repair.
2. Remove the differential pinion flange/yoke and/or oil seal. Refer to Drive Pinion Flange/Yoke and/or Oil Seal Replacement (195/218 mm Axle) Drive Pinion Flange/Yoke and/or Oil Seal Replacement (195/218 mm Axle)Drive Pinion Flange/Yoke and/or Oil Seal Replacement (250 mm Axle) Drive Pinion Flange/Yoke and/or Oil Seal Replacement (250 mm Axle).
3. Remove the differential case assembly from the housing. Refer to Differential Case Replacement (250 mm Axle) Differential Case Replacement (250 mm Axle)Differential Case Replacement (195/218 mm Axle) Differential Case Replacement (195/218 mm Axle).
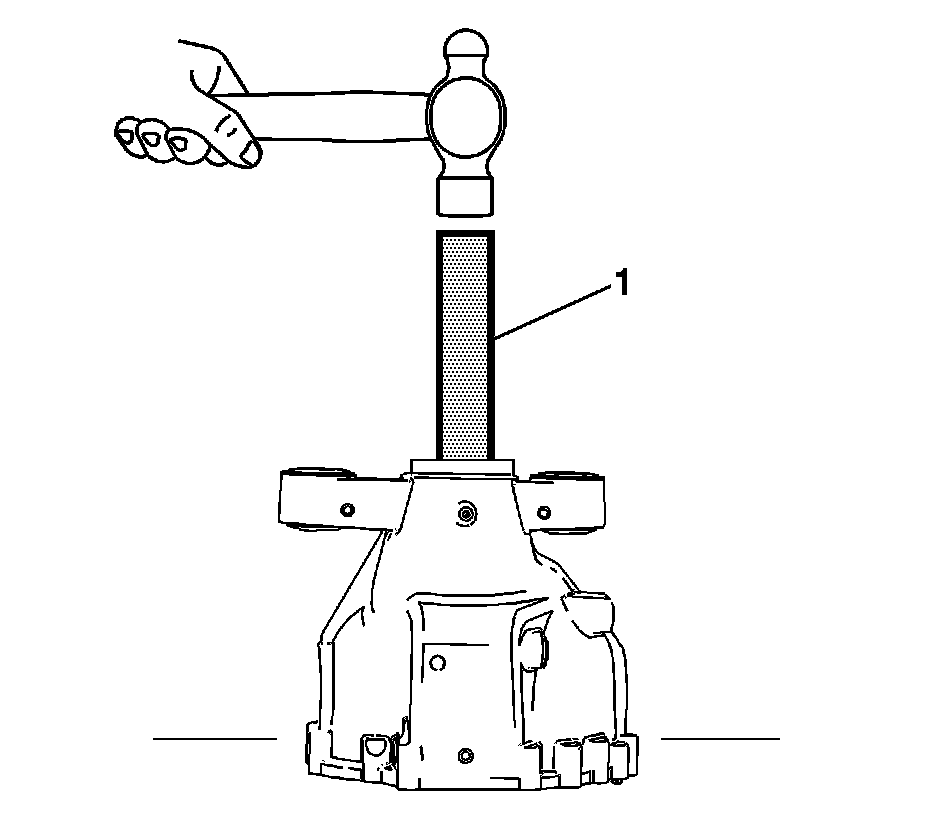
Note: Position a block of wood under the differential housing to protect the pinion gear when removed.
4. Using the DT-47561 - remover (1) and the hammer, remove the pinion gear.
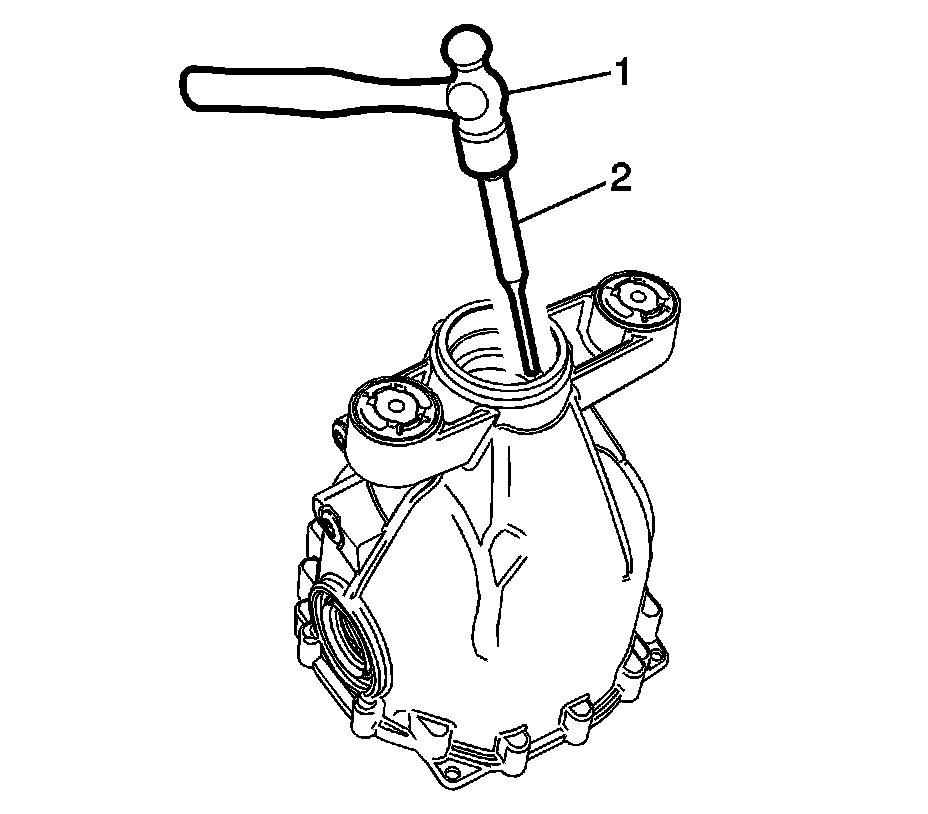
Note: Use the slot on each side of the pinion bearing to position the brass drift to remove the bearing cup. Also, alternate from side to side when removing the bearing cup.
5. Using the hammer (1) and the brass drift (2), remove the inner pinon bearing cup from the differential housing.
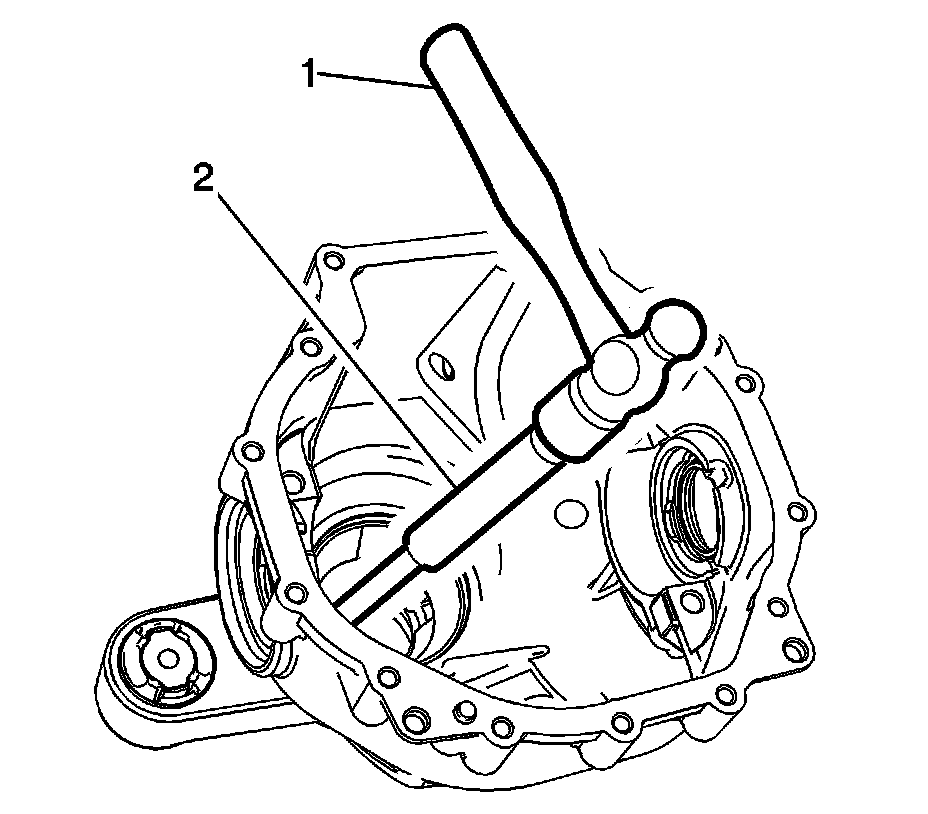
Note: Use the slot on each side of the pinion bearing to position the brass drift to remove the bearing cup. Also, alternate from side to side when removing the bearing cup.
6. Using the hammer (1) and the brass drift (2), remove the outer pinon bearing cup from the differential housing.
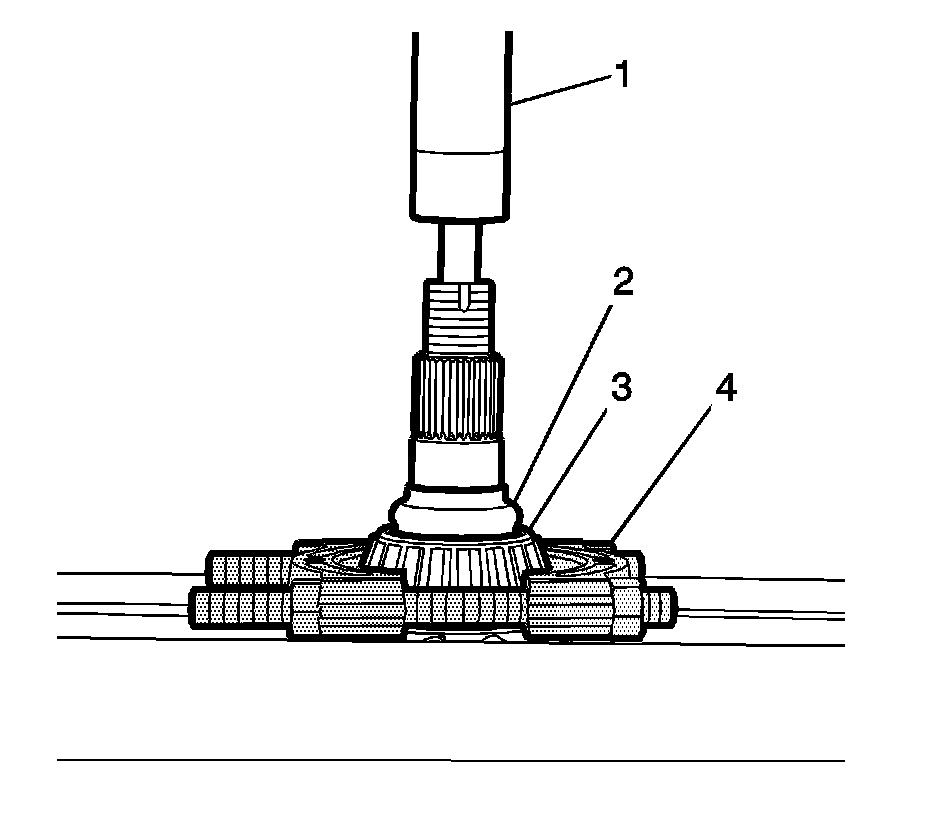
7. Using the J-22912-B - puller (4) and the hydraulic press (1), remove the outer pinion bearing (3) and the collapsible spacer (2).
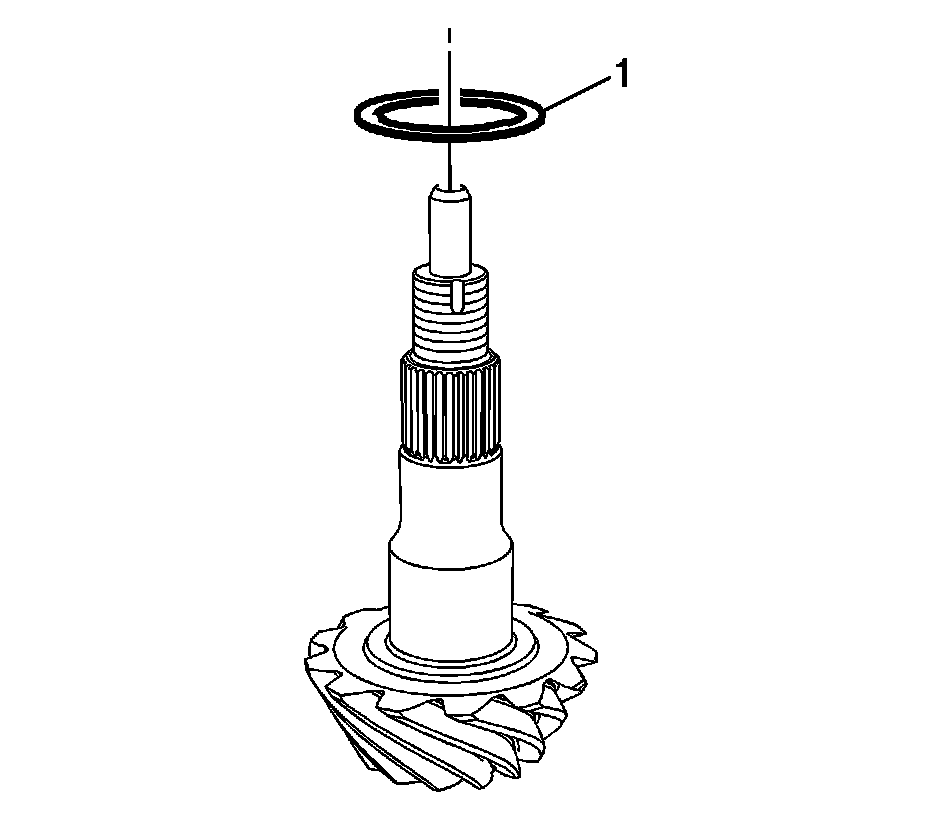
8. Remove the select washer (1).
Assemble Procedure
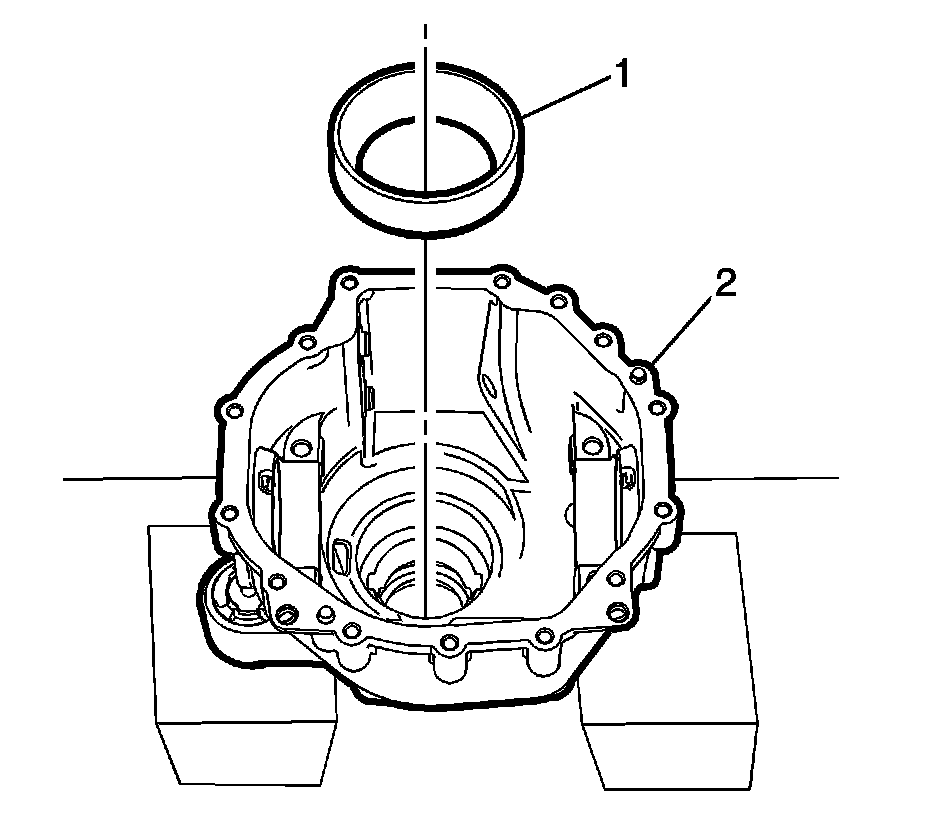
Note: Ensure that the inner pinion bearing cup is seated evenly in the differential carrier.
1. Position the inner pinion bearing cup (1) in the differential carrier (2).

2. Using the J-44417 - installer (2), J-8592 - handle (1) and the hammer, install the inner pinion bearing (3).

Note: Ensure that the outer pinion bearing cup is seated evenly in the differential carrier.
3. Position the outer pinion bearing cup (1) in the differential carrier (2).
4. Using the J-8592 - handle (1), J-8608 - installer (2) and the hammer, install the outer bearing cup.
5. Determine the selective shim thickness for the pinion bearing. Refer to Pinion Depth Adjustment (195/218 mm Axle) Pinion Depth Adjustment (195/218 mm Axle)Pinion Depth Adjustment (250 mm axle) Pinion Depth Adjustment (250 mm axle)
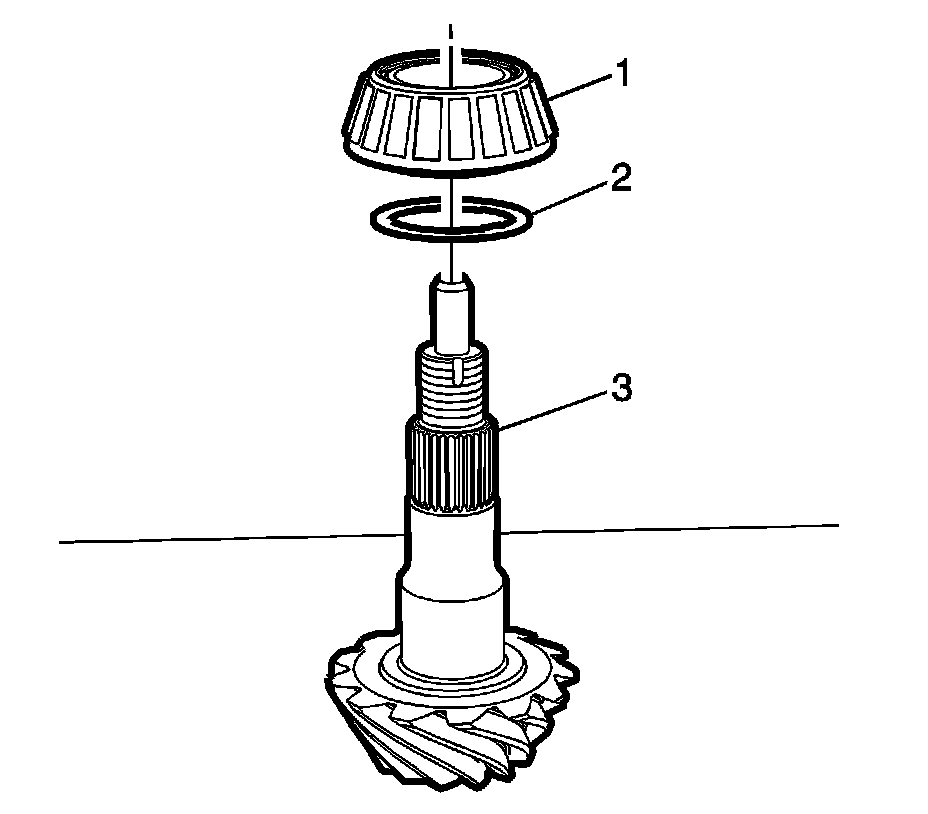
6. Install the selective shim (2) and the inner pinion bearing (1) and the pinion drive gear (3).
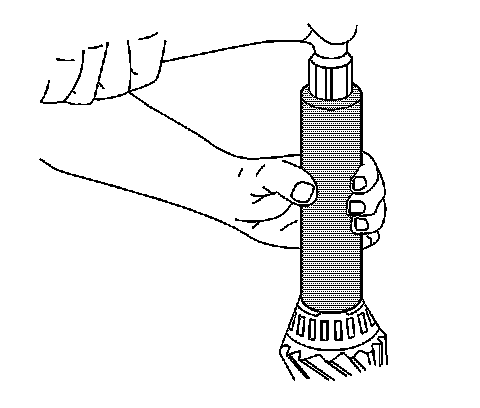
7. Using the J-44412 - installer (1), install the inner pinion bearing race (2).
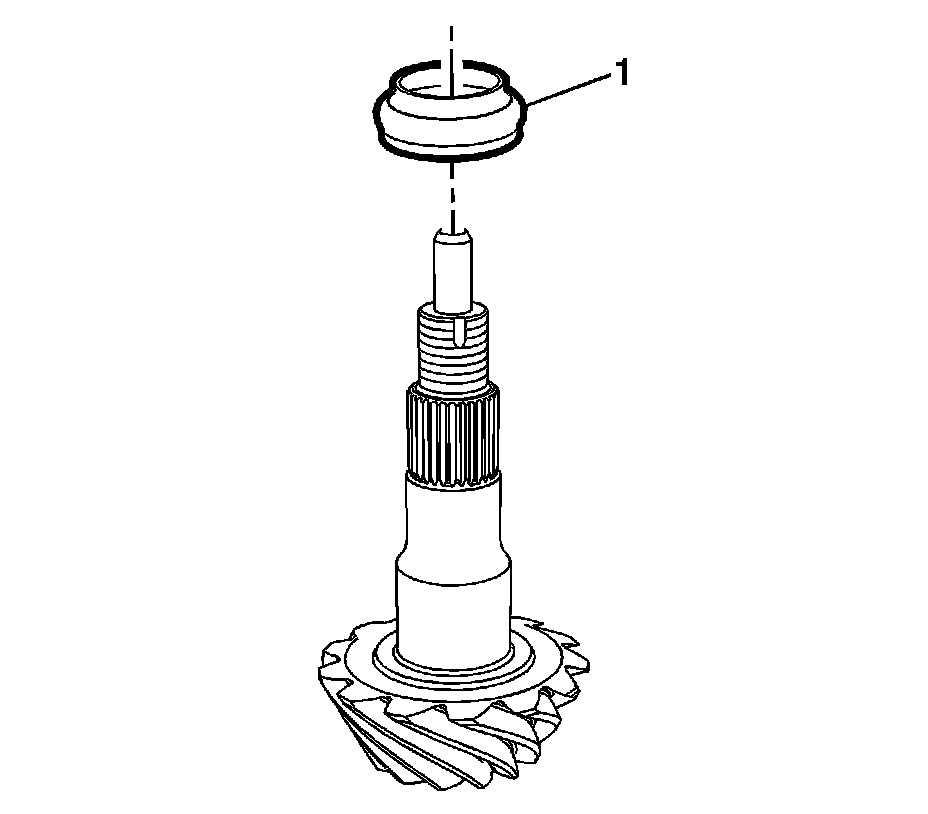
8. Install the NEW collapsible spacer (1).
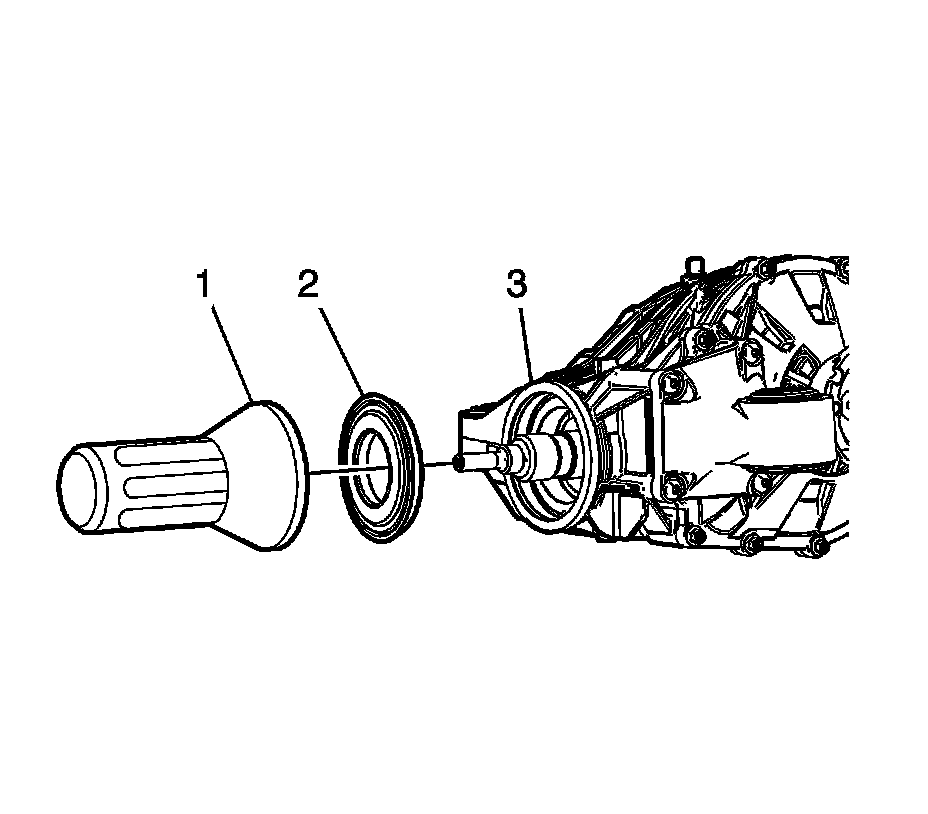
9. Using the appropriate tool (1), install the NEW pinion seal (2) in the differential carrier (3).
10. Use the proper axle lubricant on the pinion bearings.
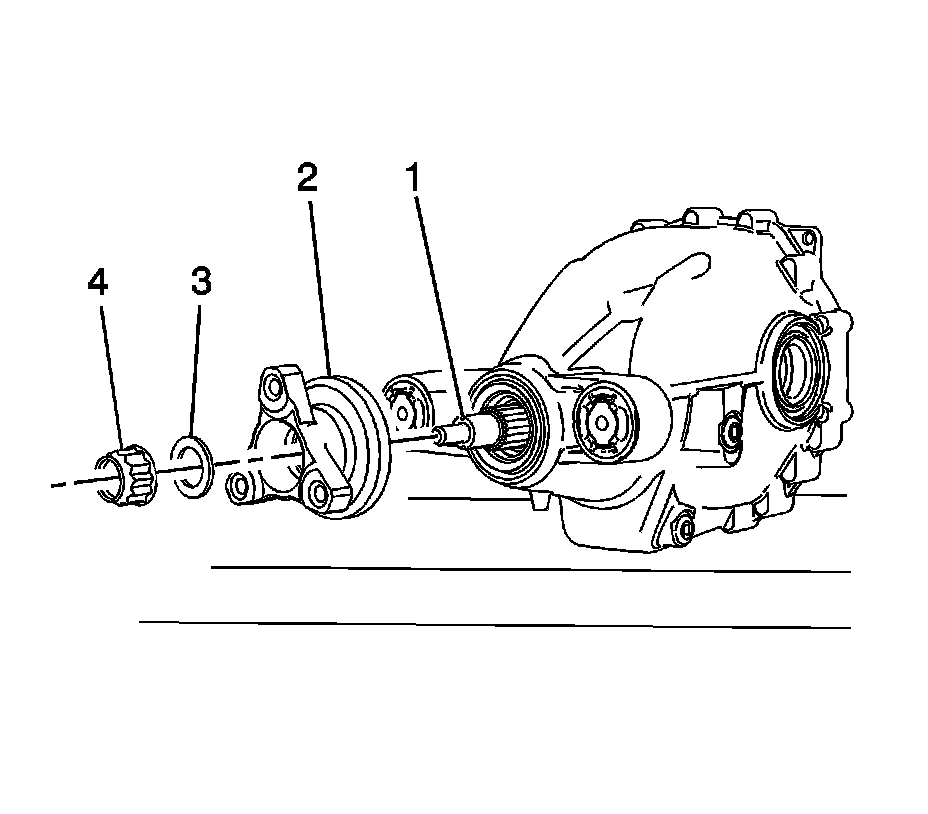
11. Using a soft face hammer, seat the pinion flange (2) on the pinion shaft (1) until a few pinion shaft threads show through the flange.
12. Install the pinion washer (3).
13. Finger start the NEW pinion nut (4) pinion shaft (1).
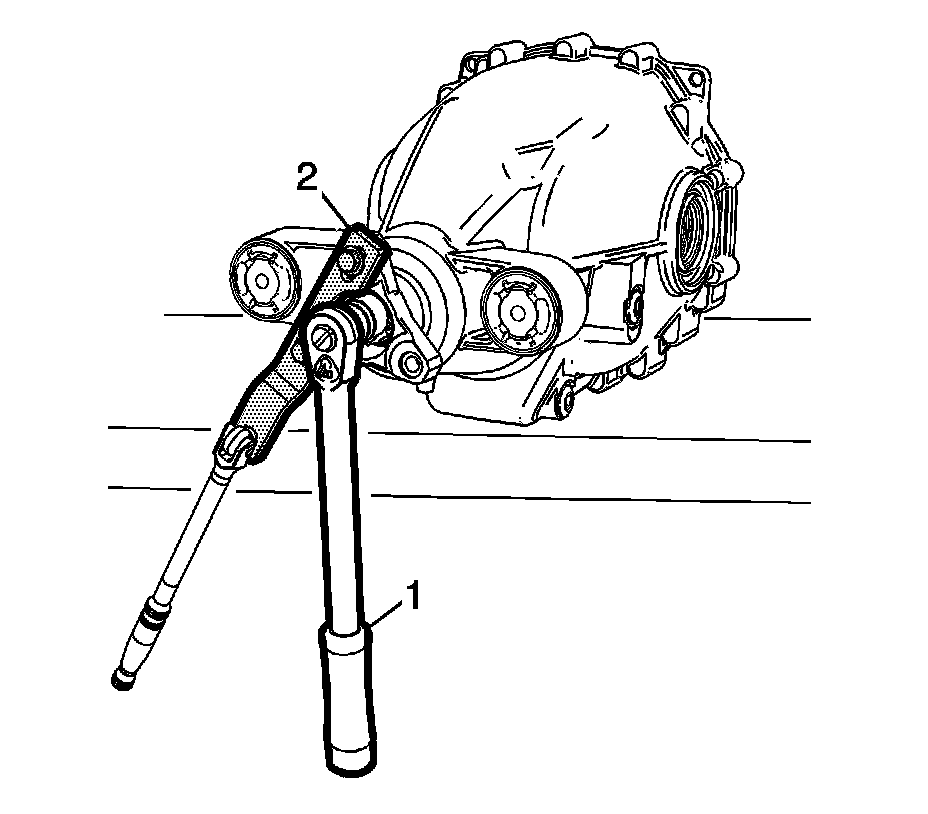
14. Using the J-45012 - fixture (2), a breaker bar and a torque wrench with the proper size socket (1), tighten the pinion until all the end play is removed.
15. Remove the J-45012 - fixture with the breaker bar (2).
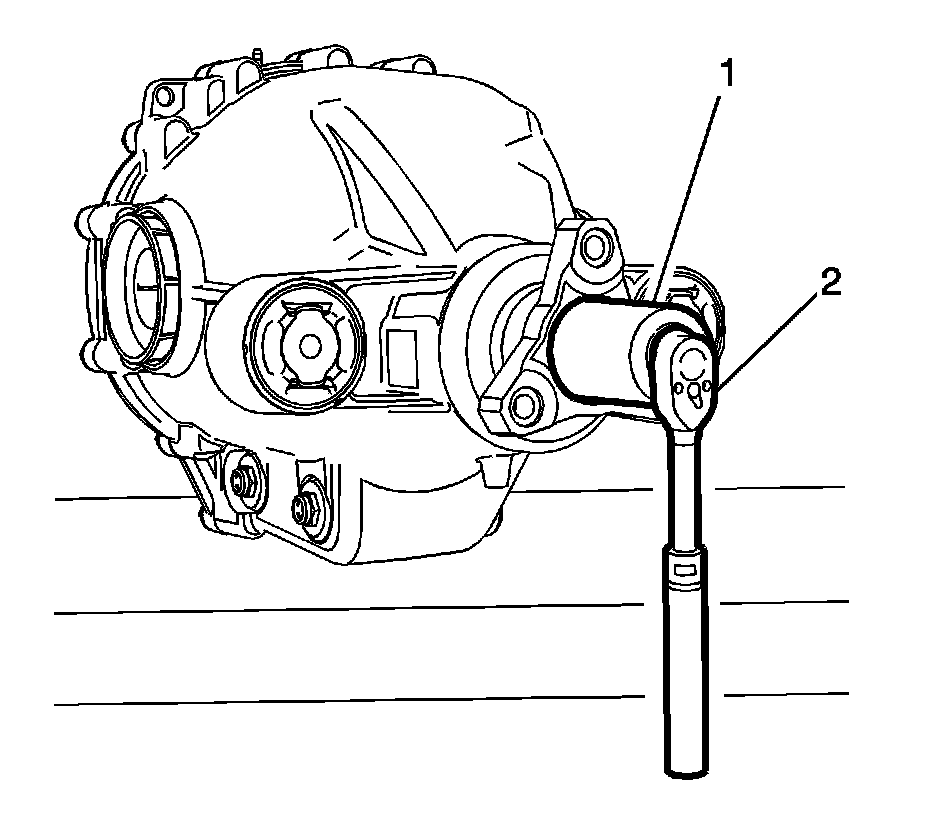
16. Using a inch pound torque wrench (2) the proper size socket (1), measure the rotating torque which should be:
* For NEW bearings 2.7-3.4 Nm (24-30 lb in)
* For used bearings 1.6-2.9 Nm (14-26 lb in)
17. If the rotating torque measurement is below the minimum torque value, continue to tighten the pinion nut in small increments until the torque is within the specifications.
18. If the rotating torque exceeds the specified values, the pinion gear will have to be removed and a NEW collapsible spacer installed.
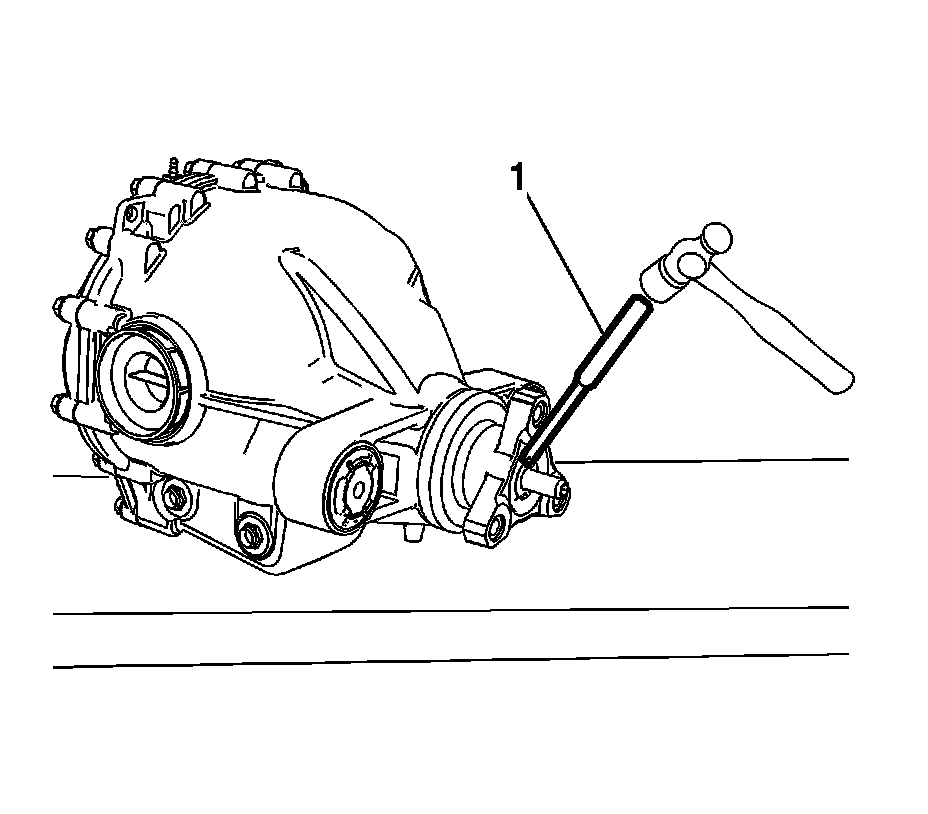
19. Using a punch and a hammer (1), stake the pinion nut in both the slots in the pinion shaft.
20. Install the differential case assembly to the housing. Refer to Differential Case Replacement (250 mm Axle) Differential Case Replacement (250 mm Axle)Differential Case Replacement (195/218 mm Axle) Differential Case Replacement (195/218 mm Axle).
21. Fill the axle with lubricant. Use the proper fluid. Refer to Differential Oil Replacement (195/218 mm Axle) Differential Oil Replacement (195/218 mm Axle)Differential Oil Replacement (250 mm Axle) Differential Oil Replacement (250 mm Axle).
22. Lower the vehicle.